The Complete 3D Artist: Learn 3D Art by Creating 3 Scenes

- Description
- Curriculum
- FAQ
- Reviews
*****FUTURE UPDATES PLANNED TO INCORPORATE NEW BLENDER 2.8 INTERFACE, TOOLS AND FEATURES*****
This course has been created specifically to teach you the fundamentals of 3D art. It isn’t a bundle of videos describing every single tool bar and slider, that’s what Google is for. It’s a project based course designed to teach you all the basics you need to know to create 3D art in practically any 3D software. We’ll start with a little bit of theory, then dive into looking at 3D software, we’ll install and explore our software and set it up to make learning as easy as possible.
For this particular course we will be using Blender. This powerful software package is open source and FREE!! This means that there is no additional cost for dong this course, everything you need is included in Blender.
Blender comes complete will the following tools:
-
Full 3D modeling suite, including digital scultping and texture painting
-
Node Based material editor
-
Cycles Render Engine, super fast and capable of stunning results
-
A built-in Node based compositor for stills or video
-
Video editing suite
-
Game engine
The skills you learn in this course will easily transfer to most other software packages. I am not going to teach you how to model specifically in Blender, the techniques to learn here are universal. So whether you become a game artist in 3ds Max, an environment artist in Maya, a texture artist in Substance Designer or a compositor in Nuke, you will have the fundamental skills to kick start your mastery of any other software!!
This isn’t just a video training course either. I want this journey into 3D art to be meaningful for all my students. Students will be encouraged to create and share their own work throughout the course, either on our Facebook Group or directly to me via email ([email protected]) or Twitter (@darkokubra). You will receive feedback, hints and tips either publicly or privately and any feedback you give the course will be carefully considered and any great suggestions will be implemented into the course.
The course consists 3 full projects:
-
A still life scene, to get you comfortable will modeling, texturing, lighting, rendering and compositing. Step by step you’ll cover all the basic tools and workflows, slowly and in detail, to ensure you retain all the knowledge and skills to use these tools in your own projects.
-
A guitar, modeled to scale using plans, this will push your modeling skills up a level or two and introduce you to texture painting directly onto a 3D model using Blender.
-
An interior scene, this is where you can learn some sculpting techniques, experiment with composition and practice your modeling, shading and lighting skills.
As the student base for this course grows, the course will grow too. Every student has lifetime access to this course and that includes feedback from me whenever you need it. But I will also create additional projects to teach the ever evolving techniques used by professional 3D artists. And wth the future release of Blender 2.8, look for additional videos on Blender’s new tools, features and interface shortly after it’s official release.
This course is intended to be the most comprehensive, artistically driven course for 3D art on Udemy. Don’t believe me, listen to what my students have said about the course:
***** Don’t hesitate taking this class. This is truly a class and not a tutorial. *****
***** Thorough explanations and examples with the encouragement to experiment and practice on your own. *****
***** The course is engaging challenging and the explanations and work flow are fantastic. *****
***** I love this course, it is so complete and easy to follow *****
***** This course is a gold-mine of information *****
***** I recommend it to everyone who wants to master Blender *****
So why not join me and I’ll teach you everything you need to know to be a great 3D artist!
-
1
 Introduction
Welcome to The Complete 3D Artist in this video I'd like to introduce you to the course
-
2
The Course Structure
In this video I will take you through the overall structure of the course and touch on some one the exciting techniques and skills you will learn in this course and the 3 different projects you will complete too.
-
3
Online Mentoring
In this video I will quickly discuss the additional onine help and feedback that you can access as a student of this course.
-
4
The Basic Principles of 3D
In this video I will give to a quick crash course introduction to 3D co-ordinates and the basic sub-objects that make up every 3D object, vertices, edges and faces (or polygons).
-
5
An Overview of 3D Software
In this video I will briefly introduce you to some of the popular 3D content creation software that is available and their main uses.
Although you will not be using any of these applications in this course, it is important to understand the core concepts which are fundamental to 3D art are applicable to any software you choose to move on to in the future.
-
6
Introduction
In this video I will introduce you to this section on downloading, installing and navigating Blender.
Since the release of this course, certain videos in this section have been subtitled with "Interface", these are the original videos in this section. Others, subtitles with "Basics" have been added to offer students an easier transition from learning to navigate in Blender to starting your first models.
The challenges set in these "Basics" videos will give you time to practice navigating in Blender, using the translate, rotate & rotate gizmos, experience using some of the basic hotkeys like Shift + A to add objects and moving in and out of Object and Edit mode.
You will also be able to gradually add some of the most basic, but powerful modeling tools in 3D art to your arsenal with each video in this section. By the end of it, you should have enough basic experience in Blender to cope with even the most challenging modeling tutorials in Section 3: Modeling 101.
-
7
Installing Our Software
In this video I will guide you through the install process for Blender. You will also download some demo scenes from Blender.org that can be used later to practice customizing the interface and navigating in a 3D scene.
-
8
Blender 2.79 or 2.8?
In this video I will discuss the new version of Blender 2.8 and why you might want to avoid it until you are more familiar with Blender 2.79.
-
9
Interface: Workspaces
In this video we will open Blender for the first time and then customize the default start up screen by creating our own workspace and saving a new Start-up File
-
10
Interface: Customising Our User Preferences
in this video you will make some adjustments to your User Preferences in order to make the most of Blender's additional Add-ons as well as your GPU's CUDA processing abilities.
Several tools that will be used in the modelling, texturing and compositing sections of this course are only available with certain Add-Ons enabled. These include Mesh>Edit Tools 2, Mesh>Looptools, Mesh>F2, Mesh>Inset Polygon, Mesh>Relax, Add Curve>Extra Objects, Add Mesh>Extra Object, Object>Bool Tool, Pie Menu>3D Viewport Pie Menus, Node>Node Wrangler. These are all disabled, but included in Blender by default, they should be enabled in your default scene, user settings saved and the start-up file saved to make sure they are always available.
-
11
Interface: Navigating in 3D Space
In this video I will teach you how to navigate a 3D scene. You will learn to orbit, pan and zoom the viewport as well as learn to use your number pad to quickly change to several default views.
I will also discuss the difference between orthographic and perspective views.
-
12
Interface: The 3D Cursor
In this video I'll discuss the 3D cursor, this is a fairly unique tool in Blender and it can be tricky to master. I'll teach you a powerful and quick way to control it.
-
13
Interface: Adding, Selecting and Deleting Objects
The this video you will learn how to add, select and delete objects.
In the video I refer to it as CTRL + D but it is actually SHIFT + D. I've added a text caption in the video to address this. Thanks to Steven for spotting this error.
-
14
Interface: Translating, Rotating and Scaling Objects
In this video I will discuss object transforms. Transforms is the term for tranlating (moving), rotating or scaling (stretching or resizing) a 3D object.
We will also briefly discuss the difference between Global transform orientation and Local transform orientation.
-
15
Interface: The Information Panel
In this video I will discuss the Info Bar or Information Panel, this is where we can find the File, Render, Window & Help menus. As well as the Workspaces, Scenes and Render Engine drop-down menus.
It also has some statistics on your scene such as poly counts and number of objects.
-
16
Interface: The Outliner
In this video you will learn about the Outliner Editor Window.
This basically shows the hierarchical structure of your scene. It contains all your objects, meshes, modifiers, constraints, materials etc.
We will learn a useful option and hotkey to find selected objects in the Outliner quickly and also how to hide objects in the viewport and much more.
You can download the BMW and Classroom Blender files from https://www.blender.org/download/demo-files/
-
17
Interface: The 3D View
In this video I'll show you the most important parts of the 3D View or the 3D Editor Window.
I'll discuss the main View, Select, Add & Object drop down menus, different Object Interaction Modes and different viewport render modes.
We'll also briefly discuss the Rendered Viewport Preview mode and Cycles renderer.
-
18
Interface: The Properties Panel
In this video I'll briefly discuss several of the different sections in the Properties Editor Window.
This window has many, many sections and options so I'll only go over the most important parts so we can get started on our first project.
Some sections like the Render, Material, Texture, Camera & Lamp Object Data will be discussed in more detail later in the course.
-
19
Basics: Object vs Edit Mode
This is the first of several additional videos in this section added since the launch of the course. These videos were added after student feedback suggested that there should be some more videos on the basics of modeling before starting to create models of the first scene.
In this video you will learn about the differences between Object mode, where you manipulate objects, and Edit Mode where you are able to manipulate vertices, edges and faces as well as access all the modeling tools.
-
20
Basics: Extrude Tools
In this video I will show you the 4 different types of extrude. For the most part you will use these on faces (although they can be used on edges and sometimes vertices).
At the end of this video you will be able to create some very basic models from primitive geometry like cubes, cylinder and sphere etc. You should take some time after the video to practice using this tool on several types of primitive object and experiment with extruding faces, edges and vertices, singularly or in groups.
One of the tools show here, Extrude and Reshape, will only appear if you have the Mesh>Edit Tools 2 Add-ons enabled. If it isn't in the list of add-ons in user preferences, you can find the scripts in the resources of this video, just unzip and drag the folder straight into the C:Program FilesBlender FoundationBlender2.79scriptsaddons or equivalent folder in your Blender install folder.
-
21
Basics: Inset Faces
In this video I will show you the extremely useful Inset Faces tool. This allows you to scale down a face or selection of faces while creating additonal geometry from the selections original boundary to its new boundary. It's very much like extrude, but instead of moving a selection, you are scaling it.
At the end of this video you should have a good understanding of how versatile this tool is. With some practice, and combining it with extrude, you should be able to create some pretty advanced models, like a stair stepped Pyramid for example.
-
22
Basics: Edge Loops, Edge Rings and Loop Cut & Slide
In this video I will start but showing you how to select edge loops and edge rings. I will then show you the Lopo Cut & Slide tool, this allows you to add an edge loop (providing there is a valid edge ring to connect). You can add multiple edge loops at one time, slide them and also have them bow in or out using the Smoothness value and type options.
At the end of this video you should be able to create some pretty interesting models from primitives and you will be able to cut edges into your models to create more geometry to inset, extrude etc.
-
23
Basics: Bevel
In this video I will give you an overview of the Bevel tool, one of the most versatile tools in 3D modeling. It can be used to smooth sharp corners or chamfer edges, create interesting profiles for things like paneling, skirting boards or furniture and countless other uses.
At the end of this video you will be able to create chamfers, bevels and inward curving profiles on objects, you will be able to quickly create a sphere from a cube, create a dome and finally, you will find out the most important use for adding a bevel to your edges, add realism to your models.
-
24
Basics: Deleting, Dissolving & Merging Sub-Objects
In this video I will show the differences between deleting and dissolving sub-objects. Depending on which type of sub-object you are deleting or dissolving, the effects can vary dramatically. For example, you can't dissolve a single face, but you can delete it, leaving a hole in the mesh. You can delete a vertex, which will in turn delete all the faces that share that vertex, again leaving a hole, but dissolving a vert will remove the vert and any edge it shares without removing the faces. knowing when or if you should delete or dissolve sub-objects can be extremely useful. You will also learn some ways to remove extra vertices by merging or removing doubles.
At the end of this video you will be able to get rid of extra edges, vertices and reduce the poly count of your objects while retaining the overall shape of them. As well as being able to remove unwanted vertices using the remove doubles tool, which can help reduce errors caused by some complex modeling tasks later in the course.
-
25
Basics: Fill Holes and Bridge Gaps
In this video You will learn some of the basic methods for filling holes in your mesh using Fill Edges/Faces tool (F), Grid Fill and the Bridge Edge Loops tools (Ctrl + E> Bridge Edge Loops). I will also briefly show you the Connect Vert Path Tool (J).
These methods can be used to join together separate meshes in the same object, fill holes after deleting faces and many, many other uses.
-
26
Basics: Cutting Tools
In this video I will show the the basic ways to cut detail into your model using the Knife, Knife Project, Bisect and Select Tools. I'll also show some of the limitations of each and way some work better than others.
At the end of this video you should be able to add edges to your models accurately in order to allow for more complex modeling.
-
27
Basics: Origins & Pivot Points
In this video I will explain origins & pivot points and how they relate to scaling and rotating. I will also show you how to move the origin point of your object, how to reset your origin point and how the 3D cursor can help you do this.
I will also discuss pivot points for groups of objects, how you can define different pivots such as by bounding box, 3D cursor, by active element or by individual origins. I will also show you how to manipulate objects by scaling and rotating their origins, without actually affecting their geometry, only their location in 3D Space in relation to a shared pivot point.
At the end of this video you should have a very good knowledge of what origins and pivot points do, how to move them and how to manipulate multiple objects at the same time, using individual or shared pivot points.
-
28
Modifiers: The Boolean Modifier
In this first video on Modifiers, I will briefly discuss the Modifier Stack, adding modifiers and their basic functions such as the Render & Eye Icons and changing their order.
I will also discuss the 4 basic settings in the Boolean Modifier, before looking at each operation type in depth in the next few video lessons.
-
29
Modifiers: Booleans - Union
In this video I will discuss using the Boolean modifier, set to a Union Operation. I'll discuss how this differs from just joining to different objects together and why using Booleans is often quicker.
-
30
Modifiers: Booleans - Difference
In this video I will discuss the difference operation in the Boolean modifier and how to use it. I will also discuss live editing using Booleans and how the Boolean modifier works in edit mode.
-
31
Modifiers: Booleans - Intersect
In this final video on the Boolean modifier, I will discuss intersect mode, this is probably the least used of the Boolean operations but when used creatively it can result in very interesting models.
I will also show you how to use multiple booleans, how to apply or bake your booleans to your model and why you may want to use a combination of Live and Baked booleans on your models.
-
32
Proportional Editing
In this video I will show the the Proportional Editing tool. This tool is a staple of 3D software, it's usually described as soft selection in most other software. In Blender there are a few extra tricks it can do, including working on multiple objects. There are also several types of falloff that can be used to achieve exactly the shape you want
With some practice you should be able to utilize this tool to create nice flowing or even randomized effects. -
33
Modifiers: Mirror
This is a very simple to use modifier that lets you create symmetrical objects on multiple axes. There a few setting that you should know about, Merge, Clipping and Mirror Object. In this video I will demonstrate the modifier and highlight the uses for these setting and some potential pitfalls you may fall into when using this modifier. I use the Mirror modifier a lot throughout the entire course, so its best to learn about it early so you don't get confused later.
-
34
Modifiers: Subdivision Surface
In this video I will discuss the Subdivision Surface modifier. This can be used to increase the amount of geometry on an object and smooth out angled surfaces, or just subdivide faces to make displacement maps produce higher quality effects.
This modifier will be used extensively throughout the course for both organic and hard surfaces. At the end of this video you will have all the knowledge you need to use this modifier correctly.
-
35
 End of Section Quiz
Test your knowledge of Blender with this short quiz
-
36
Introduction to 3D Modeling
In this video I will introduce you to the section on basic 3D modeling.
-
37
 Final Scene File
 -
38
Planning our Scene and Models
In this video I will show you show I found some of the reference images I used to plan my final image.
I will look for common objects and composition to get an idea of how the final image may look.
After watching this video, gather your own reference to create your own, unique still life scene.
-
39
Blocking Out Our Scene
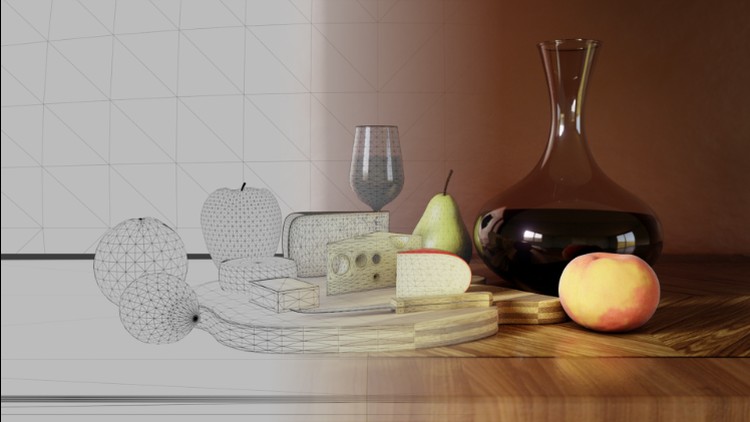
In this video I will block out a simple still life scene using basic primitive like spheres, cubes and cones. Don't worry if you can't follow along with some of the modeling here, as I create the final models of each of the pieces of fruit, decanter and cheese etc, I will explain exactly what tools I am using and why.
After watching this video please use some reference videos you have found to block out your own scene.
My scene at the end of this video is available to download in this video's resources. You can then work from than in future lessons, or create your own blocking from scratch.
-
40
Modeling the Table
In this video I will start setting up the scene for the final objects and model the table.
You learn about the Bevel modifier and why having a scale of 1,1,1 is important when you use some modifiers. I'll also show you how to change your object surface smoothing from flat to smooth to remove faceting.
The initial scene file is available in resources.
-
41
Modeling the Chopping Board
In this video I will model the chopping board using a background image for reference and bezier curves to create the shape.
You will also learn about why I use 4 sided polys where I can, how subdivision surfaces can be tightened using control edge loops and inset poly tools. Finally I will mirror the top half of the board to create the bottom half of the board.
-
42
Modeling Oranges and Lemons
In this video I will look at some reference images of oranges and think about what characteristics I would need to replicate in my model in order to great a realistic result.
In this video I will use proportional editing for the first time this is where transforms on vertices, edges and faces affect unselected sub-objects based on different types & radius of fall-off, like smooth, sharp, random etc. We will be using Proportional Fall-off quite about in this section as it works really well on organic models.
After creating a base model of an orange, I will duplicate it and add some other details for a slightly different orange and a lemon
-
43
Modeling An Apple
In this video I will model an apple. Again, I'll start by examining the object I am modeling to make sure I understand the characteristics that identify the shape as an apple.
I use continue to use the proportional editing to create the organic details that I need.
-
44
Modeling a Pear
Following on from the previous lessons I will model a pear. This time I will model directly from a background image to make sure I get the shape perfect but I'll also emphasis that you don't have to follow the reference exactly.
-
45
Modeling a Peach
In this video I will model a peach using a slightly different technique than before. I will start with a bezier curve to create the profile of the peach and use the Spin tool to turn it into a 3D object.
-
46
Modeling a Wine Glass
In this video I will model a wine glass. I will show you how to import a image onto a plane that can be used to help modeling.
-
47
Modeling the Decanter
In this video I will build on the techniques used in the last video, however I will show you another modifier, Solidify, that you can use to add thickness you your objects.
-
48
Filling our Decanter and Glass
In this video I will use the meshes of the glass and decanter to create meshes for the liquids that will fill them.
-
49
Modeling Cheese 1/2
In this video I will use some more simple modeling techniques to create various blocks of cheese.
-
50
Modeling Cheese 2/2
-
51
Modeling A Swiss Cheese
In this video I will discuss boolean operations and why they are not always the best option for creating certain models. Instead I will show you a way of manually creating a similar effect by combining 2 objects.
-
52
Modeling a Swiss Cheese (part 2)
In this video I will continue to show you some techniques to create the Swiss cheese model. I will show you how you can use a combination of our first technique to set up Booleans.
By thinking logically about why the Booleans didn't work in the last video, you can better prepare your meshes so the Boolean operations require much less tidy up. The combination of both techniques ends up being faster than either technique alone.
-
53
Tidying Up the Swiss Cheese Model
To finish off the Swiss cheese model I need to adjust the mesh slightly to keep good topology and edge flow. This allows the mesh to smooth better when the Subsurface Division modifier is applied.
I'll use two new functions, the Knife tool and the merge vertices tools. These allow us to draw edges directly onto the mesh and remove vertices to keep quad polygons.
-
54
Modeling the Cheese Knife Handle
In this video will model the handle of the cheese knife using box modeling techniques.
-
55
Modeling the Cheese Knife Blade
in this video I will continue to model the blade of the knife. Here I discuss the important of edge loops and control edges even on a model that should have some blunt and some very sharp edges.
-
56
Tidying Up The Knife Model
In this video I will finish off the knife model. I will Use Booleans, properly planned, to create the metal cylinders than attach the handle to the blade and I will mirror the handle to finish it off.
-
57
Finishing Up Our Scene
In this video I will move all of our models into place to achieve a pleasing composition on which to test out Blenders lighting tools in the next section.
-
58
End of Section Quiz
Test Your Knowledge of Basic 3D Modeling with this short quiz
-
59
Introduction to Lighting
In this video I will introduce you to the section on The Node Editor and creating basic shader trees.
-
60
Lighting Section Notes
-
61
Preparing For Lighting
In this video I will make some adjustments to the scene before starting to light the scene. This includes applying a simple diffuse material to all the objects and adding a camera so we can look at out objects from a consistent angle.
-
62
The Point Lamp
In this video I will look at the Point Lamp and its settings.
-
63
The Spot Lamp
In this video I will discuss Spot Lamp in Blender and its various settings. Don't forget to experiment with this type of light between videos.
-
64
The Area Lamp
In this video I will discuss the Area Lamp in Blender and its various settings. Don't forget to experiment with this type of light between videos.
-
65
The Sun Lamp
In this video I will discuss the Sun map in Blender. I will also discuss the relationship between the Sun Lamp's Gizmos and the way it illuminates. I'll also use a Sun lamp in conjunction with light from the Sky using a High Dynamic Range Image.
-
66
Lighting with Emmisive Surfaces
In this video I will discuss using emissive surfaces to light your scene.
-
67
Lighting With HDRI
In this video I will use various HDR (High Dynamic Range) images to light the scene.
-
68
End of Section Quiz
Test your Knowledge on 3D lighting in this short quiz
-
69
Materials Masterclass Overview
In this video I will introduce the section on the Node Editor.
-
70
The Node Editor
In this video I will briefly discuss the Node Editor specifically for creating materials and shaders.
-
71
The Node Wrangler
In the video I will discuss the Node Wrangler plug-in which has several useful tools and hotkeys for speeding u the materials creation workflow.
-
72
Input Nodes
-
73
Shader Nodes
In this video I will discuss the various different shader nodes available in Blender and some uses for those nodes.
-
74
Texture Nodes
In this video I will discuss various texture nodes. I tend to split these into a few different categories, utility nodes, image nodes and procedurals.
-
75
Color Nodes
In this video I will discuss the color nodes. These can be used to adjust or combine existing textures and images.
-
76
Vector Nodes
In this video I will discuss the vector nodes. Only a few of these are really useful to us.
-
77
Converter Nodes
In this video I will discuss some of the converter nodes. Several of these can be very useful.
-
78
Add Shader and Mix Shader Nodes
In this video I will briefly discuss the Add Shader and Mix Shader Nodes, used for combining 2 shaders together.
-
79
The MixRGB and Math Nodes
-
80
Manipulating Texture Co-Ordinates
In this video I will discuss how the Vector input/outputs on many nodes can affect how textures appear on objects. I will break down a technique where you can adjust the scale of your textures on individual axes using Separate RGB/Combine RGB nodes and MixRGB nodes. I will also show that distortion can by applied to images or procedural textures using this technique. I will show how this can be used in a procedural wood texture in a later section.