Start to finish - Creating a complete game using Unity3D

- Description
- Curriculum
- FAQ
- Reviews
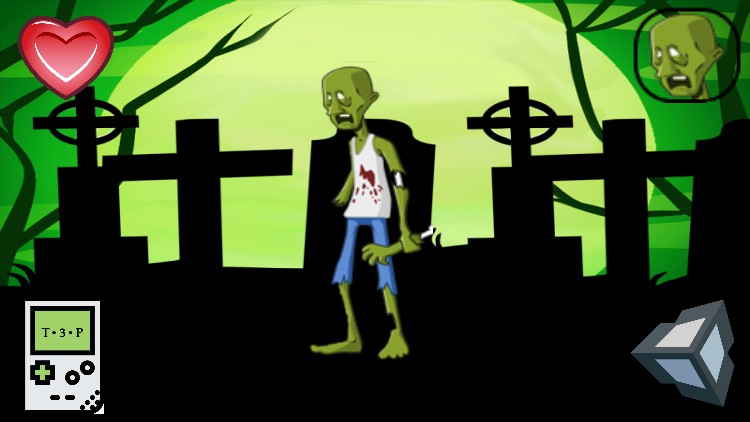
In this course we will create a 2D game called “Whack a Zombie” from start to finish. During the course of this project we will learn how to set up the project and code all the game mechanics and interactions in Visual Studios using C# and we will finish the project with adding some additional polish to it also. By the end of the project you will have a thorough understanding of the fundamentals of developing games using the Unity game engine.
-
2
 Creating the Game Manager.
Understanding the Update and Start functions.
Understanding private and public variables.
Looking at how to generate random numbers.
Creating a game manager class.
Discussing how we will structure the game manger class.
-
3
Raise the dead!
Discussing the zombie movement logic.
Implementing code and logic for zombies.
-
4
Getting the Player Input.
Discussing and understanding raycasts and rays.
Setting up colliders in our scene and discuss their importance in detecting raycast hits.
Creating our player input class.
Learning to get mouse input.
Using Debug lines to test progress.
-
5
Raycasts & Colliders.
Understanding the use of tags for our game objects.
Furthering our understanding of raycasts and colliders.
-
6
Killing the Enemy.
Writing the code for killing our enemy.
Understanding the use of GetComponent.
Setting up a life counter and a score counter.
Setting up our game over condition.
-
7
UI Setup.
Start working on the UI for our game.
Setting up the UI for our life.
Setting up the UI for our score.
-
8
UI Implementation.
Wiring up our UI from the last part.
Wiring up the score UI.
Wiring up the life UI.
Setting up our game over screen.
Wiring up our game over screen.
-
9
Increasing Difficulty.
Increasing the game difficulty with time.
-
10
Scene Management.
Learning how to work with Unity buttons.
Discussing how we will set up the scene transitions.
Working with Scene Management.
Implementing restart for the game.
Learning about build index.
Creating main menu scene.
-
11
Main Menu.
Setting up our main menu scene.