4.81
36 reviews
Spring & SpringBoot Hands-on Experience (Full-Stack Project)
Developing Full-Stack Project: Spring Data JPA, MVC, Thymeleaf, Spring Testing (Mockito, JUnit), Spring Security, Maven
- Description
- Curriculum
- FAQ
- Reviews
Introduction to SpringBoot :
Spring Boot is an open source Java-based framework used to create a micro Service. It is developed by Pivotal Team and is used to build stand-alone and production ready spring applications. This chapter will give you an introduction to Spring Boot and familiarizes you with its basic concepts.
SpringBoot Advantages :
Spring Boot offers the following advantages to its developers −
- Easy to understand and develop spring applications
- Increases productivity
- Reduces the development time
Course Description :
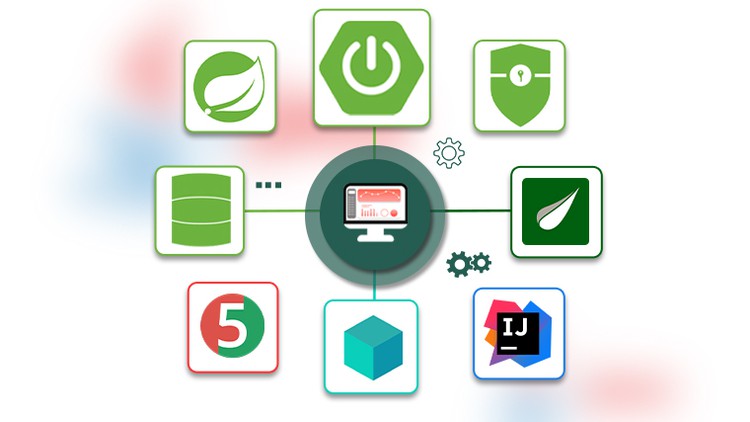
This course teaches how to build a full-stack application from the bottom up and touches on very import concepts used in real live software development .
Course Objectives :
- Learn how to build system class diagram (UML) based on system buisness requirements.
- Learn to use Spring Initializr and how to contrcust the SpringBoot project.
- Learn how to develop Model layer using Spring Data JPA.
- Learn how to develop Business layer using Spring Service.
- Learn how to develop Unti testing using JUnit-5 and Mockito-4.
- Learn how to develop Integration testing using Test Containers.
- Learn how to develop Front-End using Spring MVC and Theymleaf.
- Learn how to develop Users Authentication and authorization using Spring Secuirty (Statefull)
- Learn how to use Maven Build tool.
- Using Mysql Database for data storing.
- Using best Java IDE while developer : Intellij IDEA.
- Explaining how to install the software on Windows and Linux.
Preparing Development Environment for Windows Os
Preparing Development Environment for Linux Ubuntu
Project Analysis (Business Requirements)
-
11Step 1 : Install/Update JDK 11Video lesson
-
12Step 2 : Intellji IDE Installation (Part 1)Video lesson
-
13Step 2 : Intellji IDE Installation (Part 2 : Change to Dark Mode (Optional) )Video lesson
-
14Step 2 : Download & Install STS IDE (Part 1) [optional]Video lesson
-
15Step 2 : Download & Install STS IDE (Part 2) [optional]Video lesson
-
16Step 2 : Download & Install STS IDE (Part 3) [optional]Video lesson
-
17Step 3 : Download and Install Apache MavenVideo lesson
-
18Step 4 : Create First Maven Application on IntelliJ IDEVideo lesson
-
19Step 4 : Create First Maven Application on STS IDE [Optional]Video lesson
-
20Step 5 : Install MySQL & phpMyAdminVideo lesson
Implmenetation Step 1 : Implementing Model Layer using Spring Data JPA
Implmenetation Step 2 : Implementing Business Layer using Spring Service
-
25AgendaVideo lesson
-
26Step 1 : Choose Application Maven DependenciesVideo lesson
-
27Step 2 : Choose Application Maven DependenciesVideo lesson
-
28Step 3 : Create Entities & Relationships (Part 1)Video lesson
-
29Step 3 : Create Entities & Relationships (Part 2)Video lesson
-
30Step 3 : Create Entities & Relationships (Part 3)Video lesson
-
31Step 3 : Create Entities & Relationships (Part 4)Video lesson
-
32Step 3 : Create Entities & Relationships (Part 5)Video lesson
-
33Step 3 : Create Entities & Relationships (Part 6)Video lesson
-
34Step 3 : Create Entities & Relationships (Part 7)Video lesson
-
35Step 3 : Create Entities & Relationships (Part 8)Video lesson
-
36Step 4 : Add database configurations in application.propertiesVideo lesson
-
37Step 5 : Implement JPA Repository Interfaces (Part 1)Video lesson
-
38Step 5 : Implement JPA Repository Interfaces (Part 2)Video lesson
-
39Step 5 : Implement JPA Repository Interfaces (Part 3)Video lesson
-
40Step 5 : Implement JPA Repository Interfaces (Part 4)Video lesson
-
41Step 6 : Developing Helper Class to Test the Functionalities (Part 1)Video lesson
-
42Step 6 : Developing Helper Class to Test the Functionalities (Part 2)Video lesson
-
43Step 6 : Developing Helper Class to Test the Functionalities (Part 3)Video lesson
-
44Step 6 : Developing Helper Class to Test the Functionalities (Part 4)Video lesson
-
45Step 6 : Developing Helper Class to Test the Functionalities (Part 5)Video lesson
-
46Step 6 : Developing Helper Class to Test the Functionalities (Part 6)Video lesson
-
47Step 7 : Create the Application Database in phpMyAdminVideo lesson
-
48Step 8 : Generate the Database Tables from Application ORM (Part 1)Video lesson
-
49Step 8 : Generate the Database tables from Application ORM (Part 2)Video lesson
-
50Step 8 : Generate the Database tables from Application ORM (Part 3)Video lesson
-
51Step 8 : Generate the Database tables from Application ORM (Part 4)Video lesson
-
52Step 8 : Generate the Database tables from Application ORM (Part 5)Video lesson
-
53Step 8 : Generate the Database tables from Application ORM (Part 6)Video lesson
-
54Step 8 : Generate the Database tables from Application ORM (Part 7)Video lesson
Implmenetation Step 3 : Implementing Testing Layer using SpringBoot Testing
-
55AgendaVideo lesson
-
56Step 1 : Use Spring Data JPA projectVideo lesson
-
57Step 2 : Remove Utility PackageVideo lesson
-
58Step 3 : Create Service Interfaces & their Implementations (Part 1)Video lesson
-
59Step 3 : Create Service Interfaces & their Implementations (Part 2)Video lesson
-
60Step 3 : Create Service Interfaces & their Implementations (Part 3)Video lesson
-
61Step 3 : Create Service Interfaces & their Implementations (Part 4)Video lesson
-
62Step 3 : Create Service Interfaces & their Implementations (Part 5)Video lesson
-
63Step 3 : Create Service Interfaces & their Implementations (Part 6)Video lesson
-
64Step 3 : Create Service Interfaces & their Implementations (Part 7)Video lesson
-
65Step 3 : Create Service Interfaces & their Implementations (Part 8)Video lesson
-
66Step 4 : Add @Service & @Transactional Annotations to ServicesVideo lesson
-
67Step 5 : Update Application.properties fileVideo lesson
-
68Step 6 : Write from your Application to Database & Test (Part 1)Video lesson
-
69Step 6 : Write from your Application to Database & Test (Part 2)Video lesson
Implmenetation Step 4 : Implementing Front-End Layer using Thymeleaf
-
70AgendaVideo lesson
-
71Step 1 : Use Spring Service ProjectVideo lesson
-
72Step 2 : Creating Unit Tests for Service Layer using Junit & Mockito (Part 1)Video lesson
-
73Step 2 : Creating Unit Tests for Service Layer using Junit & Mockito (Part 2)Video lesson
-
74Step 2 : Creating Unit Tests for Service Layer using Junit & Mockito (Part 3)Video lesson
-
75Step 2 : Creating Unit Tests for Service Layer using Junit & Mockito (Part 4)Video lesson
-
76Step 2 : Creating Unit Tests for Service Layer using Junit & Mockito (Part 5)Video lesson
-
77Step 2 : Creating Unit Tests for Service Layer using Junit & Mockito (Part 6)Video lesson
-
78Step 2 : Creating Unit Tests for Service Layer using Junit & Mockito (Part 7)Video lesson
-
79Step 2 : Creating Unit Tests for Service Layer using Junit & Mockito (Part 8)Video lesson
-
80Step 3 : Configuring Test Containers For Integration Tests (Part 1)Video lesson
-
81Step 3 : Configuring Test Containers For Integration Tests (Part 2)Video lesson
-
82Step 3 : Configuring Test Containers For Integration Tests (Part 3)Video lesson
-
83Step 4 : Testing Repositories using TestContainers & DataJpaTest (Part 1)Video lesson
-
84Step 4 : Testing Repositories using TestContainers & DataJpaTest (Part 2)Video lesson
-
85Step 4 : Testing Repositories using TestContainers & DataJpaTest (Part 3)Video lesson
-
86Step 4 : Testing Repositories using TestContainers & DataJpaTest (Part 4)Video lesson
-
87Step 4 : Testing Repositories using TestContainers & DataJpaTest (Part 5)Video lesson
-
88Step 4 : Testing Repositories using TestContainers & DataJpaTest (Part 6)Video lesson
How long do I have access to the course materials?
You can view and review the lecture materials indefinitely, like an on-demand channel.
Can I take my courses with me wherever I go?
Definitely! If you have an internet connection, courses on Udemy are available on any device at any time. If you don't have an internet connection, some instructors also let their students download course lectures. That's up to the instructor though, so make sure you get on their good side!

Share
30-Day Money-Back Guarantee
Course details
Video
15 hours
Certificate of Completion
Full lifetime access
Access on mobile and TV
Popular courses
External Links May Contain Affiliate Links read more


