Master the Future of Microcontrollers with STM32 ARM Course
- Description
- Curriculum
- FAQ
- Reviews
Master the Future of Microcontrollers with STM32 ARM-Based Course!
Dive into the 32-bit Era: The Future is Now!
Remember when 8-bit microcontrollers were all the rage? Times have changed! The world is quickly transitioning to the power and prowess of 32-bit microcontrollers, and the STM32 ARM-based microcontroller is leading the charge.
Why Choose Our STM32 ARM-Based Course?
-
Step into the ARM Universe: If you’ve ever programmed a microcontroller, you know the basics. But the ARM architecture? It’s the next frontier. This course introduces you to the intricacies of ARM, its operating system environment, and its unique syntax.
-
All-In-One Learning: From the basics of getting started to diving deep into STM32 naming, pinouts, registers, and the nuances of C programming, our course is divided into eleven comprehensive parts to ensure a holistic learning experience.
-
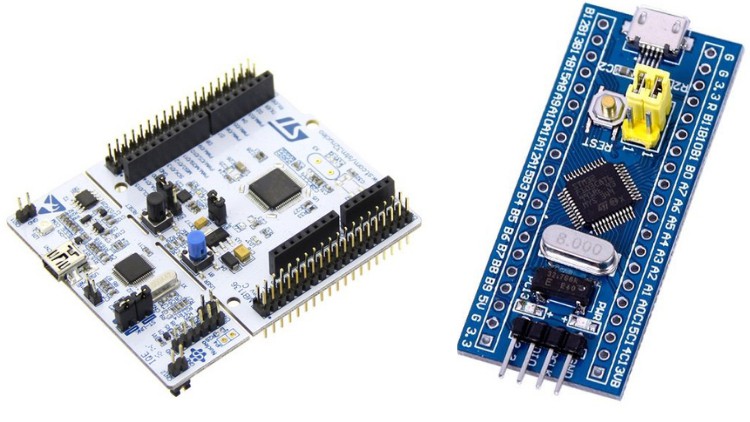
Practical Insights: Unlike courses that focus only on theory, we offer hands-on application examples and a detailed walkthrough of the STM32 development board. Plus, you’ll get to code the STM32 via CubeMx!
-
Powerful Features of STM32: Experience the might of the STM32, boasting an ARM Cortex-M3 CPU, FPU, up to 256 Kbytes of operational memory, top-tier analog performance, and a plethora of peripherals.
Why Is STM32 The Future?
-
Unparalleled Versatility: STM32 microcontrollers come in a myriad of boards and packages, ensuring that there’s always a perfect fit for your project.
-
Project Adaptability: Whether you’re aiming for a basic project or gearing up for an advanced venture, STM32 can handle it all with finesse.
-
Performance Meets Power: The STM32 isn’t just about powerful features; it’s about harnessing them to execute projects with unmatched efficiency.
Take The Leap with STM32
The shift from 8-bit to 32-bit microcontrollers isn’t just a trend—it’s the future. By mastering the STM32, you’re not just learning a new skill; you’re becoming a pioneer in the next big wave of microcontroller innovation.
Sign up for our STM32 ARM-Based Course today and be at the forefront of the 32-bit revolution!
Limited Seats Available! Enroll Now and Secure Your Spot in the Future of Microcontroller Programming!
Enroll Now
-
15Download and Install STM32CubeMx IDEVideo lesson
Installation
All OS's
Download and install the version 1.8.5 of the Arduino IDE from here.
Run the IDE, and on the Tools menu, select the Boards manager, and install the Arduino SAM boards (Cortex-M3) from the list of available boards. You must do this step, it installs the arm-none-eabi-g++ toolchain!
Download zip file containing the STM32 files from here.
https://github.com/rogerclarkmelbourne/Arduino_STM32/archive/master.zip
Unzip to create the Arduino_STM32 folder.
Windows
Copy the Arduino_STM32 folder to My Documents/Arduino/hardware (Note: if the hardware folder doesn't exist you will need to create it).
If using Maple or Maple mini, you need to install drivers for the Serial and DFU (upload devices). Please open a cmd window (run as administrator), navigate to the folder: /drivers/win/ and run: install_drivers.bat. Note: This doesn't actually install drivers. Windows comes pre-installed with a compatible Serial USB driver and a DFU (upload) driver. However the built in drivers need to be associated with the USB ID of the Maple serial and DFU devices. The batch file and wdi-simple.exe do the clever stuff to convince Windows 7 or newer, that it should use its drivers with the Maple serial and DFU devices.
Re-start the Arduino IDE, and select the appropriate board from the "Tools" -> "Board menu", and select the appropriate Com port for your Maple mini or serial upload device. Note: If you do not see a Maple Serial com device, this is probably because the Maple mini has not been loaded with the blink sketch. So upload a the Maple mini blink sketch from examplesDigitalBlink and the Maple serial device should now be available on the Port menu.
Linux
Copy the Arduino_STM32 folder to the hardware folder in your Arduino sketches folder. If the hardware folder does not exist, please create one.
Run the udev rules installation script in tools/linux/install.sh.
Note. If you are uploading via USB to Serial or STLink etc, you may need to set the relevant permissions for your specific upload device in order to be able to use it from within the Arduino IDE. You may also need to change the udev rules for the device in question.
Mac OSX
Arduino_STM32 folder must be placed inside ~/Documents/Arduino/hardware (Note: if the hardware folder doesn't exist you will need to create it).
So you should get ~/Documents/Arduino/hardware/Arduino_STM32.
Note: DFU util binaries have now been added to the repo, in tools/macosx/dfu-util, so there is no longer a need to install Homebrew to then install dfu-util, or to compile dfu-util from source.
You may still need to install libusb, see: https://github.com/rogerclarkmelbourne/Arduino_STM32/issues/256.
-
16Download and Install Arduino IDEVideo lesson
-
17Configure Arduino IDE to Program STM32 BoardsVideo lesson
-
30IntroductionVideo lesson
-
31Overview and The software to be usedVideo lesson
-
32Compilation Process and Your First C ProjectVideo lesson
-
33How to increase the font size in the Programming environmentVideo lesson
-
34Why C and Basic Program StructureVideo lesson
-
35VariablesVideo lesson
-
36Statements and OperatorsVideo lesson
-
37LOOP StatementsVideo lesson
-
38Conditions if and switchVideo lesson
-
39Numbering SystemVideo lesson
-
40Using OperatorsVideo lesson
-
41Using FunctionsVideo lesson
-
42Digital inputs and Delay loopsVideo lesson

External Links May Contain Affiliate Links read more


