Master Solidworks 2021 - 3D CAD using real-world examples

- Description
- Curriculum
- FAQ
- Reviews
Progress from complete beginner to Solidworks 2021 master in one single course!
Solidworks is one of the most popular and powerful 3D CAD programs in the world. Millions of people use it to design everything from 3D-printed toys all the way up to fully-working mechanical vehicles. Now you can join the ranks of Solidworks users, and learn to create your own models completely from scratch!
Why this course is different
There are many Solidworks courses online, but none quite like this one:
-
We use real world examples during learning! This allows you to relate to your lessons more easily and so remember and understand them better!
-
Taught by a Solidworks professional! The instructor been using Solidworks since 2006 and has even taken a range of official Solidworks-certified training courses. The instructor currently works as a Product Design Engineer and uses Solidworks every day to design all sorts of things for real clients – no academic-only experience here!
-
No prior knowledge needed. This course is designed to take you from having never used any CAD program before to being able to model almost anything you can imagine!
-
Understand the wider context of CAD use. As well as explaining the basic CAD techniques this course also details how they relate to real world uses, such as 3D Printing and injection molding.
-
Built on previous feedback! This course is built upon the instructors other best-selling Solidworks courses (2015, 2018 and 2019), and on the feedback from over 12,000 previous students on Udemy alone.
-
Fully updated for Solidworks 2021! The course has been completely redesigned and optimised for the 2021 version of Solidworks and now includes specialist Features like the Thread Tool, Mounting Bosses, Snap Hooks, Lip & Groove, and more.
About this course
This courses includes:
-
19 hours of high-quality original video.
-
All sections contain additional resources such as downloadable models and drawings, made specially for the course.
-
On-hand support. Have a question? We are always here to support any questions and take a look at your progress.
-
No prior knowledge needed. We take you from complete beginner all the way to mastering Solidworks!
You will learn
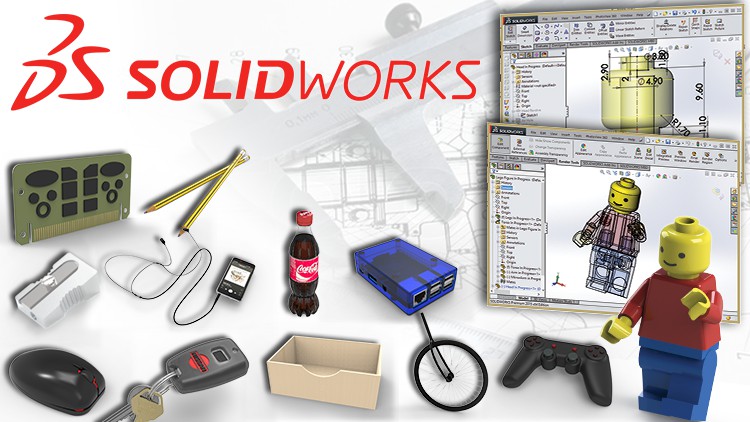
Over the course of twelve detailed modelling you’ll learn the entire range of Solidworks skills, including:
-
Circuitboard – Solidworks Basics, Sketching, Extrudes and Cuts
-
Pencil – Multi-Body Parts, Revolved Boss/Base and Cuts
-
Pencil Sharpener – Assemblies
-
Headphones – Swept Boss/Base, Splines and 3D Sketches
-
Coke Bottle – Swept Cuts, Helixes and Threads
-
Computer Mouse – Lofted Boss/Base and Splitting Parts
-
Key Fob – Modelling from Photographs
-
Lego Figure – More Complex Assemblies and Advanced Mates
-
Drawer Box – Configurations and Drawings
-
Raspberry Pi Enclosure – Importing Parts and Draft Angles
-
Bicycle Fork – 3D Curves and Sweeps
-
Gamepad Controller – Ribs and an Entire Recap of the Earlier Techniques
-
Course Conclusion and Future Learning!
The course is taught using Solidworks 2021 but the models and resources used will work with any version newer than that. If you have a previous version (2015-2020, or earlier) then my earlier courses – “Master Solidworks 2015/2018/2019 3D CAD using real-world examples” will be more helpful!
The techniques used are also common to many different CAD programs – so you can learn on Solidworks then easily transfer these skills if needed.
So sign up today, and begin your first steps in the exciting world of 3D modelling!
-
1
 Introduction to the Course
This short video welcomes students to the course.
-
2
What is CAD and Why Use Solidworks?
This video explains more about what CAD is and why it is used. It also covers the teacher's previous experience and qualifications.
-
3
How to use this Course
This video explains how to get the most out of the course, including Exercise File details and how to get help if stuck!
-
4
Introduction to the Solidworks Interface and View Controls
This video introduces the Solidworks Interface and View Controls.
-
5
Sketching Basics
Sketches are the basis of almost all Solidworks models.
This video explains how to start a Sketch, basic Sketch commands and how to use the Line Tool.
It also covers the three different types of Solidworks files.
-
6
Sketching a Rectangle and Adding Dimensions
Rectangles are a very common Sketch Entity that can be used to create more complex shapes. This video shows how to sketch a rectangle using the Line Tool and how to set the size of this using the Smart Dimension Tool.
It also introduces Sketch Relations and explains how to change units within models.
-
7
Fully Defining Sketches
When modelling it is important to ensure that your Sketches are Fully Defined. This video explains what this actually means, how to do it and why this is important. It also gives more information on Sketch Relations.
-
8
Extruding Solids
In this video the rectangle in the first Sketch is used to create a solid Feature, using the Extruded Boss/Base tool. The video explains Blind Extrudes, as well as introducing Mid Plane Extrudes. It also shows how to edit Features and Sketches, and how to rebuild models in order to apply new changes.
-
9
The Circle Tool
This video introduces the Circle Tool and shows how to create Centrepoint Circles. It also explains the use of more Sketch Relations, including the Equal and Concentric Relations.
-
10
Ellipses and Rectangles
This video shows how to use more Sketch Entities - the Ellipse and (Corner) Rectangle Tool. It also introduces the Collinear Relation.
-
11
Angled Lines and Driven Dimensions
This video explains how angled lines can be added using the Line Tool and defined using Smart Dimension. It also covers the concept of Driven and Driving Dimensions, and how these might affect your Solidworks modelling.
-
12
Trim Tool
In this video the Trim Tool is introduced and the Power Trim option is explained. This allows the Sketch to be finished and half of the Surface Chips items to be Extruded. The lesson also shows how to rename Features.
-
13
Mirroring Sketch Entities
In this video Centrelines/Construction Lines are introduced. In this case a Centreline is used with the Mirror Sketch Entities Tool to mirror the existing Sketch Entities to the opposite side and so complete the Chips Sketch. The video also shows how to hide Sketch Relations to reduce clutter within Sketches.
-
14
Mirroring Features
As well as Sketch Entities, entire Features can also be Mirrored. This video shows how to do this by mirroring the Chips Feature and explains how to fix a common error that might occur.
-
15
Cutting Material
In this video the PCB Slots are cut using an Extruded Cut Feature. This is created using the new tools; the Arc Tool and Slot Tool, and with new Tangent and Symmetric Relations.
-
16
Hole Wizard
This video introduces Hole Wizard which can be used to easily create a hige variety of hole types. It also shows how to adjust these holes once they have been added.
-
17
Fillets and Chamfers
In this video the Fillet and Chamfer Tools are explained. These allow rounded or angled edges to be added to models. Sketch Fillets and Chamfers can also be added at the Sketch level.
-
18
Linear Patterns
This video explains how to use Linear Patterns to create the Contact Features. Linear Patterns can be created either within Sketches or as Pattern Features and this video covers both options.
-
19
The Design Tree (Feature Manager)
This video explains how to use the Design Tree (Feature Manager) in more detail, including covering renaming and reordering items, suppressing and unsuppressing, the Rollback Bar and Parent & Child relationships.
-
20
Design Intent
This video explains the concept of Design Intent, giving a simple example. It also discusses simplifying models and shows how to Rebuild models when needed.
-
21
Appearances
This video shows how to adjust a model's appearances by using the Appearances, Scenes & Decals tab and the Display Manager. It also shows how to create renderings using PhotoView 360.
-
22
Troubleshooting - Missing Render Tool Tab!
This video shows how to check if the Render Tools option is available with your license type. If not then other options for exporting images are shown, including screenshots, saving out images and using third-party rendering programs. This video also explains basic view settings.
-
23
Saving and File Types
This video covers saving files in more detail and explains things like different file types for different uses, saving options and saving parts as copies.
-
24
PCB Section Recap
This video recaps the entire PCB section by rebuilding the model. It covers:
Solidworks Document Types
Solidworks Interface
View Controls
Planes, the Origin and Sketches
Starting Sketching
Sketch Entities
Dimensions and Relations
Extruded Boss/Base Feature
Trim Tool
Mirroring
Extruded Cut Feature
Hole Wizard
Linear Patterns
Fillets and Chamfers
The Design Tree and Rollback Bar
Design Intent
Appearances and Renderings
Saving and File Types
-
25
 Optional Assignment: Create your own board model from a PCB drawing
-
26
Pencil Introduction and Creating the Lead
In this video the Pencil model is introduced and started. The Wooden Casing is made using an Extruded Polygon, then the Lead is added using another Extrude. Multi-Body Parts are introduced and explained.
-
27
Up to Surface End Conditon and Making the Eraser
This video introduces the Up To Surface End Condition and shows how to use this to link Features together. It also expands on the idea of Multi-Body Parts..
-
28
Sketching the Ferrule Profile
This video shows how to use the Cross-Section View and covers sketching the Ferrule profile. It contains topics like Linear Patterning and Mirroring, as well as introducing the Sketch Xpert and showing how this can be used to fix Over Defined Sketches.
-
29
Revolved Boss/Base
In this video the previous profile Sketch is used to create a Revolved Boss/Base. Common Revolve errors - and their solutions - are also discussed.
-
30
Fillets and the Edge Selection Toolbar
This video shows how to speed up adding Fillets by using the Edge Selection Toolbar.
-
31
Adding Text
This video shows how to use the Text Tool to add text to models and how this can then be used to create Features such as debossed lettering.
-
32
Adding Appearances to the Pencil
In this video appearances are added to the Pencil model. It shows how appearances can be added at different levels, including to bodies, faces, features or entire parts.
-
33
Sharpening the Pencil - Revolved Cuts
In this video a Revolved Cut is used to sharpen the Pencil model. This is created using a closed Sketch profile that is revolved around a centreline.
-
34
Revolved Cut Errors
In this video two common Revolved Cut errors are explained - Zero Thickness errors and errors which involve the Revolve profile intersecting (crossing) the centreline.
-
35
Rendering the Pencil
This video covers more rendering details including rounding sharp edges in order to improve rendering realism. It also shows how to use the rendering Preview window.
-
36
Pencil Section Recap
This video recaps the entire Pencil section, and covers:
Polygon Tool
Coradial Relations
Up to Surface End Conditions
Multi-Body Parts
Revolved Boss/Base
Common Errors
SketchXpert
Fillets - Edge Selection Toolbar
Adding Text
Revolved Cut
More Rendering Options
-
37
Optional Assignment: Create your own Multi-Body Revolved Part
-
38
Pencil Sharpener Introduction
This video introduces the Pencil Sharpener section and briefly explains Assemblies.
-
39
Sharpener Body
In this video the Pencil Sharpener Body is created by extruding a profile. The video explains more about automatically resizing Sketches, different ways to dimension lines, automatic Relations and more about fixing Over Defined Sketches either manually or using the Sketch Xpert.
-
40
Mouse Gestures and Keyboard Shortcuts
This video introduces the Measure Tool and explains how to customise the Solidworks keyboard shortcuts in order to access tools more easily. It also shows how to turn on Mouse Gestures and how to use these to speed up your workflow.
-
41
Cutting the Finger Grips
In this video the Finger Grips are cut using Cut Extrude Features. The video explains how to dimension accross centrelines in order to get doubled dimensions and also how to use the Through All End Conditon.
-
42
Cutting the Pencil Hole
This video shows how to cut the Pencil Hole using a Revolved Cut. First a new Plane is added, then the Revolve Profile is sketched. The video shows how a Zero Thickness error might occur and how this can be avoided by offsetting the Revolve lines by using the Offset Entities Tool. It also shows how to use Points to add tricky dimensions.
-
43
Cutting the Blade Cavity and Finishing the Sharpener Body
In this video the cavity for the Sharpener Blade is cut. The video shows how to autotransition from line to arcs and explains more about adding Tangent Relations to make arcs join straight lines correctly.
It also shows how to use the Hole Wizard to add tapped holes and it explains a little about these holes, as well as finishing the Sharpener Body by adding Fillets using edge selection toolbar.
-
44
Assigning Materials & Mass Properties
This video explains what Materials are in Solidworks and how to use these. It also shows that Mass Properties can be used to find it more information about the modelled part.
-
45
Making the Sharpener Blade
In this video the Blade Part is created by using the Line Tool and autotransitioning to the Arc Tool. It shows how the selected contours of a profile can be Extruded (or Cut), giving more flexibility with Sketching. The cutting edge of the Blade is also added using a Distance-Distance Chamfer and the custom screw hole is added using the Hole Wizard. Finally a Material is assigned to the model and this is used to discover the Part's Mass.
-
46
Basic Assembly
This video shows how to create a basic Assembly using the Blade and Sharpener Body Parts that have been created earlier in this section. It introduces the Mate Tool. which is used to define how Parts relate to each other within Assemblies.
-
47
More Assembly Details
This video expands on the basic Assembly options covered in the previous lecture. It explains more Assembly details including the Parts Tree, unsuppressing and hiding Parts as well as changing transparency. It also details opening and editing Parts from within Assemblies, and switching between open documents. Finally, it covers saving Assemblies, how Assembly files work and how to use the Pack-and-Go option.
-
48
Adding the Screw using the Solidworks Toolbox
This video shows how to use the Solidworks Toolbox to insert Design Library components into Assemblies. In this case a screw is added to finish the Sharpener Assembly.
The video also shows how to automatically mate Toolbox components into place and how to lock the rotation of Concentric Mates.
-
49
Adding the Screw without the Solidworks Toolbox
This video shows how to add a screw to the Sharpener Assembly as STEP file, if the Solidworks Toolbox isn't available. It shows how to import the STEP file format and how to manually mate the Part in position.
-
50
Assembly Tools
This video shows how to assign Materials to Parts from within an Assembly. With these Materials added the Mass Properties option can then be used to obtain information for the entire Assembly.
The video also introduces the Interference Detection tool, which allows clashes between Parts to be found, and it shows how to suppress Mates. Finally, the Pencil model is added, to complete the Assembly.
-
51
Exploded Views
This video shows how to create Exploded Views within Assemblies and how to adjust these.
-
52
Pencil Recap - Part 1
This video recaps the Pencil Sharpener Model - specifically building the Body and Blade Parts.
It includes:Customizing the Solidworks Interface
Mouse Gestures
Symmetrical Dimensions
Through All End Condition
Adding New Planes
Offset Entities
Autotransitioning
Tapped Holes
Materials
Using Selected Contours
Distance-Distance Chamfers
Custom Holes
-
53
Pencil Recap - Part 2
This video recaps the Pencil Sharpener Model - specifically creating the Assembly and Assembly Details.
It includes:Creating Assemblies
Adding Components
Using Mates
Solidworks Toolbox
Smart Mates
Suppressing and Hiding Parts
How Assemblies Work
Exploded Views
Assembly Mass Properties
Interference Detection
-
54
Optional Assignment: Create your own Assembly
-
55
Headphone Jack
In this video the Headphones section is introduced and the Jack section is made using a Revolved Boss/Base. The Zero Thickness Error is also explained further.
-
56
Modelling the Strain Relief using Multiple Bodies
In this video the Strain Relief Features are added. The initial Extrude is created using a Centrepoint Slot and the ability to add Draft to Extruded Features is demonstrated. The Strain Relief Extrude is created as a separate Body so that the Feature Scope can be used to apply the next Feature - an Extruded Cut - to the selected Body only.
During the creation of the Extruded Cut a number of techniques are used, including Select Chain, Linear Sketch Patterning and Mirroring. Then a Through All End Condition is used.
Once the Cut has been made, the Combine Feature is then introduced and used to merge the two Bodies back together. The Search Commands option is also introduced and it is shown how this can be used to locate less-common Features that aren't found on the Command Manager.
-
57
Creating the first cable using a Swept Boss/Base
In this video the Swept Boss/Base Feature is introduced. First a new Plane is added by dragging out from an existing Plane. The Convert Entities and Spline Tools are also detailed.
-
58
Improving Sweeps using Tangent Relations
This video shows how to improve Sweep and Spline transitions by using Tangent Relations. It also demonstrates the Fully Define Sketch option and more Sweep options. It explains how to unabsorb Sketches and Features for editing and shows how to fix a common Sweep Error.
-
59
Creating the Ear Bud
In this video the Ear Bud part of the model is created using a Revolved Boss/Base, Fillet, Cut and a Drafted Extrude.
-
60
Joining the Ear Bud with a 3D Sweep
This video introduces 3D Sketches and shows how a 3D Spline can be used to create a 3D Swept Boss/Base for the Ear Bud Cable. The start and end points of this Sweep are also improved by making the 3D Spline Tangent, similar to the 2D Spline used for the first Sweep.
-
61
Adding a Second Ear Bud using Move/Copy Bodies
This video covers adding the second Ear Bud using a variety of options starting with Mirroring. For this, a new Plane is added and it is shown how to select line Mid Points and add more Plane References. Mirroring Bodies is demonstrated.
The Mirroring options don't give a good solution to the model's requirements so instead the Move/Copy Body tool is used. It is shown how to use this to add a new body and how to translate and rotate that body.
-
62
Creating the Second Ear Bud Cable
This video shows how to create the cable for the second Ear Bud by using a 3D Spline and Swept Boss/Base, similar to the first Ear Bud cable. It also shows how to define the length of Splines.
-
63
Adding the Silicone Ear Buds, and Finishing the Assembly
This video finishes off the Headphones model by adding appearances and making an Assembly for the Headphones.
The silicone Ear Bud Covers are modelled up using a Revolve and added to the Assembly. The video then shows how to copy Parts within Assemblies and how existing models can be used to augment user-created models. It shows how to find these models online and import them into Assemblies, and explains a little about imported parts.
-
64
Headphones Recap Part 1
This video recaps the Headphone section, and covers making the Headphones model up to the first Ear Bud. Topics include:
More on Zero Thickness Errors
Adding Draft to Features
Using Bodies during Modelling
Through All Both End Condition
Combine
Commands Search Bar
Swept Boss/Base
Convert Entities
Spline Tool
Fully Define Sketch Tool
3D Sketches
-
65
Headphones Recap Part 2
This video recaps the Headphone section, and covers finishing the Headphones model, making the new Parts and creating the Assembly. Topics include:
Defining New Planes
More on Mirroring
Moving Features
Move/Copy Body
Copying Parts Within an Assembly
Using Online Resources
Importing Existing Parts
-
66
Optional Assignment: Practice using Sweeps
-
67
Creating the Main Bottle Shape
This video introduces the Coke Bottle model and creates the main Bottle shape using a Revolved Boss/Base. This profile is sketched using Lines and Splines, as well as using the Point Tool and Sketch Fillets.
A Revolved Cut is also created for the Bottle's label area and Fillets are added. The video shows that sometimes Fillets interfere with each other, meaning that they can't be added properly as a single Feature, but that they will work correctly as two separate Features.
-
68
Swept Cuts
This video introduces the Swept Cut Feature and uses this to cut the Bottle ribs. The Path Sketch for this is made using a Converted line, the Trim Tool and Tangent Relations. After the Ribs are cut the edges are Filleted (and the Tangent Propagation option is shown), then more Ribs are added to the model using a Circular Pattern.
-
69
Cutting the Base Ridges
In this video the larger Ridges at the bottom of the Bottle are added using another Swept Cut. Fillets are also added to round the sharp edges and some limitations of the Fillet Tool are discussed. The Circular Pattern Feature is also shown again and the Geometry Pattern sub-option is briefly explained.
-
70
Shelling Parts
This video shows how to make the solid Bottle shape hollow using the Shell Feature. It also shows how to remove certain faces when Shelling.
-
71
Creating Manual Threads using a Helix and Sweep
This video shows how to create a thread manually by using a Helix to make a Swept Boss/Base Feature. It also shows a simplified way of starting and ending the threads by making Revolve Features that only revolve a certain portion, instead of a full revolution. The manual thread is finished off by adding Fillets.
-
72
The Thread Tool
This video shows how to use the Thread Tool to create threads more quickly than using a Helix and Sweep. It also discusses thread specifications and thread tables, 3d printing tolerances and reverse threads.
-
73
Intersection Curve
This video shows that sometimes the Convert Entities Tool can't create what is needed, so instead the Intersection Curve Tool can be used. This tool is used to create closed profiles inside the problem areas in the Bottle neck. These are then Revolved to fix these issues.
-
74
Decals and Assembly
In this video the appearance of the Bottle is adjusted using a transparent Plastic. Decals are also introduced. These allow labels and other artwork to be added to models.
-
75
Creating the Bottle Cap
In this video the Bottle Cap is made using a Revolve. More details are added to the model using Extrudes, Fillets and a Circular Pattern. It is also shown how to insert an Axis for use with Features like Circular Patterns.
Next, the thread is created using a Helix and Sweep, Partial Revolves and Fillets. The Select Other option is introduced and this allows troublesome items to be selected more easily.
Finally, Appearances and Decals (with PNG transparency) are added to the model and some more Decal details are discussed.
-
76
Adding the Cap to the Assembly
In this video the Cap Part is added to an Assembly with the Bottle Part. The video shows how to refresh Section Views and select items that have a transparent Appearance. It also explains a little more about threads.
-
77
Adding the Liquid to the Assembly using In-Context Parts and the Cavity Feature
In this video different ways to add the Liquid Part are discussed. A new Part is inserted directly into the Assembly (an 'In Context' Part). Top Down Design and Virtual Parts are then covered.
The Liquid Part is created using a Cavity Feature and External References are explained. Finally, the Appearances are adjusted and a Rendering is created.
-
78
Bottle Recap Part 1
This video recaps the Coke Bottle section, and covers making the Bottle Part. This includes:
Swept Cut
Circular Pattern
Shell Feature
Helixes
Creating Threads
Partial Revolves
Thread Feature
Intersection Curve
Decals
-
79
Bottle Recap Part 2
This video recaps the Coke Bottle section, and covers making the Cap Part, creating the Assembly, and adding the Coke Part as an In-Context Part. This includes:
Axes
In-Context Parts
Cavity
External References
-
80
Optional Assignment: Practice using Helixes