Adobe Photoshop Mega Course-From Beginner to Super Designer
- Description
- Curriculum
- FAQ
- Reviews
This course is designed to take you from an absolute beginner to a super Designer
We divided this course two parts; Basics and Advanced
Basics Part consists of 9 Sections
We will star with the principle of design
In this part you will learn everything about the basic tools of Photoshop, you will learn clipping masks, layer masks, selection tools.
You will learn how to remove background from the most complex compositions like curly hair. You will learn how to remove objects from a scene Professionally. You will learn how to change and adjust the colours and how to make your own colour looks. For photographers, you are going to master Camera Raw Filter which is an alternative to Adobe Lightroom. You will learn how to work with text and use it for beautiful Artworks. You will learn how to work with 3D. You will learn how to make beautiful looks using layer styles.
By the end of the basic part, you will master the Adobe Photoshop CC like a good designer and you will have dozens of artworks to add it to your CV.
After you finish the basics you will be ready for the advanced stuff in photoshop
Advanced Part Consists of 13 Sections
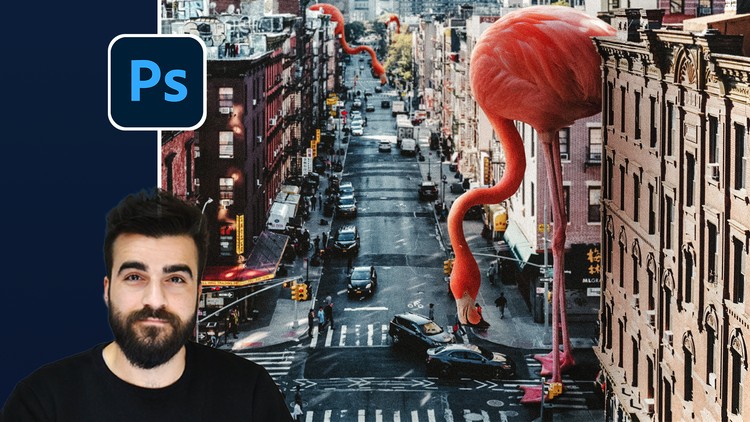
I will teach you how to use Adobe Photoshop CC for photomontage and we will be practising on a creative artwork.
Then will teach you how to achieve a double exposure effect in Photoshop and how to use it creatively.
In the Baugasim section, I will teach you the tools you need to achieve this trendy style and we will be working on a project to practice it.
In the photo collage section, we will be creating an outstanding poster and will show all the techniques you need to make your own photo collage.
In the User Experience UI section you will learn how to use photoshop to make UI designs, at the end of this action we will be creating a mobile app UI design and a web dashboard UI.
Then we will have the Mockup section in this section I will teach you how to work with mockups and how to make your own mockups. By the end of the section, you will be creating all these mockups.
And you can’t learn Photoshop without knowing about the retouching, in this section I will teach you all the tools you need for the High-End Skin and Eyes retouching.
In the Abstract Gradient style section, I will teach you how to achieve this trendy style in Adobe Photoshop CC and we will be creating a trendy artwork.
Then will show how you how to create Glowing Objects in Photoshop and especially the Calop style.
Then I will show you how to make Contrast trendy style.
After you finished this course. Of course, you will be a very good designer and you will want to make money out of your skills, that’s why I have added this I bonus section. This section is for those who want to sell Photoshop elements and Templates online. I will teach you how to make Photoshop, Actions, Brushes, Patterns, Mockups and Design Templates. Then I will show where and how to sell them online, and maximise your revenue as a designer.
This course is designed to take your from absolute beginner to a super designer so if you want to start your design, business or carrier this is the course that you should be taking.
After enrolling you will have access to our Facebook group there you can get feedback from me and other students.
And if for any reasons you did not like this course you have 30 days money-back guarantee.
-
24Selection ToolsVideo lesson
-
25Object Selection ToolVideo lesson
-
26Quick & Magic Selection Tools + Select Mask SettingsVideo lesson
-
27Lasso Selection Tools + Pen Tool for SelectionVideo lesson
-
28Using of RGB Channels to Remove the BGVideo lesson
-
29Homework - Flying FishVideo lesson
-
30Solution for the Homework - Flying FishVideo lesson
-
48Camera Raw FilterVideo lesson
-
49BasicsVideo lesson
-
50Tune CurveVideo lesson
-
51DetailsVideo lesson
-
52HSLVideo lesson
-
53Split TuningVideo lesson
-
54Lens CorrectionVideo lesson
-
55EffectsVideo lesson
-
56CalibrationVideo lesson
-
57Extra ToolsVideo lesson
-
58How to Create PresetsVideo lesson
-
59Camera Raw Filter HomeworkVideo lesson
-
603D in PhotoshopVideo lesson
-
61Preparing The Workflow For 3DVideo lesson
-
62Controls for 3D LookVideo lesson
-
63Environment and Global AmbientVideo lesson
-
64Adding 3D Boxes to Our DesignVideo lesson
-
65Adding 3D boxes to our design P2Video lesson
-
66Separating The Letters and Finalizing the DesignVideo lesson
-
67Homework- 3D in PhotoshopVideo lesson
-
68PhotomontageVideo lesson
-
69Preparing Before Starting the PhotomontageVideo lesson
-
70Cutting the Objects from the BGVideo lesson
-
71Preparing the Crosswalk for the FlamingoVideo lesson
-
72Fixing Lights and ShadowsVideo lesson
-
73Enhancing Lights, Colors and ShadowsVideo lesson
-
74Matching Flamingo with the BG + Enhancing ColorsVideo lesson
-
75Homework - PhotomontageVideo lesson
-
76User Experience - Mobile App UI DesignVideo lesson
-
77Prepare the Artboards for UI DesignVideo lesson
-
78Creating Stories ScreenVideo lesson
-
79Creating Quick Chas ScreenVideo lesson
-
80Creating Messages Area ScreenVideo lesson
-
81Creating Settings ScreenVideo lesson
-
82ExportingVideo lesson
-
83Homework - App UIVideo lesson

External Links May Contain Affiliate Links read more


