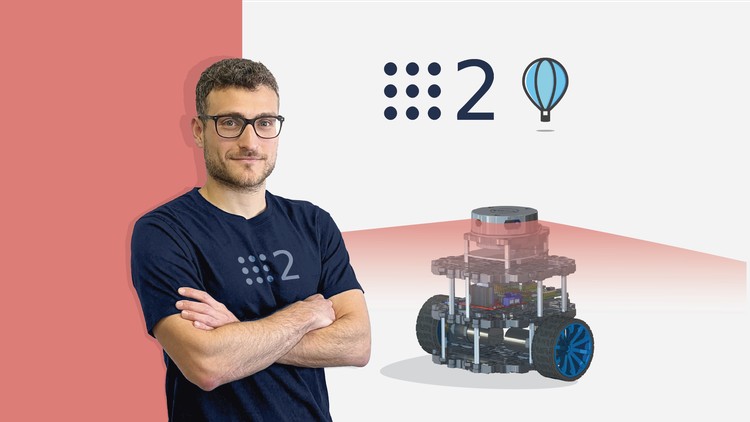
Self Driving and ROS 2 - Learn by Doing! Map & Localization
- Description
- Curriculum
- FAQ
- Reviews
Would you like to build a real Self-Driving Robot using ROS2, the second and last version of Robot Operating System by building a real robot?
Would you like to get started with Autonomous Navigation of Robot and dive into the theoretical and practical aspects of Localization, Mapping and SLAM from industry experts?
The philosophy of this course is the Learn by Doing and quoting the American writer and teacher Dale Carnegie
Learning is an Active Process. We learn by doing, only knowledge that is used sticks in your mind.
In order for you to master the concepts covered in this course and use them in your projects and also in your future job, I will guide you through the learning of all the functionalities of ROS both from the theoretical and practical point of view.
Each section is composed of three parts:
-
Theoretical explanation of the concept and functionality
-
Usage of the concept in a simple Practical example
-
Application of the functionality in a real Robot
There is more!
All the programming lessons are developed both using Python and C++ . This means that you can choose the language you are most familiar with or become an expert Robotics Software Developer in both programming languages!
By taking this course, you will gain a deeper understanding of self-driving robots and ROS 2, which will open up opportunities for you in the exciting field of robotics.
-
7Install Ubuntu on Virtual MachineText lesson
-
8Install Ubuntu on Dual BootText lesson
-
9<LAB>Install ROS 2</LAB>Video lesson
-
10<LAB>Configure the Development Environment</LAB>Video lesson
-
11<HWLAB>Configure the Development Environment</HWLAB>Video lesson
File /etc/udev/rules.d/81-event.rules
SUBSYSTEM=="input", KERNEL=="event*", GROUP="raspberry", MODE="0660"
File /etc/udev/rules.d/99-arduino.rules
SUBSYSTEMS=="usb", ATTRS{idVendor}=="2341", GROUP="plugdev", MODE="0666"
-
12<HWLAB>Install ROS 2 on Raspberry Pi</HWLAB>Video lesson
-
13<LAB>Getting Started with the Simulated Robot</LAB>Video lesson
-
14Why a Robot Operating System?Video lesson
-
15What is ROS 2Video lesson
-
16Why a NEW Robot Operating SystemVideo lesson
-
17ROS 2 ArchitectureVideo lesson
-
18Hardware AbstractionVideo lesson
-
19Low-Level Device ControlVideo lesson
-
20Messaging Between ProcessVideo lesson
-
21Package ManagementVideo lesson
-
22Architecture of a ROS 2 ApplicationVideo lesson
-
23Introduction to ROS 2Quiz
-
24<LAB>Create and Activate a Worksapce</LAB>Video lesson
-
25<PY>Simple Publisher</PY>Video lesson
-
26<C++>Simple Publisher</C++>Video lesson
-
27<PY>Simple Subscriber</PY>Video lesson
-
28<C++>Simple Subscriber</C++>Video lesson
-
29Workspaces, Publishers, SubscribersQuiz
-
38Where am I ?Video lesson
-
39Robot LocalizationVideo lesson
-
40Robotics Convention for LocalizationVideo lesson
-
41Why a Robotics Convention for Localization?Video lesson
-
42Gazebo Worlds and ModelsVideo lesson
-
43<LAB>Give an house to the Robot</LAB>Video lesson
-
44Local and Global LocalizationVideo lesson
-
45Local LocalizationVideo lesson
-
46Global LocalizationVideo lesson
-
47Wheel Odometry ErrorsVideo lesson
-
48Laser Odometry ErrorsVideo lesson
-
49The Real Purpose of Global LocalizationVideo lesson
-
50Error PropagationVideo lesson
-
51Odometry Motion ModelVideo lesson
-
52<PY>Odometry Motion Model</PY>Video lesson
def angle_diff(a, b):
a = atan2(sin(a), cos(a))
b = atan2(sin(b), cos(b))
d1 = a - b
d2 = 2 * pi - fabs(d1)
if d1 > 0:
d2 *= -1.0
if fabs(d1) < fabs(d2):
return d1
else:
return d2
-
53<PY>Odometry Motion Model with Noise</PY>Video lesson
-
54<C++>Odometry Motion Model</C++>Video lesson
double angle_diff(double a, double b)
{
a = normalize(a);
b = normalize(b);
double d1 = a - b;
double d2 = 2 * M_PI - fabs(d1);
if (d1 > 0) {
d2 *= -1.0;
}
if (fabs(d1) < fabs(d2)) {
return d1;
} else {
return d2;
}
}
-
55<C++>Odometry Motion Model with Noise</C++>Video lesson
-
56<LAB>Odometry Motion Model</LAB>Video lesson
-
57What is a MapVideo lesson
-
58How Robots Perceive the WorldVideo lesson
-
59Sensors for Self-Driving RobotsVideo lesson
-
601D Sensors - SonarVideo lesson
-
612D Sensors - LiDARVideo lesson
-
62<LAB>Add a 2D LiDAR to the Robot</LAB>Video lesson
Laser Link Inertial Matrix
<inertial><origin xyz="-0.011945780406062 -0.000381929217680526 -0.0170649378129477" rpy="0 0 0" />
<mass value="0.073084435549317" />
<inertia ixx="1.96074931730795E-05" ixy="-3.62091076640009E-07" ixz="4.28230084046735E-07" iyy="2.40983835136327E-05" iyz="1.50180909250652E-08" izz="4.14184164228595E-05" />
</inertial>
-
63<LAB>Simulate a 2D LiDAR</LAB>Video lesson
-
643D Sensors - RGBD Cameras and 3D LiDARVideo lesson
-
65Speed and Separation MonitoringVideo lesson
-
66twist_muxVideo lesson
-
67<LAB>Preparation for twist_mux</LAB>Video lesson
-
68<LAB>Configure twist_mux</LAB>Video lesson
-
69<LAB>Use twist_mux</LAB>Video lesson
-
70<PY>Safety Stop</PY>Video lesson
-
71<C++>Safety Stop</C++>Video lesson
-
72<LAB>Safety Stop</LAB>Video lesson
-
73ROS 2 ActionsVideo lesson
-
74<PY>Create an Action Server</PY>Video lesson
-
75<C++>Create an Action Server</C++>Video lesson
add_library(simple_action_server SHARED src/simple_action_server.cpp)
target_include_directories(simple_action_server PRIVATE
$<BUILD_INTERFACE:${CMAKE_CURRENT_SOURCE_DIR}/include>
$<INSTALL_INTERFACE:include>)
target_compile_definitions(simple_action_server
PRIVATE "SIMPLE_ACTION_SERVER_CPP_BUILDING_DLL")
ament_target_dependencies(simple_action_server
"bumperbot_msgs"
"rclcpp"
"rclcpp_action"
"rclcpp_components")
rclcpp_components_register_node(simple_action_server
PLUGIN "bumperbot_cpp_examples::SimpleActionServer"
EXECUTABLE simple_action_server_node
)
-
76<LAB>Create an Action Server</LAB>Video lesson
-
77<PY>Create an Action Client</PY>Video lesson
-
78<C++>Create an Action Client</C++>Video lesson
-
79<LAB>Create an Action Client</LAB>Video lesson
-
80<PY>Speed and Separation Monitoring</PY>Video lesson
-
81<C++>Speed and Separation Monitoring</C++>Video lesson
-
82<LAB>Speed and Separation Monitoring</LAB>Video lesson
-
83<PY>Display Markers in RViz</PY>Video lesson
-
84<C++>Display Markers in RViz</C++>Video lesson
-
85<LAB>Display Markers in RViz</LAB>Video lesson

External Links May Contain Affiliate Links read more


