Blender 2.9 & Adobe Photoshop 3D Modeling a Hobbit Door

- Description
- Curriculum
- FAQ
- Reviews
Course Description
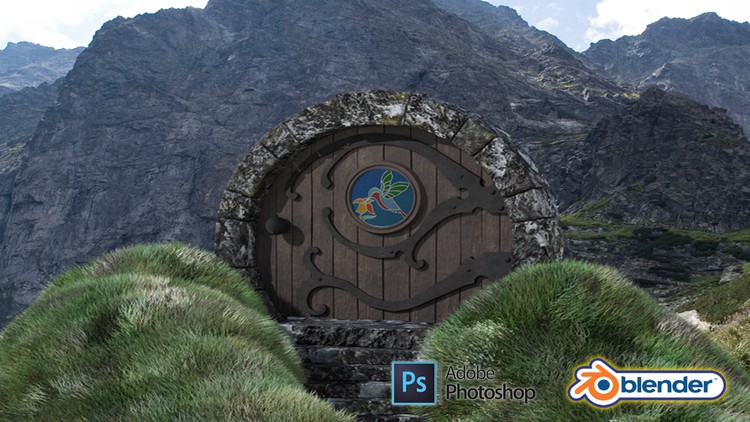
Hi and welcome to my newest Blender 2.9 fantasy genre 3D art course. ‘Blender 2.9 & Adobe Photoshop 3D Modeling a Hobbit Door a complete guide into creating a 3D fantasy scene with the backdrop of a remotely towering mountain.
‘Blender 2.9 & Adobe Photoshop 3D Modeling a Hobbit Door is one of the few 3D modelling courses that will show you how to create grass foliage. It will also be one of the first fantasy genre courses for aspiring 3D modelers. As another first, this course will include a full introduction into basic Adobe Photoshop features.
One of the most sought-after learning experiences of this course is learning how to create Scalable Vector Graphics (SVGs) from scratch. Other exciting course content includes 3D modelling a round door, making procedural materials, learning how to use HDRIs as backgrounds to feature your 3D models in, and learning how to blend a render into a real-world environment using various Adobe Photoshop techniques.
‘Blender 2.9 & Adobe Photoshop 3D Modeling a Hobbit Door’teaches you the very basics of both Blender 2.9 and Abobe Photoshop, moving on to professional techniques in a short time of accelerated learning.
Best of all, anyone can follow along even if you do not have to have Adobe Photoshop. This is because course resources include ready-to-use hinges and stained glass which can be imported into Blender 2.9 straight away. As such, this provides you with a course shortcut which you can take if you so choose.
Taking all the great tools and screen tooltips from past courses, ‘Blender 2.9 & Adobe Photoshop 3D Modeling a Hobbit Door’ will give you the most comprehensive learning process out there.
You will have access to a full course handbook as part of this course, allowing you to identify which parts of the course you would like to jump ahead to if you are a non-linear 3D modeller. The ‘Blender 2.9 & Adobe Photoshop 3D Modeling a Hobbit Door’ course handbook features 8 sections, each focusing on an asset or set of assets. The handbook will transform the learning experience for 3D modelers who love to organise their learning process and take the steering wheel into their own hands.
Following the success of my latest course, we will be modelling, texturing, and finalising every individual asset before moving onto the next. Students have said that this has helped them in staying excited throughout the creation process, being able to see how their scene comes closer to the course preview step-by-step.
Whether you are a beginner 3D modeller eager to learn how to build a 3D Hobbit Door scene and an enthusiast of Blender who wants to fast-track their understanding of its new and exciting changes, this course has something in the bag for you.‘Blender 2.9 & Adobe Photoshop 3D Modeling a Hobbit Door is also ideal for beginner Adobe Photoshop users who are eager to learn how to use this software for 3D modelling or mid-level 3D modellers who want to take their modelling to the new level and improve their workflow with tips and tricks.
In addition to learning a super-fast industry-standard workflow, you will learn how to continuously assess the quality of your scene, and how to tweak smaller sub-components you want to make better through render reviews.
‘Blender 2.9 & Adobe Photoshop 3D Modeling a Hobbit Door’ freebies include a course handbook, 6 references, an option of backgrounds, two types of metal materials, a glass overlay for Adobe Photoshop, a grass texture, an HDRI map, a rock and a weathered texture (including roughness, normal, metallic, displacement, and colour maps), a stained glass SVG and a metal hinge SVG.
Because of how versatile every ‘Blender 2.9 & Adobe Photoshop 3D Modeling a Hobbit Door’ 3D asset is, this course will show introduce you to interesting functionalities, including new and creative ways of using Blender 2.9 and Adobe Photoshop:
· Following through a complete guide on creating a 3D Hobbit Door scene in Blender 2.9 and Adobe Photoshop
· Using Blender 2.9 (the newest software version) and understanding its interface and shortcuts
· Creating a stunning unique 3D Hobbit Door scene
· Learning an industry-standard 3D modelling professional workflow within Blender 2.9 and Adobe Photoshop
· Effective problem-solving in Blender 2.9
· Learning the basics of Adobe Photoshop
· Creating a Scalable Vector Graphic (SVG) from scratch
· Learning how to blend a render into a real-world environment using various Adobe Photoshop techniques
· Learning how to use HDRIs as backgrounds to feature your 3D models in
· Maintaining and optimising fantasy scene aesthetics for a Hobbit Door scene
· Marking Seams, Sharps, and fixing Normals
· Smoothing and preparing meshes for texturing
· Adding materials using Blender 2.9’s node system
· Creating procedural materials in Blender 2.9
· Mesh deforming and using Booleans
· Learning how to make loop cuts in Blender 2.9
· Fixing Ngons within Blender 2.9
· Complete guide on marking seams & texture resolutions
· Complete UV Mapping Guide: UV mapping and UV unwrapping your model
· Creating procedural, stained glass, and metal materials
· Creating Collections of Objects and Meshes using a Hierarchy System
· Learning how to use rendering to improve the quality of presentation for your 3D environment
· Rendering a 3D fantasy Hobbit Door scene to a high level.
Modeling
‘Blender 2.9 & Adobe Photoshop 3D Modeling a Hobbit Door’will give you access to one of the most versatile modelling experiences out there. You will be creating several 3D assets in a short time, helping you practice different skills and Blender 2.9 addons, modifiers, and tools.
This course will teach you how to 3D model fantasy assets from the ground up, using Blender 2.9 and Adobe Photoshop. Whether you are a 3D modelling beginner, intermediate, or advanced user, on-screen tooltips and animations will be popping up when you need them to explain what each Blender 2.9 modifier, addon, or functionality do. Learning outcomes from joining this course will also include adding new key commands to your 3D modeller toolkit with key casting allowing you to keep track of every key I press during the course.
Because of the ‘Blender 2.9 & Adobe Photoshop 3D Modeling a Hobbit Door’course design, the course handbook will enable you to take a personalised approach to the modelling tasks you chose to focus on next. Using the handbook, you will be able to skip ahead to model those assets you cannot wait to get your hands on. By the end of the course, the knowledge you will have learned can be used independent of the direction you take in 3D modeling – following the amateur or the professional path.
Texturing
‘Blender 2.9 & Adobe Photoshop 3D Modeling a Hobbit Door’will teach you how to make procedural materials from scratch using Blender 2.9’s node system. We will be taking an in-depth look at all texture maps, like metallic and roughness, for example. As part of this course, you will also be creating stained glass and metal materials in addition to grass foliage.
Through enrolling in this course, you will also learn how to lay and apply multiple materials to meshes.
Rendering
‘Blender 2.9 & Adobe Photoshop 3D Modeling a Hobbit Door will show you how to use Blender 2.9 cycles rendering as part of your quality assurance process. You will be learning how to use rendering to improve the quality of presentation for your 3D environment, as well as how to use HDRIs as backgrounds to feature your 3D models in.
Adobe Photoshop will also be part of the rendering process. As such, significant learning outcomes will include becoming competent at blending a render into a real-world environment.
You will come away with renders which you will be proud to show off on your social media, and which will allow you to present our model professionally and make it stand out in any portfolio. By the time we have finished rendering in Blender 2.9, you will have the knowledge and confidence to create fantasy genre assets that look like they fell out straight out of a game.
Download Pack
Download packs always excite me when I get my hands on a new course.
‘Blender 2.9 & Adobe Photoshop 3D Modeling a Hobbit Door’will include a free download pack with 6 fantasy art genre resources of what we will be creating. You will also get access to free-to-use metal materials, a glass overlay for Adobe Photoshop, a grass texture, an HDRI map, a rock and a weathered texture (including roughness, normal, metallic, displacement, and colour maps), a stained glass SVG and a metal hinge SVG.
The best course navigation tool for ‘Blender 2.9 & Adobe Photoshop 3D Modeling a Hobbit Door’ will also be included. The course handbook will give the control back to you and you will be able to fully streamline your learning process to your needs and wants seamlessly.
3D Modelling a Hobbit Door Scene in Blender 2.9 and Adobe Photoshop is one of my quickest, most compact courses to date, filled with efficient, quick-to-follow tips and animations that will help you accelerate your workflow through a single project.
Check out the free introduction and I am sure you won’t be able to put this course down.
Who wouldn’t like to feel closer to nature and serene living, now more than ever?
By enrolling in ‘Blender 2.9 & Adobe Photoshop 3D Modeling a Hobbit Door’, you will get the full fantasy environment experience in which you will be immersed further after every lesson.
I was eager to make this scene something magical, straight out of a story, and I am sure you will too!
Happy modelling everyone,
Neil, 3D Tudor
-
2
 Lesson 1 - Course Layout & Photoshop Set up
This lesson will introduce you to the course layout and explain how the pop-up animations and key-casting work to assist your learning process. We will also be setting our canvas in Adobe Photoshop, ready to start work on creating our stained glass window for our Hobbit Door scene.
-
3
Lesson 2 - Creating the Outline of the Stained Glass SVG
In this lesson, we will be sketching out a hummingbird within Photoshop and going over it again to create our stained glass. We are sketching out a hummingbird from scratch to learn how to take any reference and achieve the same outcome, whether it is a Kraken or a ship instead of a bird. You will learn how to use the brush and eraser Photoshop tools to create the outline of our stained glass.
-
4
Lesson 3 - Exporting & Importing SVG's from Photoshop to Blender
In lesson 3, you will be learning how to turn an image that was created within Adobe Photoshop into an SVG. We will also go over how to import that SVG into Blender 2.9 and then change it into a workable mesh.
-
5
Lesson 4 - Creating the Glass Mesh
This lesson involves taking the SVG that we created in Adobe Photoshop and turning it from a curve into an object within Blender 2.9. We will then learn how to give depth to the 2D mesh.
-
6
Lesson 5 - Marking Seams & Preparing Mesh for Materials
Within this lesson, you will find a short video which explains why and how we mark seams and what relevance this has for placing materials as part of a typical 3D modeling workflow. After this short introductory lesson-within-a-lesson, we will be marking the seams and preparing the mesh for materials as discussed.
-
7
Lesson 6 - Creating a Procedural Metal Material
In this lesson, we will be creating the procedural metal material using the Blender 2.9 node system. You will be learning about every one of these nodes and what they do as part of the process alongside helpful pop-up animations. The procedural metal material will be used as the material for the stained glass outline of our Hobbit Door scene window.
-
8
Lesson 7 - Setting up the Stained Glass Material
In lesson 7, we will be creating the stained glass material in many different colours within Blender 2.9. You will learn all about the random island node – a brand new node to Blender 2.82.
-
9
Lesson 8 - Creating & Applying Stained Glass
This lesson will focus on applying the stained glass we created in the previous lesson to all of the islands of our window mesh. We will be creating a mosaic of stained glass, featuring different shades and colors.
-
10
Lesson 9 - Importing the HDRI & Creating the Wooden Frame Base
In this lesson, we will be working on the frame of our stained glass window. We will be importing an HDRI to make sure we have a good lighting set up so that we can estimate how easily we can see through our glass. As part of this lesson, we will also be making a start on the wooden frame that will encapsulate our stained glass window as it features on our Hobbit Door.
-
11
Lesson 10 - Finishing the Wooden Frame
In lesson 10, we will finish the entire stained glass window creation process, complete with its wooden frame. You will learn how to unwrap cylindrical objects, and by the end of this lesson, you should have a professional-looking stand-alone asset.
-
12
Lesson 11 - Starting the Stone Arch
This lesson will see us creating the initial shape for the stone arch using a highly effective but simple technique within Blender 2.9. This skill is highly transferable to any of your future models.
-
13
Lesson 12 - Creating the Stone Blocks
In this lesson, we will be looking at how to transform a 2D object into stone blocks, quickly and easily. The focus of this lesson will be on learning how to make these stone blocks look alive and take on a realistic appearance, fit with grooves and uneven surfaces.
-
15
Lesson 14 - Creating the Stone Steps
This lesson will see us creating the stone steps using a mixture of array and empty primitives within Blender 2.9. We will aim to model the steps in such a way that they look like they cut into the landscape. In the end, we will have created a fantasy spiral staircase.
-
16
Lesson 15 - Adding Material to our Steps
In this lesson, we will be marking seams, UV unwrapping, attaching materials, and finalising our stone steps for the Hobbit Door scene we are creating. As part of the learning process, we will also learn how to pack islands within Blender 2.9.
-
17
Lesson 16 - Creating the Hinges SVG
In lesson 16, we use the same techniques as we learned in the first lesson. However, this time, we will use a screenshot of our door to style the hinges around the shape of our Hobbit Door. Through this creation process, we will be trying to give the hinges an entangled root character to help them fit into the fantasy theme of our Hobbit Door scene.
-
18
Lesson 17 - Hinges SVG Curve to 3D model
This lesson will involve importing our hinges from Adobe Photoshop into Blender 2.9. After importing them, we will be turning them into workable meshes. This is an intense lesson where we also mark seams and add the materials.
-
19
Lesson 18 - How to Control Normal Faces
In this lesson, we will be creating the opening mechanism for our Hobbit door as well as looking at how to prepare our model for rendering. This will involve learning about normal faces.
-
20
Lesson 19 - Creating the Bolts & Cleaning up the Scene
In lesson 19, we will be learning all about collections within Blender 2.9. You will find out how you can use collections to clean up our scene – a process which is one of the most important for quality assurance in 3D modelling to avoid importing and exporting issues in the future. Finally, we will be creating the bolts for our Hobbit door.
-
21
Lesson 20 - Creating the Grass Mesh using Displacement
This lesson will involve creating our grass meshes. You will also be learning how to remesh them for perfect topology. In the end, we will be going over how to use the displacement modifier within Blender 2.9.
-
22
Lesson 21 - Creating the Grass Particles
In this lesson, we will set up our grass using the in-built particle system within Blender 2.9. You will learn how to create grass with a few simple clicks. Part of the learning outcomes will also involve finding out all about particle edit to cut and shape grass.