3.65 out of 5
3.65
89 reviews on Udemy

The Product Photography Guide

Learn photography with your camera
Instructor:
Manik Roy
19,577 students enrolled
English [Auto]
Product photography with smartphone camera

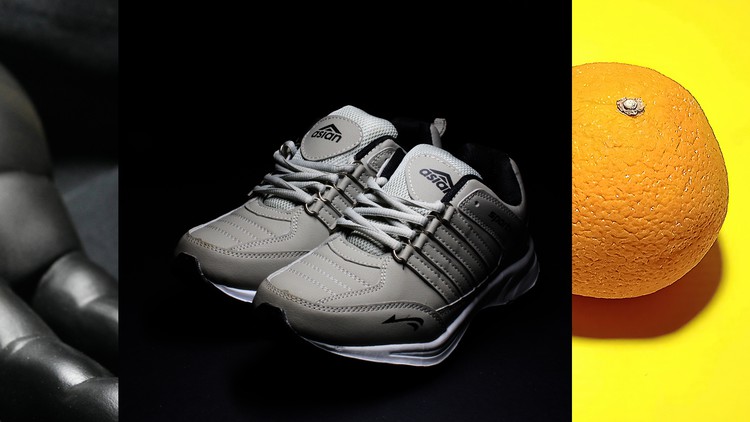
This course will allow you to learn photography with a camera. Moreover, previous knowledge about photography does not require at all. Even, when you will first get into the course, then you will know how a smartphone can be used as a primary photographic tool for product photography. The course will inspire you to go to the new horizon for another promising career as a photographer. May it be a beginning but when you will be habituated with its power, then your skill will shine through with time. This course is a trial and error process for any learner like you. Even, I am also learning as I am developing this course for you. One interesting point about this course is that as you learn theoretically as well as practically in this course. Moreover, you have to work on your learning about photography through this course and also you have to practice ceaselessly. At the initial stage, you will bound to commit mistake but never give up and also try and try over the time to shot a professional look in your photography also. The main purpose of this course is to guide you in learning the principles of photography but you will have to be self-propelled along with this course. Therefore, over time, you will become a good photographer as well.

Introduction

1
Introduction

In the modern world, taking a photo is a highly specialized skill for everyone. Despite having the desire to take a good photo, not everybody able to take it. The reason is that people may not have adequate knowledge about picture taking skills or they may not have adequate knowledge about camera mechanism as well. In this regard, they have to train themselves with the latest photographic technique and equipment as well. Otherwise, they will never get satisfied results from their skill. Product photography requires some elements like saturation, colour, exposure, post-production, and others, which are highly relevant to it. For taking a good product picture with a smartphone camera, you have to know the correct technique and the application as well. In the modern era, smartphone technology is a boon for photography. The reason is that its portability and user-friendly features make it a future photographic gadget. In general, the people still accept its photo shooting power as amateurish. What happens is that the people always think that the smartphone camera as a tiny object in their mind and therefore they downgrade their power as well. It is unfair justice to smartphone photography. After taking this video course, you will able to justify the power of smartphone photography and you will able to taste the versatility of the smartphone camera as well.

DSLR vs Smartphone

1
Comparison

In the modern world, feeling about photography always attracts the image of a camera in our mind. First, we try to perceive its type or form. In this context, we are talking about DSLR and smartphone cameras. Therefore, you will like to see the difference between DSLR and smartphone cameras. Technologically, both are developed on the same digital platform but what makes its difference is that they are attached to the different categories as well. The main difference between DSLR and smartphone is portability. As far as the components of a digital camera are concerned, the power of digital camera lies on its built-in software whereas DSLR camera depends on its lens. Moreover, you will observe that the smartphone camera mostly depends on software whereas the DSLR camera depends on lens hardware. At this point, you will find that the performance of the smartphone camera has a unique pattern for delivering quality picture over time. You can imagine that all of your photographic functions and features which you will get in the small form of smartphone with extreme portability. Moreover, when you are thinking about the smartphone, then you will find that the smartphone requires the minimum number of hardware whereas the DSLR camera will require a lot of hardware as well. In this context, you can say that the smartphone only requires lens and screen which are housed in a single form and you will not require to change the hardware for taking the picture. But in the case of the DSLR camera, you will need body, lens separately to form a single form as well. When you are going to shoot a product, then you should keep in mind that the shooting area of a product is very much compact and small. Therefore, you will need a normal lens with 50mm for your shooting most of the time. Here, the smartphone camera is a boon for you. The reason is that for taking a product photo you will require better lighting which can easily control by the smartphone camera with any light source. The advantages you will get when you are going to shoot the product with the smartphone by controlling light easily because the in-built camera software will make to save your labour. What happens is that portability and usability will make your photographic performance in a bigger perspective also.

Exposure

1
Exposure Mechanism

In photography, exposure is a very much important element. The reason is that it gives a picture’s visual existence in the eyes of the viewers. Therefore, you can expect accurate exposure for a product shot through a smartphone camera as well. It is observed that exposure is very much important and essential tool for any smartphone photographer. One thing is true that how much light enters the camera sensor which designated as an exposure. The elements of the exposure are shutter speed, aperture, and white balance. These elements are crucial for a well-exposed picture as well. For the case of a smartphone camera, you can imagine that every exposure is an artistic decision for any photographer. Generally, exposure consists of aperture, shutter speed, and ISO. For product photography, you should first adjust the aperture for light to hit on the camera sensor. After that shutter speed comes second to allow the aperture to hold light before it hits on the camera sensor as well. Lastly, ISO will come last which will allow you to measure the sensitivity of light which is hitting on camera censor. For product photography, in terms of exposure, you will require aperture and shutter speed most. The reason is that most of the time, product photography has shot in the studio. Therefore, you will get the controlled light source which will give more consistent light over the times as well. For the smartphone camera, you will able to control the light in a significant manner. Because the smartphone camera sensor has smaller in size. Therefore, it takes light from the subject in a smaller proportion. So that it will be difficult for the smartphone camera sensor to capture a large amount of light from the scene as well. But if you adjust ISO speed, then you can get the substantial light quantity for the smartphone camera sensor. Another point you have to keep in mind that the smartphone camera will read the subject light differently before taking the final shot. Because the smaller sensor will have limited ability to capture the light and make the exposure accordingly. You indeed have to understand the lighting condition very seriously, otherwise, you will never get the right exposure for your product shoot. Nowadays, the picture from the smartphone camera sometimes deceives our perception about a picture’s sharpness, details, and exposure. The reason is that exposure belongs to the power of the light source. Therefore, if the variation of light intensity is compromised, then the total exposure mechanism from the smartphone camera sensor will be hampered. For product photography, the smartphone camera always reads the exposure accordingly after taking the light deflection of the subject body. It happens due to the small sensor of the smartphone camera as well. It is observed that the DSLR camera sensor is bigger than the smartphone camera sensor. Therefore, the DSLR camera sensor reads the bigger area of light spread around the subject. So that it will automatically adjust the variation of light intensity. For product photography, the importance of aperture setting is high. The reason is that it delivers details about the product and sharp as well. Generally, the shutter speed is negligible for product photography. Because the product photography is most of the time shot on a tripod and the camera shake is minimum for it.

Composition

1
Rules

As far as composition is concerned, it is important for any kind of product photography. The reason is that the smartphone camera has very flexible composition support for any photographer whether he or she is a novice or professional. If you like to shoot with a DSLR camera, then you have to adjust the external settings as well as the internal settings also. But in the case of a smartphone, you only have to adjust the composition through its internal settings like camera setting on third-party software or built-in software on the smartphone as well. For the product shooting through the smartphone, you will be able to use the composition grid for any product shot with dead accuracy as well. For the smartphone camera, the product shot will be highly challenging. The reason is that product photography requires more room for creating the composition. In this respect, the smartphone camera gives enough room through its internal settings. Practically, you will able to move easily around the product to select the best shot for it. It is observed that product photography will require special attention to compositional skill. The reason is that the photographer should keep in his or her mind that product photography is always based on the horizontal plane. Because not a single product could not be more than 2 feet in height. If this height is increased in a higher proportion, then you will find difficulty to frame the product accurately for composition. It is the norm for basic product photography. Another point you have to keep in mind that the smartphone camera has a limited ability to capture the long height of any subject due to lack of additional lens. It is happened due to the internal mechanism of the camera as well. Even if you try to test it with your smartphone camera, then you will find its limitation as well. Logically, it is happened due to the deliberate restriction between smartphone size and its form. If you are keen on your feeling, then you will find that all smartphones are rectangular but all DSLRs are in the semi-square shapes as well. For any composition of a photo, you will always require some room along with the subject also which only can be found through the extra lens and other accessories which belong to the DSLR camera also. Therefore, for a smartphone camera, there is no option about it. Another point you have to consider when you are going to shoot a product under a lighting condition. The reason is that the accurate light measurement will say more about the product details and its liveliness as well. It is observed that for compositional purposes, a smartphone camera will need a more precise lighting source which could not be inconsistent. Therefore, you will able to compose your product accurately. If the light source is not consistent, then the White Balance and Exposure will be hampered as well. For the case of the smartphone camera, it is observed that the composition of a product on a tabletop shoot, you will require a precise follow-up of photographic composition rules. It is very much important for every product shot as well. When you are going to create a good composition of your product shot, then you have to keep in mind that not all composition rules will be applied to product photography. Even, the smartphone camera follows the minimum compositional rules for product photography. Because its in-built settings make it easier for the photographer whether he or she is a novice or professional as well. Generally, for product photography, you will have to follow some composition rules like line, form, texture, focus, and others. But all the elements of photographic composition are linked with each other. It is true that when you follow the few rules then it will automatically be adjusted with other rules simultaneously without your knowledge as well. When you are going to compose your product shot, then you will have to consider baseline, white space and focus for your photo composition. The rest will be automatically adjusted with smartphone camera internal settings. The smartphone camera is a point-shoot mechanism which invites all level of photographic experienced people. Therefore, people get enough time to compose their products precisely as well. For composition purposes, the rule of thirds is used most of the time in product photography. It is the primary rule of photographic composition. Because first, you have to frame a product on your camera with a sharp focus. So that your viewer will able to see your product shot in detail and it will give a detailed view of the overall composition as well. After that secondly, place your product off the centre on the screen which will lead your eye to the subject and it will make a believable shot also. Thirdly, you have to compose the product shot based on the baseline which means that whether it will be on the horizontal or vertical baseline. It will depend on the height of the subject as well.

2
Rules of Thirds
  • It means that a plane will be divided with nine squares of equal size, with two horizontal lines intersecting two vertical lines. Therefore, it will create the drama and interest into a plane. The existence of the rules of thirds also visible in the mother nature as well. Even you will find it all over our surroundings also. But one thing is sure that it always simulates the visual easiness for looking on a subject which soothes our eyes and imagination. If you look deeply into your mind, then you will see that our mother nature also follows the rules of thirds. But for the product shoot, it creates a balance between aesthetics and visualization as well. Most of the case, you will find that the rules of thirds are being used for product photography also. Honestly speaking, it is true that the rules of thirds are one of the weakest composition guidelines among all composition rules. Still, it is used extensively all over the place also. For product photography, it is good for the straight forward tool for composition guideline. Now the question is that should you follow the rules of thirds. You should follow this composition guideline for product photography. The reason is that it will give you a good composition for your product shooting as well. The main problem with the rules of thirds is that it just placing the main parts of your image at arbitrary points on a grid and it directs your eye straight to the picture as well as you could not move your eye towards any diagonal direction. Even if you like to get full proof for the composition of the product photography, then you can try other composition guidelines which will be discussed in the later lectures.

3
Spiral

It has different names which people called like a Fibonacci spiral, Golden Spiral, Phi Grid, Divine Proportion, or the Golden Mean. This composition guideline is very much pleasing and balanced for the human eye. The reason is that it steers the human eye around the picture and take into the centre point of the subject as well. Therefore, for product photography, it brings visual happiness in the product picture. It also helps to lead the viewer through the entire photo. The Golden Ratio or Spiral also called ‘nature’s number’ because it is said to appear everywhere in nature, from the nautilus shell to the sunflower.

4
Triangles
  • It is called The Golden Triangles. It divides the frame with a diagonal line going from one corner to another. The main purpose of this composition guideline is to convey a strong feeling like aggression, stability, compassion, caring, instability and others. For product photography, triangles can be used when the product which you are going to shoot should convey one of these feelings as well. In this context, you will have to read the product carefully and make the final decision about how you will able to apply triangle composition in your product shooting. Generally, the triangles are being used in architecture, landscape and movie as well.

5
Diagonal

It represents a balanced composition of dynamically intersecting and crossing parallel and diagonal lines, the result of viewing and framing the subject from a particular angle. Practically, diagonal composition creates a feeling of movement. For product photography, it makes little impact on product composition.

6
Rule of Odds
  • It means that when you are arranging more than one product in the product shooting with your smartphone, then you should always rely on the odd numbers (3,5,7,9,11,13,15 .etc.). Among all these odd numbers, 3 is the most powerful odd number for photo composition. When you are going to shoot the product photography, always try to use a set of three in the composition if you are shooting more than one product. The reason is that the odd numbers always force your eye to move around the group. Therefore, it makes the composition more appealing and memorable as well.

Smartphone Camera

1
Camera

In the present time, the smartphone camera is based on the two operating systems. One is the Android operating system and another is the iOS operating system. Therefore, you can expect the different kinds of features in the smartphone camera as well. It is observed that both of the operating systems are highly user-friendly in its terms. But there is little difference in their performance. An android operating system is indeed popular due to its cheaper licensing to all smartphone makers and also it caters to the maximum compatibility of the latest smartphone features as well. Whereas the Apple iOS operating system is not a market leader in the smartphone user’s community due to its price tag. Although it is famous for its graphic capability it is not a fixed conviction for the people around nowadays. Because the smartphone camera is popular for the selfie picture. Therefore, the people look for a quality selfie every time for maintaining the relationship. But the back camera is for the festivities and occasions purposes as well. Therefore, the back camera is highly important for smartphone camera makers. The reason is that smartphone manufacturers are always looking for the big profit from their smartphones. So that they always give more importance to the back-camera features as well. But for the product photography, the smartphone back- the camera is only and foremost tool for any kind of product shot. When you are going to use the smartphone back-camera for the product shoot, then you should keep in mind that the higher pixel camera does not always give you a better picture at a regular interval. More you can say that the back-camera should have well synchronized with its hardware as well. You should keep in mind that the smartphone camera always depends on the built-in software also. The reason is that it performs with a 35%-65% range between built-in software and camera hardware. Actually, for the product photo shot, you will require favourable compatibility with the camera and the software.

Smartphone Apps

1
Apps

For the smartphone camera, photographic apps are one of the important tools for any kind of photographers like amateur or professional. It is true that without any photographic application in the smartphone, the camera will not perform to its fullest power as well. It is observed that the photographic applications of the smartphone are selected according to the personal choice of its users as well. The reason is that personal preference and requirement will vary from one person to another person. Even, you will observe that every single smartphone application is quite different from another smartphone photographic application in its features and functions as well. So that you have to decide which application you will use and what purpose will be fulfilled. When you are going to select the photographic application for the product photo shoot, then you have to keep in mind that the application should provide you with some important features like manual exposure, RAW file format, Exposure Compensation, ISO speed, and White Balance. Sometimes, we observe that smartphone photographic apps that you like to use for product photography, then you have to sort out the basic types of photographic apps in Google Play and Apple Store. Because you will need a different kind of photo app like a studio light setup, ephemeris, light meter, and basic camera. Now you will get to know about all these photo apps. First, you have to install the studio light setup app in your smartphone for taking an instant view of product composition. It is vital for your product shot. Because you will able to see how the shooting will be performed and get an accurate shot as well. The shooting diagram in the studio setup light app before you commit the product shot will be a vital clue for your overall performance as well as you will able to save your time and money also. When you will know how your product shot is going to happen, then the chance for failure will be minimum. Secondly, the Ephemeris app is generally used for the outdoor location. But if you try to experiment with the product photography with a daylight source, then it will come handy for you as well. You will able to understand the sun's location according to its movement over the horizon. One thing is true that the Ephemeris app is built for the landscape shooting but if you are a creative one and try to explore differently, then this app will give you a new dimension in your skill as well. Another point you should know that the Ephemeris app will give you enough opportunity to understand the light variations at the different time slots from the morning to the dusk as well. Moreover, you will able to see the difference between the pictures taken with the Ephemeris app and the picture taken without the Ephemeris app. Sometimes you will feel the power for using the Ephemeris app for your product shot in the outdoor location. It will create a unique experience with it. As far as the light meter app is concerned, you will find a useful tool for your product photography. The reason is that this tool will guide you to measure the accurate exposure setting in any kind of lighting condition. Moreover, it will steer you to take the well-exposed product shot. It will come handy when you are going to sit on the editing table and you will know about the importance of taking the accurate exposure reading before taking the final shot on the field. You should never compare the performance between the manual light meter and the software-based light meter. Because the performance of both the light meters will work according to its available light source and operational mechanism as well. You may indeed use it if you think that it is very much important for your accurate photography. Practically, the basic camera app is built-in with every smartphone. Therefore, you should use it frequently. The reason is that the built-in camera app is highly compatible with the camera hardware. Even, the third-party camera app may not work smoothly with the smartphone camera mechanism.

Photo Editing Applications

1
Software

Despite having a photo app on the smartphone, you will require separate photo-editing software for retouching purposes. It is observed that the photo editing software is highly robust and powerful in terms of the smartphone built-in photo app. Sometimes we thank that we could make the final editing of the product shot in the built-in or third-party photo app. But the output from it will discourage you completely. Because first you will have to edit on the smartphone photo app and second you have to edit the final phase on the photo-editing software on PC or MAC. In the market, you will find the different brands of photo-editing software like Adobe’s Photoshop CC & Lightroom, Corel’s Paint Shop Pro, and others. But the photo-editing software from Adobe stable is most popular. Even, this software is now expensive for any individual. If you are a professional photographer, then it is a must-have tool for the final production of the product photo. Moreover, if your pocket is thin, then you can go for Corel’s Paint Shop Pro. The reason is that it is the best in the low-budget phot-editing software. Even you will observe that it has a unique blending of features for the amateur and professional photographers as well. When you are editing on a photo editing software, you should keep in your mind that control over the colour and exposure should be given the utmost importance. The reason is that the picture from the smartphone camera always has more contrast and brightness. Therefore, you should give attention to it. Because on the editing table, the photo from the smartphone will look a little brighter and you have to adjust it with the proper selection of filters and tools as well. You will need brightness, contrast, hue and saturation tools for controlling the brightness of the picture. These basic tools which you will find in any photo-editing software. Wisely, you can expect a better result from post-production sessions with photo-editing software. For the product shot, you will require the accurate exposure and colour details for highlighting the product which ultimately brings the branding image for the company. One thing you should keep in mind that photo editing software always takes your editing skill to the utmost level where you will never imagine before. Because with this photo-editing software you will able to shine your editing skill through its tools.

Smartphone OS

1
Operating System

Despite having a photo app on the smartphone, you will require separate photo-editing software for retouching purposes. It is observed that the photo editing software is highly robust and powerful in terms of the smartphone built-in photo app. Sometimes we thank that we could make the final editing of the product shot in the built-in or third-party photo app. But the output from it will discourage you completely. Because first you will have to edit on the smartphone photo app and second you have to edit the final phase on the photo-editing software on PC or MAC. In the market, you will find the different brands of photo-editing software like Adobe’s Photoshop CC & Lightroom, Corel’s Paint Shop Pro, and others. But the photo-editing software from Adobe stable is most popular. Even, this software is now expensive for any individual. If you are a professional photographer, then it is a must-have tool for the final production of the product photo. Moreover, if your pocket is thin, then you can go for Corel’s Paint Shop Pro. The reason is that it is the best in the low-budget phot-editing software. Even you will observe that it has a unique blending of features for the amateur and professional photographers as well. When you are editing on a photo editing software, you should keep in your mind that control over the colour and exposure should be given the utmost importance. The reason is that the picture from the smartphone camera always has more contrast and brightness. Therefore, you should give attention to it. Because on the editing table, the photo from the smartphone will look a little brighter and you have to adjust it with the proper selection of filters and tools as well. You will need brightness, contrast, hue and saturation tools for controlling the brightness of the picture. These basic tools which you will find in any photo-editing software. Wisely, you can expect a better result from post-production sessions with photo-editing software. For the product shot, you will require the accurate exposure and colour details for highlighting the product which ultimately brings the branding image for the company. One thing you should keep in mind that photo editing software always takes your editing skill to the utmost level where you will never imagine before. Because with this photo-editing software you will able to shine your editing skill through its tools.

Focus

1
Focusing Mechanism

For any kind of photography, focusing is a vital skill for any photographer. The reason is that it gives a photo into a crisp and sharp looking identity as well. It is observed that focusing a product determines its real identity. Moreover, you can say that focusing on the smartphone has a unique experience. Because you have to press a shutter button in a DSLR camera but for the smartphone camera you don’t need it. Rather, autofocus starts immediately you open the camera application in the smartphone. Practically, it makes the user starts the photo-taking action as well. For product photography, the smartphone camera does not allow to focus manually which you use in any DSLR camera. It is true that the autofocus feature in any kind of camera will be different and works in different ways as well. Moreover, you will see that manual focus is more powerful than autofocus. The reason is that the autofocus works well on the principles of contrast which means that the difference between light tones. One point you have to keep in mind that autofocus could not work well in macro or close-up distances. All kind of product photography is done on the shorter distance between the product subject and the camera plane. You have to understand it well when you are going to shoot product photography. Manual focus is the best option for product photography. But in reality, we are habituated with the autofocus feature which gives us time-saving and lesser labour as well. The logic behind focusing is that moving the camera plane in a forward and backward manner will ultimately give the product a real-life view as well. For product photography through the smartphone, you will require the basic motor control of your brain. The reason is that if you have a robust motor control ability, then you will able to focus on your subject precisely without any image stabilization tool. It is observed that the smartphone is not built for the tripod support due to its portability feature. Another reason is that it is built for a snapshot of the people in general. As far as the autofocus for the smartphone is concerned, there are three types of autofocus like passive autofocus, active autofocus, and hybrid autofocus. Among all these autofocus categories only Phase-Detection Auto Focus (PDAF) of Passive Auto Focus category is most popular today and also it is very much effective as well. Autofocus mechanism is always light-dependent and any kind of variation in the light source will give a great impact on auto-focus mechanism as well. The only drawback of the PDAF system is that it will work only on the bright light source and it never works well in the dark light situation. For that reason, most of the smartphone cameras today could not perform well in the low light area of a scene. You will indeed find the smartphone camera in the studio setup for the product photography will work well due to the flash-oriented light source as well. When the focusing mechanism starts to work, the focus motor of the smartphone camera will work on the light-dependent source to achieve focus using trial and error as well. The active autofocus uses the infrared beam to make autofocus work. But sometimes it is found that the accuracy is not seen in every lighting condition of the product subject as well. Therefore, nowadays, the hybrid autofocus system is being used to overcome the weakness of both passive and active autofocus systems.

Metering

1
Smartphone Metering

Metering in the smartphone camera is quite important for the photographer. Because you have to choose the right metering system (Matrix Metering, Spot Metering, and Centre-weighted Metering system) for product photography. You should keep in your mind that which metering system will be required for the product shot will depend on how the light source will be played around the product surrounding as well. Practically, the spot metering and centre-weighted metering system are the prime metering systems for product photography. It depends on you how to interpret your product shot according to the client’s demand. If your client wants to highlight a segment of the product, then you have to select the spot metering system because it will highlight a particular area of its light spread. On the other hand, if your client wants to highlight the full product details then you have to select the centre-weighted metering system as well. For measuring the light, the two kinds of light meters are available in the market. One is reflected light meter and another is an incident light meter. But you have to select the right meter after judging the scene of the photographic subject. Indeed, the smartphone camera does not have this kind of metering device separately which is available in the photography market. But most of the time you will get the reflected light measurement in the smartphone camera. If you like to take the incident light measurement, then you have to buy a separate light meter which is an expensive and life-long investment for any photographer as well. But for the case of the product photography, you have to take the reflected light measurement for your need. The reason is that most of the case the background of the product is white and it is the colour is highly deceptive to the light meter. Even it can deceive the light meter by over-exposure light measurement or under-exposure light measurement. Generally, the incident light reads the light fall on the subject. Therefore, you will expect accurate light measurement as well. For the case of the smartphone camera, you can use a neutral grey card on the background to take an accurate measurement of light falling on the subject as it will make your job easier. Sometimes you can get the light meter app with the incident light metering system in it but it is not accurate due to the smartphone hardware mechanism.

Camera Lighting

1
Lighting

Lighting in product photography has an important role. Particularly it has four controllable qualities like intensity, colour, direction, and movement. Lighting does the unique impact on product photography to make it more real-life looking as well. When you are going to arrange your product subject, then it should be placed on a flat plane which we can call it a stage. For stage lighting, the functions of it are mood, selective focus, modelling, and visibility. These functions are vital for interpreting product photography in the real form. Mainly light has a unique power to instil its functions in such a way that a product could appear to look like a real one. For the smartphone camera setup, the lighting setup should be the bare minimum for getting a real picture of the product subject. You have to shoot in the closed area and you will get the acceptable shot with the minimum lighting setup. Practically, you will need a flash setup or to use the simple a couple of torches will be sufficient for your mobile product photography. It is observed that too many lighting setups will jeopardize the product photo shooting as well. Generally, you will need two indoor off-camera light sources for product photography. If you think deeply about any kind of product photography, then you will see that most of the time, the product shot requires the least quantity of lighting gadgets. Because always product photography needs the minimum lighting pieces of equipment for creating a better picture of the product. For product photography, the pair of home light bulbs like CFL or LED bulbs are enough for your product shooting. The reason is that for the closed area if you put a lot of lighting gears, then you will not able to control the light intensity as well. If you put the pressure on the high intensity of the light source, then there will be a chance for burnout of the pixels of the camera sensor. If it happens, then you will never able to get the accurate exposure of your product shot and you should keep it in your mind also. It is an instinct that if you are in a closed area for a long time then you will feel some kind of burnout due to the suffocation. Similarly, when you put a lot of lighting gears for a product shot, then you will see that some kind of suffocation in your product shooting as well. For arranging the lighting gears for product photography, you have to follow two lights rule. Because it will be sufficient for most of the product shot. Practically one light gear uses for lighting on the full surrounding area of the product subject and another lighting gear uses to fill the shadow area of the product subject. Even still if you need another light gear, then you could use the white-coloured reflector as it may be art paper or paper board also. If you want to get a well-illuminated product shot, then you will require 300 watts light gears which you can get from a 75 watts LED bulb. It is enough for a decent product shot. One thing you should keep in your mind that smartphone camera screen always shows a couple of higher numeral value in the exposure screen. Therefore, the heavy light intensity will be required to control through the exposure compensation feature. When you are using the lighting source, then you should always go for the LED bulb. The reason is that it is less expensive and gives a big cut in the electricity bill as well as it gives cool light as well. Moreover, the LED light bulb delivers cool and soothing intensity which is good for product photography. If you use the natural light for the product photography, then you have to be skilful one to control the sunlight. But if you use the artificial light i.e flashlight then you can easily tame its intensity also. When you are using the smartphone camera for the product photography, then you should keep in your mind that the small sensor of the smartphone camera will require more light whereas the DSLR camera has a larger sensor which it needs the less light requirement as well. When you are going to select your product subject for shooting, you should check your surrounding regarding the unwanted light interference. Because you should keep in your mind that any secondary light source should not spoil the primary light source. It is found that sometimes the unwanted light interference develops the white balance problem which is very much detrimental for the product shoot with the smartphone camera. The reason is that the censor of the smartphone camera takes quick reading within a slight variation in the light source. Another point to ponder is that you could never use the different wattages of the light source and you should maintain the equal value of wattage for the light source.

White Balance

1
Colour Temperature

The main reason for using the white balance is to remove unrealistic colour cast from the subject surrounding. If you use auto settings of white balance in a smartphone camera, then you will get the default white balance reading. But if you manually change the white balance settings, then you will get the different result from it. But always the colour temperature of the light source should be around 6500K as well. It will give the cool daylight effect on the product subject. Generally, the background of the product subject is white. Therefore, you will need the reading from the white-coloured perspective as well. If you think deeply, then you will find that white balance is the measurement of light temperature which delivers the true colour of the photographic subject. Unless you are not competent how to use the white balance, then you should use auto settings of the white balance in a smartphone camera. Practically, you will never get the true colour balance from the auto settings. Sometimes the smartphone camera sensor gets deceived due to the variable light temperature. Particularly it is most of the time is visible in the case of natural light like sunlight. But if it is the flashlight, then you can expect some control over the light temperature. The reason is that the flashlight always has a consistent colour temperature. Therefore, it is easy to control it through white balance mechanism as well. Sometimes we confuse about the white balance application in our photo shooting procedure. The reason is that the colour of the product sometimes needs a total interpretation of the product details. In this regard, we can say that the product presentation to the buyers is the utmost importance for selling at the point of sellers as well. Because the accurate look of the product will determine the selection process of the buyers also. Manually you can change the white balance according to the demand of the product identity. It requires when you have to present an accurate hue of the product for your clients as well. It is observed that sometimes the manual adjustment of white balance gives the product aesthetics a new look also. One unique criterion of the white balance is that it always converts the white colour of the subject into the pure white colour on the smartphone camera sensor as well. Maybe a question arises in your mind that why the white balance is required for photography. The reason is that to read the correct hue of colour in the subject. So that it could appear white colour like pure white in the front of our eyes as well.

Photography Props

1
Props

Generally, the props are used in the portraits extensively. But in product photography, there is a limited possibility to use the props. The reason is that the use of props will be required when the subject should be presented creatively. In this regard, you could make an intelligent move to use the props in product photography. Most of the time you will observe that the product photography require less space. So that adding a prop sometimes make it difficult for the product shot. Practically props mean additional stuff like a hat, toy, ballon, light wand, smoke bomb, flower and others for creating a story or the mood of the product shot. For advertising purpose, sometimes props create a delicate touch of creative visualization to invite the buyer's attention as well. When you will shot the product with the smartphone camera, then you will see that the smartphone camera sensor will read the whole frame of the product subject with props to add a character and interest to the photo.

Product Background

1
Background

It is very much important elements of product photography. The background is the cornerstone of any product photography. Because it creates the atmosphere and conveys the product identity to the consumers as well. In general, the background of the product should be between black and white colour as well. The reason is that their usefulness gives a huge impact on highlighting the product, consistency and clean surroundings as well. When you are going to use the white background, then you will able to interpret the product in its true form to the buyers and also could maintain consistency over time. Even the white background will never fade over time and it will never be out of trend as well. For any kind of product, the white background brings the product shot into product-centric and highlights the product itself. When you use the white background for glass products, then it will stand out precisely in terms of details and refreshing look as well. When you are going to shoot the product photography with white background, your smartphone camera will compel you to adjust the background colour with the foreground colour by tweaking the exposure control as well. Sometimes we become confused when we will select the right background for our product photography. In this regard, you will have to compare the product‘s texture and background texture. The reason is that if you find that the product texture is plain, then you should select the plain background as well. As far as the black background is concerned, it draws the eyes of the buyers towards the product first and creates along with lasting impression for buying the product. Even you may use a different coloured background for product photography. But you will have to study the product well and its colour as well. Sometimes you have to read the true meaning of the colours. The reason is that every colour hue has an identical meaning. Never forget to match the product colour with the background colour before you shoot the product. Sometimes we become confused when we will select the right background for our product photography. In this regard, you will have to compare the product‘s texture and background texture. The reason is that if you find that the product texture is plain, then you should select the plain background as well. Again, if you find that the product texture is uneven or wavy, then you should select the textured background also. But keeping the textured background slightly out of focus which will give you an eye-catching composition as well. Always try to keep at least 1 feet distance between product subject and textured background. The smartphone camera will take the product shot efficiently without any problem.

Post Production

1
Editing Stage

After completing the photo shoot, you have to edit the product photo for the final production. For this need, you will require to edit it on a photo editing software on your PC or Mac. This stage indeed is the crucial one for the photographer as well. It is observed that post-production on a photo editing software delivers the different post-production result. It happens due to the different algorithm of software architecture. It is observed that the features and function ability of the photo editing software have a distinct parameter to distinguish one software to another software. Generally, the photo editing software concentrates on a specific task like light controlling, filter effects, HDR manipulation or exposure control. But you should keep in your mind that first, you have to find on a specific task which you like to do with your picture. Because of the smartphone don’t have a powerful editing tool in it which could give you a professional touch on your picture. But the external photo-editing software will give you a unique opportunity to explore your picture’s power accordingly. Moreover, if you concentrate on your product shot for extracting the meaning of it, then you will find that the external photo editing software gives better exposure correction and visual impregnation as well. It happens due to the maximum GPU utilization on the post-editing stage which is not available in the smartphone also. You should keep in your mind that despite having the larger megapixels camera in the smartphone could not afford the power of the external photo editing software in this matter. Technically speaking, if you like to get the professional-looking picture on the editing stage on the smartphone, then you will need higher GPU acceleration and more RAM which is not possible on the smartphone at this moment. Always remember that the post-editing on the external photo-editing software gives the picture ultimate perpetuity. The reason is that during the editing stage on the photo-editing software on PC delivers the higher graphics rendering and pixel stabilization on the Jpeg file format which is the default file format of your final photo. As far as the photo-editing software is concerned, there is a lot of software on the photo editing in the market. But you must select the right one according to your need as well. Not all software will do all kinds of photo editing jobs efficiently. Even you will see that a particular photo editing software will work efficiently on a specific editing task. But you must find it through a lot of photo editing software testing. Practically, when you will test your photo on the different photo editing software, then you will get the real result from it. It is a norm that maximum you can test three photo editing software at a time for your smartphone product picture and you likely get a suitable answer after you use them. You may use Adobe Photoshop or Lightroom, Corel PaintShop Pro, Topaz Labs or ON1 software. But before using it you have to take a trial version and after that decide whether it is suitable for your skill or not. Again, you have to make a choice or sacrifice for your picture. Because it is observed that sometimes the photographer has to sacrifice for the picture by selecting the right software for the photo. It depends on the photographer’s need and observation on the photo quality and the final output anticipation. Sometimes if you are on the go and want to edit your smartphone photo in a hurry, then you can do on the online photo editor like Fotor, Photopea, BeFunky and others. But you will never expect the quality of the output from this online software as compared to the standalone software on your PC. You may expect the initial presentation of the picture on the go and you may deliver the photo to the customers for the initial look on it how the final output will come. When you are on the editing table, you should keep in your mind that any pictures first require exposure control, second sharpness control, third white balance control, fourth composition and final printing setup. If you keep these five stages in your mind when you are going to edit a photo, then you will never do wrong anymore. One emotional trait you should keep in your mind that complacency should not visible on your editing table. If you show it, then it will destroy your all effort.

Photography Subject

1
Subjects

When you are thinking about the product subject, then you must keep in your mind that the different kinds of product subject will need a different photo mechanism. Suppose you will shoot a glassware product, then you will need an exclusive shoot application. Because it is a shiny subject and it will need to place on the table as a non-shiny product but the proper control of light will do the trick in this regard. So that the selection of the product subject will depend on the client’s requirement and availability of subject material. The reason is that before shooting the product, you have to arrange all kinds of light source and accessories. When you are going to shoot with a smartphone camera, then you will have enough opportunity to explore your photo skill with a limited quantity of shooting accessories. It is observed that the smartphone camera will give you a chance o shoot on the go which means that you can take the picture of your product at any time and anywhere, only your imagination is the limitation. As far as the shooting base plane is concerned, you can shoot your product on your bed as well as on your dining table as well. Indeed, you will only need time, imagination, quick response, presence of mind and passion for your product shoot with the smartphone camera when you are on the go. If you think deeply, then you will find that instant urge for taking the product shot on the go could give you a unique result which will never find easily. Moreover, you will take the chance to experiment with your imagination.

Studio Setup

1
Setup

The studio setup for the product photography for the smartphone camera will require minimum accessories. Indeed, a couple of light sources like torches, some reflector and a set of background as well. Moreover, you will also require a table for the product shoot. Even, you can shoot the product with a smartphone on any flat surface in your surrounding also. It may indeed be your bed, balcony, dining table or other surfaces where you may think it available as well.

Conclusion

1
Final Assumption

If you are eager to shoot the product with a smartphone camera, then it is sure that you will get a unique experience which is not quite identical from the DSLR camera as well. Moreover, your journey through a smartphone camera will bring some solace between portability and accomplishment as well.

You can view and review the lecture materials indefinitely, like an on-demand channel.
Definitely! If you have an internet connection, courses on Udemy are available on any device at any time. If you don't have an internet connection, some instructors also let their students download course lectures. That's up to the instructor though, so make sure you get on their good side!
3.7
3.7 out of 5
89 Ratings

Detailed Rating

Stars 5
25
Stars 4
19
Stars 3
14
Stars 2
10
Stars 1
21
32b8fa849a3eb38c923a5faaa652a029
30-Day Money-Back Guarantee

Includes

1 hours on-demand video
Full lifetime access
Access on mobile and TV
Certificate of Completion

External Links May Contain Affiliate Links read more

Join our Telegram Channel To Get Latest Notification & Course Updates!