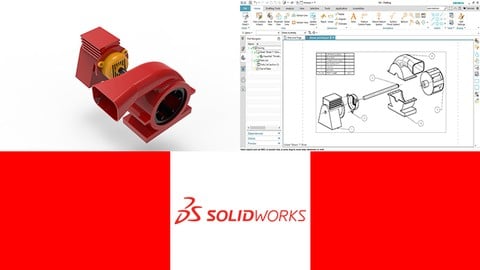
SOLIDWORKS is a very productive 3D CAD software tool. It helps to design various products and services, testing them in very cost effective way like Model and prototype testing as you learned earlier in engineering degree class.
The Solidworks have wide range of applications in industries such as
- Aerospace
- Defense
- Automotive
- Transportation
- Machinery
- Heavy Equipment
- Consumer products
- Mold & Tools design
- Electronics
- Sheet metal work
- Process Plant
- Energy conservation
- Construction
- Medical tools
- Product design and other engineering services.
This course will help you in understanding and learning the basic and advanced tools of the software. You will get a thorough knowledge and hands on experience on Sketch, Part, Assembly and Surface Environments of SOLIDWORKS.
Introduction
After going through this video you will get familiar with the real world applications of SOLIDWORKS and its use in the industry.
After watching this video, you will become familiar with the interface of SOLIDWORKS.
After watching this video, you will be able to customize the interface of SOLIDWORKS.
Drawing Sketches For Solid Models
After watching this video, you will be able to start a new file and open an already created file.
After watching this video, you will learn how to get into the sketching environment of SOLIDWORKS.
After watching this video, you will be able to create lines, center and midpoint lines.
After watching this video, you will be able to create different types of circles.
After watching this video, you will be able to create different types of arcs.
After watching this video, you will be able to create different types of rectangles.
After watching this video, you will be able to create different types of polygons.
After watching this video, you will be able to create different types of splines.
After watching this video, you will be able to create different types of slots.
After watching this video, you will be able to place points in the drawing.
After watching this video, you will be able to create ellipses and elliptical arcs using various methods.
After watching this video, you will be able to create different types of curves used in drawings.
After watching this video, you will be able to create curves by writing their equations.
After watching this video, you will learn how to use the drawing display tools.
After watching this video, you will learn how to delete sketched entities.
This practice example will give you hands on experience in creating sketches.
Editing and Modifying Sketches
After watching this video, you will learn how to trim unwanted parts from a sketch.
After watching this video, you will learn how to extend sketched entities up to the required points.
After watching this video, you will learn how to convert edges of a solid model into sketches.
After watching this video, you will learn how to create intersection curves.
After going through this video, you will be able to apply fillets at the corners of the sketches.
After going through this video, you will be able to add chamfers at the corners of the sketches.
After going through this video, you will be able to offset the sketched entities at the required distance values.
After watching this video, you will be able to offset edges and faces of 3D Model.
After going through this video, you will be able to create to create a mirror image of the selected entities.
After going through this video, you will be able to mirror entities dynamically about a symmetry line while sketching.
After going through this video, you will be able to move sketched entities from one location to another.
After going through this video, you will be able to rotate the sketched entities at specified angle values.
After going through this video, you will be able to scale the sketched entities to a specified scale factor.
After going through this video, you will be able to change the shape and size of the entities by stretching them along different directions.
After going through this video, you will be able to copy and paste sketched entities within the same drawing file or some other drawing file.
After going through this video, you will be able to create copies of objects using the linear pattern tool.
After going through this video, you will be able to create copies of objects using the circular pattern tool.
After going through this video, you will be able to modify the created patterns.
After going through this video, you will be able to split the entities into required number of parts.
After going through this video, you will be able to add text in your drawing file.
This practice example will give you hands on experience in editing and modifying sketches.
Adding Relations and Dimensions to Sketches
After going through this video, you will be able to add geometric relations between the entities in a sketch.
After going through this video, you will be able to learn about the automatic relations that are applied in a sketch.
After going through this video, you will be able to use the Smart dimension tool to add various types of dimensions in a sketch.
After going through this video, you will be able to add horizontal and vertical dimension values in a sketch.
After going through this video, you will be able to add aligned dimensions to a sketch.
After going through this video, you will be able to add angular dimensions to a sketch.
After going through this video, you will be able to add diametric dimensions to a sketch.
After going through this video, you will be able to add radial dimensions to entities in a sketch.
After going through this video, you will be able to add diametric dimensions in a linear fashion.
After going through this video, you will be able to add dimensions in the form of coordinate values at a particular point of the sketched entity.
This practice example will give you a hands on experience in adding relations and dimensions to a sketch.
Advanced Dimensioning Techniques and Base Feature Options
After going through this video, you will be able to make the sketches fully defined by adding required dimensions and relations to them.
After going through this video, you will be able to add the true length dimension value to an arc.
After going through this video, you will be able to measure distances between any two points in a drawing.
After going through this video, you will be able to calculate the section properties of closed sketches.
After going through this video, you will be able to the view the models in different orientations.
After going through this video, you will be able to change the view orientation using the reference triad.
After going through this video, you will be able to view the model in different viewport configurations.
After going through this video, you will be able to change the display modes of a model.
After going through this video, you will be able to assign materials to a model.
Creating Reference Geometries
After going through this video, you will come to know about the need of creating planes.
After going through this video, you will be able to create offset planes and parallel planes passing through a Point.
After going through this video, you will be able to create planes at angle to an existing plane and passing through Lines, Points.
After going through this video, you will be able to create a plane normal to a curve and a plane in the middle of two faces.
After going through this video, you will be able to create a plane on non-planar surface.
After going through this video, you will be able to create reference axes of your own.
After going through this video, you will be able to create reference points of your own.
After going through this video, you will be able to create reference Coordinate systems of your own.
After going through this video, you will be able to calculate center of mass for a solid body..
This practice example will give you hands on experience in creating bodies using reference planes.
Part Modeling 1
After going through this video, you will be able to add thickness to sketches using the Extruded Boss/Base tool.
After going through this video, you will be able to create revolved features using Revolved Boss/Base tool.
After going through this video, you will be able to create cuts in the extruded feature.
After going through this video, you will be able to create revolved cuts in the created features.
After going through this video, you will be able to calculate the mass properties of a solid body.
After going through this video, you will know how to dynamically rotate the view of a model.
Part Modeling - Practice Examples
This practice example will give you hands on experience in creating part models.
Advance Part Modeling - Practice Examples
This practice example will give you hands on experience in creating advanced part models.