How To Draw - EVERYTHING!

- Description
- Curriculum
- FAQ
- Reviews
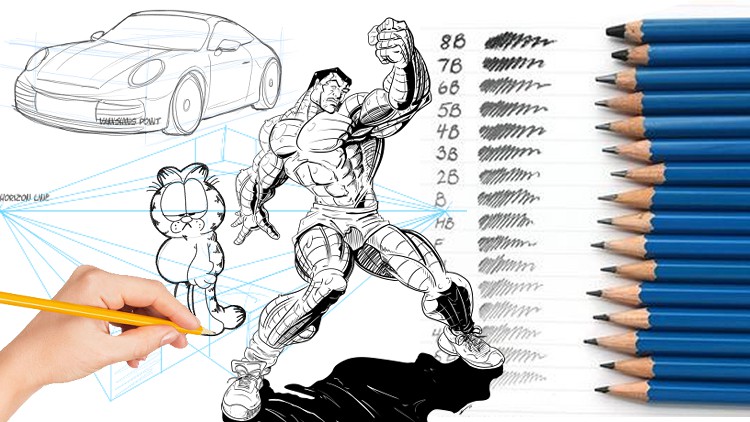
Welcome to How To Draw EVERYTHING! In this class, you’ll learn the fundamentals of drawing and apply them to a wide range of subjects and styles. We’ll start by exploring the basics of sketching and doodling, including techniques for capturing the essence of your subjects with quick, loose lines.
As we progress, you’ll learn how to draw portraits, landscapes, and human figures with accuracy and expression using pencils and other traditional drawing media. You’ll also learn how to observe and analyze your subjects in order to create more realistic and dynamic drawings.
In addition to these core subjects, we’ll also delve into the world of technical drawing, including the use of linear perspective to create 3D illusions on a 2D surface. By the end of this course, you’ll have a strong foundation in drawing and the skills to tackle a wide range of projects.
So, what am I offering you in this “EVERYTHING” course?
-You’ll create over 30 different projects in this course that will take you from beginner to expert!
-You’ll gain instant access to all 30+ units of the course.
The course is setup to quickly get you drawing, and having fun with it. It will bring you through basic fundamentals, and then one into more complex illustration work.
Don’t believe me? I offer you a full money back guarantee within the first 30 days of purchasing the course.
Here’s what you get with the course:
Section One
- Learn all of the fundamentals of drawing. From materials to basic pencil skills, you’ll be able to understand how to deconstruct and reconstruct almost any illustration on a basic level. This level is geared towards beginners and is fun and easy to follow.
Section Two
- In this section, you’ll take all the beginner skills and apply them to drawing things. Learning new lessons in perspective and planes, you’ll start to be able to draw professional-level backgrounds and landscapes, as well as everyday items like cars, and the drawing secrets you’ve been looking for.
Section Three
- This section is the most difficult. Here, we’ll learn about the basics of drawing the human figure and then move on to portraits. It will take all the skills you’ve learned so far to really excel here, but when you do, you’ll be churning out professional-level art!
What else will you get?
- Personal contact with me through PMs and Q&A
- Lifetime access to course materials here on Udemy
- Exercise work sheets
All of this comes under one convenient and easy-to-use platform.
Whether you’re an experienced artist looking to brush up on your skills or a beginner just starting out, this class has something for everyone. You’ll have the flexibility to learn at your own pace and the support of an instructor who is available to answer your questions and provide feedback on your work. So, if you’re ready to start your journey as an illustrator and learn how to draw everything, grab your pencils (or your stylus) and let’s get started!
So, what are you waiting for? Sign up now and get drawing today!!
-
1
 Introduction
Welcome to How To Draw - EVERYTHING! If you follow the steps of this course, you'll not only drastically improve your drawing skills, but also be able to draw pretty much anything out there! have fun!
-
2
Make the Most Of This Course
A quick unit on how to make the most out of this course. Don't let opportunity slip by you, be sure to watch this, and reach out to me with any questions.
-
3
Equipment and Materials
A brief look at the equipment options for drawing. Don't let it deter you though, your basic pencil and paper are still the best way to go!
-
4
Important Exercises - Line, Circles, Shapes
This is possibly the most important unit in the course. If you practice these exercises, all your future illustrations will the that much easier!
-
5
Drawing Your Name
Learn how to take what you've learned so far and design cool full formed NAMES
-
6
Simple Shape Outlines (Silhouettes)
Use simple outlines to denote simple shapes. You'd be surprised by the power of this exercise in drawings and illustrations.
-
7
Understanding Form and Shapes
If you can break down something with basic shapes, you can draw - ANYTHING!!
-
8
Finding the Circumference Line
In this unit you will do exercises that help you understand how a simple circumference line will give form and shape to your illustrations.
-
9
Tonal Values and Blending
And important lesson in learning tonal value.
-
10
Shading and Lighting
This is where a lot of what you've learned is starting to come together. You take the lesson on tonal value, and get to try your first attempts at shading. Understanding lighting is a huge part of this.
-
11
Measuring - Grids and Others
In this unit we talk about how to measure when drawing from reference. Grids and other techniques are used.
-
12
Turn It Upside Down - References
A great little trick to help shift how your brain works - turn things upside down!!
-
13
Common Mistakes to Avoid
In this unit we go over a lot of the common mistakes I see my students making. It's a bit of a different unit, but if you take a moment, you just might save yourself tons of frustration in the long run.
-
14
Setting The Scene - Fore, Mid, Backgrounds
In this unit we take a moment to understand planes - Foreground, Midground, Background. And the rules for differentiating between them.
-
15
Linear Perspective
This is the introduction to linear perspective. It's short, but hopefully if you understand the concept, it will help you in the next few units.
-
16
1 Point Perspective
In this unit you will explore the world of One Point Perspective. Using simple squares, you will learn how to transform them into 3D objects. Once that is achieved, you'll go on to more complex skills.
-
17
2 Point Perspective
In this unit you will explore the world of Two Point Perspective. Using simple squares and rectangles, you will learn how to transform them into 3D objects. Once that is achieved, you'll go on to more complex skills, like curves and subtraction.
-
18
Perspective Tips
In this unit I give you some extra tips for understanding Linear Perspective. It's a tough concept for some, so we make sure to take extra time to review, and then add a few pointers in along the way.
-
19
3D Names
Learn to draw any name in 3D!! This build on previous - Drawing Your Name and Linear Perspective.
-
20
Drawing Vehicles
Want to learn how to draw all sorts of vehicles? Well, this is the unit for you. We draw a car, a truck, a jet, and a helicopter!
-
21
Drawing Spaceships From Household Items
A little trick I want you to learn to create some new and amazing spaceship concept designs using every day items you can find in your home.
-
22
Drawing Still Life
Here are some steps you can follow to draw a still life:
Start by arranging your objects in a way that is visually appealing. Consider the composition of the scene, and try to create a sense of balance.
Sketch the basic shapes of the objects with a light pencil. This should include the overall shape of the objects, as well as any major details such as folds in fabric or cracks in a vase.
Add in the details of the objects. Think about the texture of each object - is it smooth or rough? Shiny or matte? Use lines and shading to indicate these details.
Consider the lighting of the scene. Is the light coming from one direction, or is it more diffuse? How does the lighting affect the shadows and highlights on the objects?
Use pencils, pens, or paints to add in the details and color. You can also use techniques such as shading and blending to create a more realistic effect.
Step back and look at your drawing as a whole. Make any final adjustments to balance the composition and add any final details.
-
23
Illustrating a Landscape
Here are some steps you can follow to illustrate a landscape:
Start by sketching the basic shape of the landscape with a light pencil. This should include the horizon line, any large shapes such as mountains or valleys, and the overall composition of the scene.
Add in details such as trees, buildings, and other elements of the landscape. Think about the perspective of the scene - are the objects in the foreground larger than those in the background?
Consider the lighting of the scene. Is it a sunny day or a cloudy day? How does this affect the shadows and highlights on the objects in the landscape?
Think about the colors of the scene. Look at reference photos or real-life examples of the landscape to get an idea of the colors you'll need to use.
Use pencils, pens, or paints to add in the details and color. You can also use techniques such as shading and blending to create a more realistic effect.
Step back and look at your illustration as a whole. Make any final adjustments to balance the composition and add any final details.
-
24
Perspective Review
-
25
Mastering the Stickman
Can you draw a stickman? well, I'm about to teach you how to draw one that will change your approach to figure drawing for life!
-
26
Line Of Action
Learn how to add action to your figure drawing!
-
27
Figure Drawing Speed Exercise
In this unit we will draw using prompts from external sites (mentioned in the video). NOTE! That with gesture and figure drawing, there is a high likelihood for nudity. Please be aware and proceed with caution.
-
28
Drawing Characters
Learn the basic structures of your favourite characters and try this easy unit.
-
29
Figures in Perspective
Apply what you've learned about Perspective to figure drawing. You'll start with reviewing the proportions of your stickman, and then learning what happens when you look at it from the worm's eye view, and then a bird's eye view.
-
30
Simplified Muscle Anatomy
Building on our lessons of the simplified skeleton, we learn how to add basic muscular anatomy to our figure drawings.
-
31
Drawing Hands
Drawing hands can be tricky. If you want to draw hands accurately and effectively, it's important to understand the different parts of the human hand, as well as how a person's hands are used in everyday life.
The first step is to break down the hand into its component parts. The thumb and index finger are separate from each other, but they're all connected to each other through the palm. The pinky is attached to the middle of this group of fingers, so it's also part of the palm. (If you're curious about how these fingers are connected, there are some great videos online on this topic.)
Next, it's important to understand how these components move when we use our hands for different tasks—for example, using chopsticks or playing an instrument. This knowledge is critical when you're drawing hands from life, because if you don't know what your subject is doing with their hands when they're holding them in different positions, it'll be hard for you to accurately draw those positions in your drawing.
We recommend starting with tracing your subject's hand with a pencil or pen before moving on to your actual drawing process. This will give
-
32
Drawing Feet
-
33
Rendering Muscles
In this unit we take what we've learned about shading - understanding form and lighting, and apply it to a sketched out figure. We do it first in pencil, then I take some time to show the difference using ink. Please make sure you do up the exercise sheet attached to this unit and submit it to me after practicing a few times.
-
34
Facial Structure
Welcome to our unit on drawing the proportions and structure of the human face! In this unit, you will learn how to accurately draw the head and facial features using basic shapes, observation skills, and techniques for adding structure and depth to your drawings.
To begin, we will study reference images of faces from different angles and identify the main facial features and their relative positions. You will then learn how to use basic shapes, such as circles and ovals, to construct the head and facial features. This will help you to understand the underlying structure of the face and to create more accurate drawings.
Next, we will focus on adding structure and depth to the face. You will learn how to draw the brow line, cheekbones, and jawline to give your drawings more realism and character. As you work on your drawings, you will have the opportunity to practice your observation skills and to experiment with different techniques to achieve your desired results.
Throughout the unit, you will receive guidance and feedback from the instructor and your classmates. When you have completed your drawings, you will have the opportunity to share your work with the class here on Udemy and discuss the challenges you faced and the strategies you used to overcome them in the Q&A section. We hope you enjoy this unit and come away with a new appreciation for the complexity and beauty of the human face.
-
35
Faces Exercise - Don't Lift The Pencil!
Welcome to our unit on continuous line drawing! In this unit, you will have the opportunity to create a drawing of a face using a single, continuous line. This means that you will not lift your pencil from the paper while creating the drawing. Continuous line drawing is a fun and challenging technique that can help you to develop your observation skills and create a sense of unity and flow in your artwork.
To begin, you will need to choose a reference image of a face from a variety of angles. You will then use this image to guide you as you draw the face, trying to capture the unique features and proportions of the person in the photograph. As you work on your drawing, you may find it helpful to take breaks and stretch your hand to prevent fatigue.
Throughout the unit, you will receive guidance and feedback from the instructor and your classmates. When you have completed your drawing, you will have the opportunity to share your work with the class and discuss the challenges you faced and the strategies you used to overcome them.
We hope you enjoy this unit on continuous line drawing and that you come away with a new appreciation for this fun and rewarding technique.
-
36
Rotating The Face
When drawing the face from different angles, it can be helpful to break the process down into smaller units or steps. Here is a general unit description for drawing the face at different angles:
Start by drawing a basic shape or structure to represent the head. This can be a circle, oval, or other shape that captures the overall proportions of the head.
Add the main facial features. These include the eyes, nose, and mouth. Make sure to place these features in their correct locations relative to the head shape and to each other.
Define the brow line and cheekbones. These features can help to give the face more structure and depth.
Add the ears. These are located on either side of the head and can be challenging to draw from certain angles.
Refine the details. Once the main features are in place, you can go back and add smaller details such as eyelashes, nostrils, and individual hairs.
It's important to remember that every face is different, and the key to drawing a face accurately is to carefully observe the unique features and proportions of the person you are drawing. It can also be helpful to practice drawing from a variety of angles and to use reference images to help guide your process.
-
37
Different Styles of Drawing The Face
In this unit we talk a bit about comparing drawing styles - how realism vs a comic book approach changes the proportions a bit in our portraits.
-
38
Planes Of The Face and Shading
The planes of the face refer to the different surfaces or areas on the head and face. These planes can affect the way that light falls on the face, and can be used to create different effects in portrait photography. The main planes of the face are:
Forehead: This is the area above the eyebrows and extends up to the hairline.
Temple: This is the area on the sides of the head, just above the ears.
Cheeks: These are the fleshy areas on the sides of the face, below the eyes.
Nose: This is the central feature of the face and extends from the forehead to the tip.
Chin: This is the bottom point of the face and helps to define the jawline.
Lighting refers to the way that light is used to illuminate a scene or subject. In portrait photography, lighting can be used to highlight certain features, create shadows, and add depth and dimension to the image. Some common lighting techniques used in portrait photography include:
Rembrandt lighting: This is a lighting technique that uses a single light source to create a triangle of light on the cheek opposite the light source. This technique is named after the Dutch painter Rembrandt, who used this lighting effect in many of his portraits.
Butterfly lighting: This is a lighting technique that uses a single light source placed high and directly in front of the subject, creating a butterfly-shaped shadow under the nose.
Loop lighting: This is a lighting technique that uses a single light source placed at a 45-degree angle to the subject, creating a small shadow on the far side of the face.
I hope this helps!