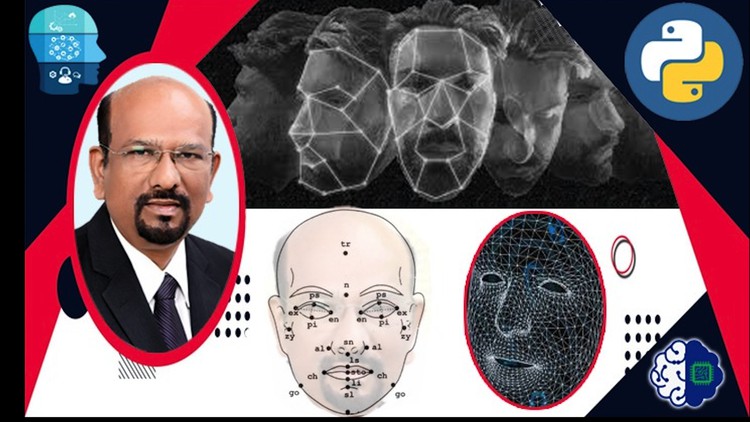
Face Recognition using Python Language

- Description
- Curriculum
- FAQ
- Reviews
Face Recognition is one of the popular domains in Artificial Intelligence having applications in Employee attendance management, Student attendance management, Immigration, Travel Documentation, Surveillance of campuses, and many more. In this course, we teach an ordinary beginner to develop Python applications for very useful AI applications using Face Recognition. This course begins with a historical perspective of Face recognition and its importance in the AI-enabled world. We also give the algorithms used in research for some high-level understanding. We first write a Python program to read an image and identify all faces in the image. We explain the concept of face signature. The next chapter is about developing a program to compute the face signature. We then write Python programs to read faces and compare the signatures and recognize resemblances. We explain the process to create a face recognition application using the data. We write the complete program to recognize the faces of all known people. We also write a program to recognize faces from the CCTV footage. We coach the reader to understand the applications of face recognition and motivate them towards developing new applications. The tests are given at the end of each section help to summarize the understanding to build further in the right understanding.
-
1
 Introduction to Face Recognition
NOTE: Please download the PDF Document for a better, clear description of the lecture content.
In this lecture, we introduce Face Recognition as a branch of study in the field of Artificial Intelligence. We begin with a historical perspective. We begin with Face Detection. Face detection is about observing an image and detecting the human faces in it. A human face has a specific structure with the nose, chin, cheek, forehead, hair, moustache, beard, eyes, eyebrow, eyelashes, mouth, lips, and several other components and features. As we know a human face and its components, we can detect a human face in an image. In a group photo taken at an outdoor with animals, flowers, birds and other objects, we detect all the faces in it. The problem of viewing an image and detecting all human faces in the picture and extracting them in the form of rectangular frames is called face detection.
Face Recognition is a higher level of intelligent activity than face detection. Face recognition is about reading a human face either directly or in an image and recognize one or more of the following:
· Identity of the person, who is the person?
· Age, what is the age of the person? At least approximately.
· Gender
· Ethnicity
· Attractiveness, this is about the symmetricity of various components of the face
· State of mind, if the person is restless, thoughtful, peaceful
· Emotions, anger, fear, happy,
· Trustworthiness
· Competence
· Dominance
· Extraversion, how much the person is an extravert?
· Mental Health
Enormous amount of research is happening by leading Artificial Intelligence companies such as Google, Amazon, Facebook, IBM etc. Hundreds and thousands of startup companies in the bay area of US, Continental Europe, Israel, Bangalore and many more places are working on great applications in this area.
Biometrics
Right form early days, scientists are trying to uniquely identify human being based on one or more parts of the body and their measurement. Biometrics is the study of body measurements and computation of ratios and other relationships among them. This is used to see if we can uniquely identify people from these measurements. Fingerprints and IRIS have been successfully studied and used for several years in medical research, immigration, travel documentation, criminology, educational certification and many more.
Medical researchers have been studying how human brain stores faces and recognize them. They have found that the brain does the following cognitive activities:
· Face Detection
· Face categorization based on gender, ethnicity, age etc.
· Face discrimination
· Faced Individuation
· Face memory
· Face naming
Medical Researchers are working on a few interesting concepts such as Face Diet and Other Race Effect (ORE) areas in Face Recognition. Face recognition capability varies widely among the people. Some people are super recognizers. Even if they meet somebody once, they recognize the face even after a long time. Some people are very poor in face recognition. They require a great deal of training and practice to familiarize a face. There are people who have very high level of inability to recognize faces. This inability is medically diagnosed as Face blindness or Developmental prosopagnosics (DP). In order to improve face recognition capabilities, the researchers propose a few activities.
Face Diet
Face Diet is the number of faces we come across every day. People who have rich face diet are found to have a high face recognition capability. People who live meet very few people in a day. So, they have a poor face diets. They have a poor face recognition capability.
Other Race Effect (ORE)
We come across people from different ethnicity and race. There are some common face features for every race. When people have no familiarity with a particular race, they find it hard to distinguish faces of that race. All the faces of that race look alike for them. As we become familiar with more and more people of that race, the ability to distinguish increases. This is called Other Race Effect (ORE). when I watch movies from Japan, China or Korea, I have experienced difficulty in recognizing different characters. For me all the characters look alike. This is due to ORE.
Medical Researchers also work on Nose recognition, Ear Recognition, Mouth Recognition etc. Critical Features of face are studied in detail.
Face Recognition Approaches
Broadly there are three sets of scientists working on face recognition and related fields. They are
1. Medical Scientists – Cognitive strategies
2. Anthropological Researchers
3. Artificial Intelligence Researchers using Computer Vision with Deep Learning Convolution Neutral Networks.
In Medical Research, Scientists work on two broad approaches.
1. Holistic Face Processing in the brain. In the approach scientist work on how the brain stores and retrieves data.
2. Recognition of parts such as nose, mouth etc. The work on various shapes of the parts and specialize on recognizing them. For example, in figure __, a few photos are shown. You can observe that the noses have various shapes. In figure ___ different shapes of mouth and lips are shown.
In Biological Anthropology, researchers study the physical metrics of people from various ethnicity. Craniofacial Anthropometry is the study of head and face measurements. Figure ___ lists all the metrics studied Craniofacial Anthropometry.
In Artificial Intelligence research the image of the face is represented as a matrix of pixels. By analyzing the image, we try to find the unique set of numbers, called a signature. We use face signature for face recognition. Each image is considered as a matrix of pixels. Each pixel is represented by a set of numbers.
If the image is BW, the content of a pixel is represented as a number from 0 to 255. Colors are represented by the combination of Red - Green - Blue combination. So, each pixel is represented a tuple (r, g, b) where each entry is a number between 0 and 255.
NOTE: Please download the PDF Document for a better, clear description of the lecture content.
-
2
Introduction to Face Signature
NOTE: Please download the PDF Document for a better, clear description of the lecture content.
In this video, we explain the concept of Face Signature. The face signature of a face image is created using image recognition methods by extracting the features. Face signature is a 128-size vector.
Face Signature
The image of the human face has a standard format, with one nose, two eyes, two ears, a chin, cheek, etc. So, how do we want to distinguish human faces? We must do feature extraction and create a Face signature. In Deep Learning, Convolution Neural Networks are designed and trained using a data set that has thousands of human faces. This CNN outputs the face signature as a vector of dimension 128 or 256. The face signature is a vector of numbers. In order to compare if two faces represent the same person, we compare the two face signatures and check if they are almost the same.
NOTE: Please download the PDF Document for a better, clear description of the lecture content.
-
3
Mathematical Techniques and Algorithms for 2D Face Recognition
NOTE: Please download the PDF Document for a better, clear description of the lecture content.
Mathematical Techniques for Face Signature
In this section present a high-level view of various mathematical principles and techniques are used in face recognition research. Though these topics are not in the scope of this course, we present at a high-level for a high level understanding.
We learn three categories of work on Face recognition.
1. Global Face approach
2. Local features approach
3. Hybrid approach
Global Face approach
In global face approach, researchers have worked on linear and non-linear techniques. The following are Linear techniques:
· Eigen vectors and Eigen Faces
· Principal Component Analysis (PCA)
· Independent Component Analysis (ICA)
· Multidimensional Scaling (MDS)
· Non-negative Matrix Factorization (NMF)
· Liner Discriminant Analysis (LDA)
· Gabor Wavelets
Researchers have also used the following non-linear techniques for Global Face Recognition approach.
· Kernel Functions
· Support Vector Machines (SVM)
· Nearest Manifold Approach
Local Feature Approaches
Local approaches study only same local features of the face such as mouth, eyes etc. Local methods are also called Feature Based Methods. There are two categories of research in this approach.
1. Interest Point based
2. Local Appearance based
In the interest point based approach we first detect the point of interest and then extract features around the point.
In local-appearance based methods, the face is divided into smaller regions or patches. From each patch, the local features are extracted.
Hybrid Approaches
To make the algorithm more efficient people have tried hybrid approaches combining some prominent features of global face and some local ones.
NOTE: Please download the PDF Document for a better, clear description of the lecture content.
-
4
 Introductory Concepts
This tests the understanding of the introduction concepts.
-
5
Python Face Recognition Library - An Introduction
NOTE: Please download the PDF Document for a better, clear description of the lecture content.
Python face-recognition Library Introduction and Overview
Python face-recognition library is a simple, user-friendly library with methods useful for to recognize and manipulate faces from Python. More details can be found from www.pypi.org/project/face-recognition/.
Python library Face-recognition is built on three important foundations.
1. CMake
2. Dlib
3. Open CV
CMake: CMake is a cross-platform free an open source software tool. This is used to manage the software building process using compiler independent method.
Dlib is a dynamic library. This is actually a modem C++ to solve real life problem. This contains machine learning algorithms and tools for building complex software in C++ to solve real life problem. Most of the Machine Learning packages are built on Dlib
Open CV (opensource computer vision)
This is a very popular open-source library implementing Computer Vision algorithms using Machine Learning.
Major Features
This library has the following key features:
1. Face detection and location
Face detection is about detecting human faces in a picture. This identifies all the human faces in the picture and locate them in the 2-dimensional representation as rectangle frames. This can be done using two different methods.
1. Histogram Oriented Gradient approach denoted as hog approach.
2. Deep Learning based Convolution Neural Network (CNN) based approach
While hog approach is simple and runs in less computing time its accuracy is low. CNN is very complex and takes more time but has a better accuracy level.
2. Face Encoding
Face Encoding is about extracting the features of faces and convert them into their respective face signatures. The signature is farther used for comparing faces and recognize a resemblance.
3. Face Resemblance Identification
Given two faces, it is possible to check the resemblance. This is done as follows:
1. Load face f1 and f2
2. Find Face encoding of f1 and f2 and get their signatures s1 and s2.
3. Find the distance between s1 and s2 distance (s1, s2)
4. If distance (s1, s2) is small we say the face f1 and f2 have resemblance.
4. Face Landmark Identification
It can identify important landmarks on human faces. The following are identified:
1. Chin
2. Left eyebrow
3. Right eyebrow
4. Nose bridge
5. Nose tip
6. Left eye
7. Right eye
8. Top lip
9. Bottom lip.
5. Face recognition
There are some known faces that are registered in the memory. When a new face fu is received we can recognize this new face fu as one of the known faces. This feature is used in the face-recognition-based Employee Attendance System and Immigration Systems.
NOTE: Please download the PDF Document for a better, clear description of the lecture content.
-
6
Installation of Python Face Recognition Library
NOTE: Please download the PDF Document for a better, clear description of the lecture content.
Python Face Recognition Library
Python is a language with thousands of libraries. Some estimates say that there are more than 80,000 libraries. The library Face-recognition is used to recognize and manipulate faces from Python. More details can be found from www.pypi.org/project/face-recognition/. Python library Face-recognition is built on three important foundations.
1. CMake: CMake is a cross-platform free and open source software tool. This is used to manage the software building process using compiler independent method.
2. Dlib is a dynamic library. This is actually a modem C++ to solve real-life problems. This contains machine learning algorithms and tools for building complex software in C++ to solve real-life problems. Most of the Machine Learning packages are built on Dlib
3. Open CV (opensource computer vision)
This is a very popular open-source library implementing Computer Vision algorithms using Machine Learning.
Install Face Recognition Library
As we have seen that the Python library face-recognition is built on the three foundations CMake, Dlib and OpenCV, we must first install the foundation and then the face-recognition library, you must also have Python already
The library CMake is installed by calling pip command in command line
pip install CMake
The library Dlib is installed as follows:
pip install dlib
The python version of library OpenCV can be installed as follows:
pip install opencv-python
when all the above installations are successfully done, we are ready to go.
NOTE: Please download the PDF Document for a better, clear description of the lecture content.
-
7
Python Face Recognition Library Quiz
Python Face Recognition Library Quiz
-
8
Load Face Image File
NOTE: Please download the PDF Document for a better, clear description of the lecture content. The Python Source Code is given. You can download and practice.
Load a digital picture
In Python face_recognition package, a picture file can be loaded using load_image_file() method. It has the following format:
face_name = face_recognition.load_image_file( filename, mode = 'mode')
where
face_name is a Python NumPy array where the RGB or L numbers are stored
filename is the name of the file loaded, such as john04.png, ally.jped.
mode is either 'RGB' or 'L'. RGB is the default.
Example
Consider three color photos as shown in Figure 1. In the files we see that their dimensions are as follows:
The file xavier01.png is of dimension 830 X 1066. The files alwyn01.jpeg and arun01.jpeg are of dimensions 200X252 and 225 X 225 respectively. The dimension of the picture is the pixel matrix size.
We can read the three files and store them in NumPy arrays photo_xavi, photo_alwy,and photo_arun respectively.
photo_xavi = face_recognition.load_image_file( './photos/xavier/xavier01.png','RGB')
photo_alwy = face_recognition.load_image_file( './photos/alwyn/alwyn01.jpeg','RGB')
photo_arun = face_recognition.load_image_file( './photos/arun/arun01.jpeg')
Notice that the last statement is not given the RGB option. As RGB is the default option, it works here, without mentioning.
The three photo files are of the dimension, 830 X 1066, 200X252, and 225 X 225 respectively. Actually, in python the height appears before the width and hence it considers them as 1066 X 830, 252 X 200, and 225 X 225 respectively. So, the numpy arrays will have the shape 1066 X 830 X 3, 252 X 200 X 3, and 225 X 225 X 3 as every pixel in RGB is represented as 3 numbers r, g, and b. Now we want to check the shape of the NumPy arrays photo_xavi, photo_alwy, and photo_arun. This can be done using the function shape in NumPy arrays. We write as photo_xavi.shape, photo_alwy.shape and photo_arun.shape respectively. We can actually print them directly as follows:
print("Xavier Photo....",photo_xavi.shape)
print("Alwyn Photo.....", photo_alwy.shape)
print("Arun Photo......", photo_arun.shape)
In this program, if we want to load the files in Black and White format we must use using 'L' attribute in the second attribute of load_image_file() function as follows:
photo_xavi = face_recognition.load_image_file( './photos/xavier/xavier01.png','L')
photo_alwy = face_recognition.load_image_file( './photos/alwyn/alwyn01.jpeg','L')
photo_arun = face_recognition.load_image_file( './photos/arun/arun01.jpeg', 'L')
In this case, the shape of the files will be 1066 X 830, 252 X 200, and 225 X 225 respectively. This is because each pixel is represented only as one byte from 0 to 255.
NOTE: Please download the PDF Document for a better, clear description of the lecture content. The Python Source Code is given. You can download and practice.
-
9
Load Face Image Quiz
Load Face Image Quiz
-
12
Face Detection and Face Locations
NOTE: Please download the PDF Document for a better, clear description of the lecture content. The Python Source Code is given. You can download and practice.
In python face-recognition library, we have a method face_locations(). This method detects all human faces in the image.
Each face is detected as a rectangular frame in the form of a tuple (top,left,bottom,right). If there are n faces, the output is a list of n tuples with four entries as
(top, right, bottom, left).
In a picture, if there are three faces, the output of the function call is
l = [(t0, r0, b0, l0), (t1, r1, b1, l1), (t2, r2, b2,l2 )]
where ti = top of ith face
ri = right of ith face
bi = bottom of ith face
li = left of ith face
.Example
Consider a photo of size 1066 x 830. This means that it has 1066 pixels in the vertical side y axis and 830 pixels in the horizontal side (x axis).This is shown in the figure. Assume that a face is located at the picture as depicted in figure…… This is represented by the frame: Top = 295, Right = 664, Bottom = 850, left = 110. The size of the face extracted has a size of 555 x 554.
The image file name is, xavier01.png stored in a folder ./xavier/. We load the file in a variable, xavi_photo. The code is written as follows:
from PIL import Image
import face_recognition
xavi_photo = face_recognition.load_image_file( './xavier/xavier01.png')
We can write the code to locate the faces in the picture as follows:
l = face-recognition.face_location(xavi_photo)
In the photo mentioned, there is only one face. So, we get
l = [(295, 664, 850,110)].
There is only one entry in the list. It is the tuple l[0]=(295,664,850,110).
This means,
top = l[0][0]=295
right l[0][1]=664
bottom = l[0][2]=850
left = l[0][3]=110
We can print l and check how it prints the list of tuples:
print(l)
We can extract the entities of l[0] as top, right, bottom, left as follows:
top = l[0][0]
right = l[0][1]
bottom = l[0][2]
left = l[0][3]
From the full image xavi_photo, we can extract only the face part as xavi_face follows
xavi_face = xavi_photo[top:bottom, left:right]
Note that both the full picture xavi_photo and extracted face xavi_face are Python Numpy arrays. We can test it by printing the shape.
print(xavi_face.shape)
We can convert the Numpy face xavi_face to the PIL Image object and displayed as follows:
xavi_face_image = Image.fromarray(xavi_face)
xavi_face_image.show()
Face Detection. Model
In detecting the faces and locating the rectangular frames, the algorithm can use either of the following two models / approaches:
1. HOG (Histogram Oriented Gradient) Approach. This is faster but less accurate. By default, hog approach is considered when the programmer does not mention the model.
2. Deep Learning based Convolution Neural Network (CNN) approach. CNN is more accurate but it takes more time to compute.
This can be given as a parameter in the face_locations method as follows:
l = face_recognition.face_locations(
xavi_photo, model ='cnn')
Or
l = face_recognition.face_locations(
xavi_photo, model ='cnn')
NOTE: Please download the PDF Document for a better, clear description of the lecture content. The Python Source Code is given. You can download and practice.
-
13
Locate Facees and Mark them with rectangle
-
14
Writing Text on a Face Image
-
15
Group Photo - Locate all Faces and mark each face with a rectangle
-
16
Group Photo - Write names on. all the faces
-
17
Face Encodings
NOTE: Please download the PDF Document for a better, clear description of the lecture content. The Python Source Code is given. You can download and practice.
Face Encoding
Face encoding is the encoding of the digital file into a vector of size 128. Every face has a encoding which is base upon research done by several researchers over the past 50 years.
In Python Face recognition package, we have a method for doing the encoding.
Aa_face_encodings = face_recognition.face_encodings(
face_image, known_face_locations=None, num_jitters=1, model='small')
where
face_image is the numpy array file of the image with one or more faces
known_face_locations This is an optional attribute. Usually we will not be using this attribute
num_jitters This attribute tells how many times the face sample must be resampled to calculate the encodings. Encoding is done in iterations. This can be considered the number of iterations. More the number of iterations, slower the execution of the program is.
model is either 'small' or 'large' which specifies the model to be used. Default model is large.
The function returns the face encodings of all the faces in the picture. For example, if the
Example
Let us write a simple program to load a face xavier01.png, stored in the directory './photos/xavier' and find its encoding. We want to first load this file and create the embeddings.
Step 1: Load the face image file in Python numpy array photo_xavi
Step 2: Create Face embeddings of the face file photo_xavi and store it in variable encodings_xavi
Step 3: Print the shape and values of encodings_xavi
Let us first load the face xavier01.png using the following code:
#Dr. Xavier Chelladurai
#07 April 2020
#Program to load a picture and find its face encoding
import face_recognition
photo_xavi = face_recognition.load_image_file ('./photos/xavier/xavier01.png','RGB')
The encodings can be created using the face_recognition.face_encodings() function. As it returns an array of encodings, we have to pick up the encodings with index 0.
encodings_xavi = face_recognition.face_encodings(photo_xavi)[0]
The variable encodings_xavi is a numpy array of size 128. We can print the shape of the variable as well as the actual values in the array as follows:
print("The shapes of the Encoding array is ...", encodings_xavi.shape)
print("Now let us print the encoding")
print(encodings_xavi)
The output appears in the terminal as follows:
The shapes of the Encoding array is ... (128,)
Now let us print the encoding
[-0.11245298 0.09912995 0.10795732 0.00151516 -0.0423191 -0.01651081
0.09944715 -0.02389248 0.18813288 -0.06395282 0.24275967 -0.00656932
-0.21104488 -0.18928014 0.07453956 0.13124248 -0.07843325 -0.17012337
-0.03869912 -0.10880773 0.04663627 -0.0505698 -0.07678583 0.07137413
-0.07842989 -0.34108192 0.00199308 -0.1296214 0.04027355 -0.18480591
-0.01619856 0.0563811 -0.12519674 -0.07620251 -0.03689148 0.09955552
-0.01687153 -0.03322148 0.12322649 -0.0872578 -0.11441804 0.00429077
-0.00259247 0.27818573 0.14439768 0.03548209 0.04057569 -0.05115522
0.0865852 -0.17931193 0.01963838 0.09413285 0.14782099 0.01681186
0.10049818 -0.19097838 0.02107307 -0.05677506 -0.2533713 0.03708472
0.03367204 -0.08610024 -0.07857269 0.00498296 0.25758538 0.05349108
-0.06449759 -0.13740376 0.20197028 -0.13529861 -0.01746862 0.03636249
-0.10422881 -0.13455257 -0.21692136 0.12433951 0.35970819 0.12999333
-0.20712036 0.0992782 -0.14708667 0.05983461 0.07348134 0.01022062
-0.08147535 -0.0180106 -0.16631821 0.05126615 0.05674621 0.00570038
-0.043865 0.11810865 0.02003061 -0.01501924 0.04092561 -0.0286501
-0.08208138 0.11377324 -0.09680663 -0.04661448 0.14818721 -0.08186541
0.08282243 0.08710676 -0.19560672 0.11164703 -0.00385447 0.043111
0.04466273 0.0859648 -0.15439937 -0.03761441 0.10141518 -0.31918731
0.21815056 0.15111378 0.01055311 0.13163726 0.04793873 0.08593549
0.03553717 -0.06592404 -0.1390844 -0.01039092 0.04563561 -0.00565342
0.05420707 0.08139516]
NOTE: Please download the PDF Document for a better, clear description of the lecture content. The Python Source Code is given. You can download and practice.
-
18
Distance Function and Face Resemblance
NOTE: Please download the PDF Document for a better, clear description of the lecture content. The Python Source Code is given. You can download and practice.
Distance Function and Resemblance of Faces
The purpose of encoding is to find a unique signature for a face. The face encoding with 128 numbers serves the purpose in a limited way. If we consider two face photos of the same person and find out the encodings of each photo. The two encodings are almost same. This means that the Euclidean distance between them is as small as less than 0.6. If the two encodings are for two different person's photos, the distance is more than 0.6. People with resemblance have encodings with distances small and people with totally difference face appearances have encodings of distance high.
Euclidean Distance
Let x = [x0, x1, x2, x3, …….x127] and y = [y0, y1, y2, y3, …….y127] be two encoding of pictures Px and Py.
In the package face_recognition, the method, face_distance() is used to measure the distance between two encodings. The method is described below:
Let f be the face encoding of a face picture.
Consider a list of face encodings of n pictures.
face_encodings = [f0, f1, f2, f3,…fn].
We want the Euclidean distance of each face encoding fi from face encoding f. That is, we want to find the values of di = dist (fi, f) where dist is the Euclidean distance.
In Python face_recognition package, we write as follows:
face_encodings = [f0, f1, f2, f3, …, fn-1]
d = face_recognition.face_distance(face_encodings, f)
The result d is a numpy ndarray [d1, d2, d3, ….…dn] where di denotes the Euclidean distance from f to fi.
We first read load all the five phots and store in the Python Numpy objects fa, f0, f1, f2, f3 with the following code:
fa = face_recognition.load_image_file('./known/Anil.jpeg','RGB')
f0 = face_recognition.load_image_file('./known/Bill.jpeg','RGB')
f1 = face_recognition.load_image_file('./known/Mukesh.jpeg','RGB')
f2 = face_recognition.load_image_file('./known/Surya.jpeg','RGB')
f3 = face_recognition.load_image_file('./known/Vikram.jpeg','RGB')
We can encode them using the following code:
fa_sign = face_recognition.face_encodings(fa)[0]
f0_sign = face_recognition.face_encodings(f0)[0]
f1_sign = face_recognition.face_encodings(f1)[0]
f2_sign = face_recognition.face_encodings(f2)[0]
f3_sign = face_recognition.face_encodings(3)[0]
We want to find the distance between Anil face to each of the other faces. So, we want to keep all the other four faces in a list faces:
faces = [f0_sign, f1_sign, f2_sign, f3_sign ]
Now we find the distance of Anil face to each of the other faces can be determined by the following line of code:
d = face_recognition.face_distance(faces,fa_sign)
We directly print the same using the print statements as follows:
print("Distance: Anil1 to Bill, Mukesh, Surya, and Vikram respectively")
print(d)
NOTE: Please download the PDF Document for a better, clear description of the lecture content. The Python Source Code is given. You can download and practice.
-
19
Distance between Face Images of the same person
NOTE: Please download the PDF Document for a better, clear description of the lecture content. The Python Source Code is given. You can download and practice.
Encodings of different photos of the same person face
Consider two photos of the same person, Photo Px and Py. The encodings of Px and Py are x and y respectively.
Consider three photos of the same person as shown in Figure ---
The three photos can be loaded first in three files photo_xavi01, photo_xavi02 and photo_xavi03 respectively. The following is the Python code for loading the three files:
#Dr. Xavier Chelladurai
#09 April 2020
#Program to load three photos of same person
import face_recognition
#Load the three faces of the same person
photo_xavi01 = face_recognition.load_image_file('./xavier01.png','RGB')
photo_xavi02 = face_recognition.load_image_file('./xavier02.jpg','RGB')
photo_xavi03 = face_recognition.load_image_file('./xavier03.png','RGB')
Let us now encode these three photos into three variables encodings_xavi01, encodings_xavi02 and encodings_xavi03:
#Let us find the encodings for each of the three faces
encodings_xavi01 = face_recognition.face_encodings(photo_xavi01)[0]
encodings_xavi02 = face_recognition.face_encodings(photo_xavi02)[0]
encodings_xavi03 = face_recognition.face_encodings(photo_xavi03)[0]
Now we can find the three distances:
1. Distance from encodings_xavi01 to encodings_xavi02
2. Distance from encodings_xavi02 to encodings_xavi03
3. Distance from encodings_xavi03 to encodings_xavi01
The following is the python code for calculating the three distances:
# Let us find the distance between xavier01.png to xavier02.jpg
dist01_02 = face_recognition.face_distance([encodings_xavi01],encodings_xavi02)
dist02_03 = face_recognition.face_distance([encodings_xavi02],encodings_xavi03)
dist03_01 = face_recognition.face_distance([encodings_xavi03],encodings_xavi01)
Now we can print the values of the three distances using the following Python code:
print("Distance 1 to 2 ", dist01_02)
print("Distance 2 to 3 ", dist02_03)
print("Distance 3 to 1 ", dist03_01)
The result is printed as follows:
Distance 1 to 2 [0.44813714]
Distance 2 to 3 [0.31075778]
Distance 3 to 1 [0.37672455]
Analysis and understanding of the result. The result shows that pictures 2 and 3 are closer to each other. This means that pictures 2 and 3 have a better resemblance as the photos were taken during the same period, whereas photo 1 was taken a few years later.
NOTE: Please download the PDF Document for a better, clear description of the lecture content. The Python Source Code is given. You can download and practice.
-
20
Resemblance Detection - Example Program
NOTE: Please download the PDF Document for a better, clear description of the lecture content. The Python Source Code is given. You can download and practice.
Case Study: You have a resemblance of your grand mother
In India, the young congress leader Priyanka Gandhi is said to have the resemblance of her grand mother and former Prime Minister of India Indira Gandhi. Let us evaluate it using the face_recognition.face_distance function. For this study, I am considering five face photos of three people as follows:
1. Priyanka Gandhi – 2 face photos – photo_priy01 and photo_priy02
2. Indira Gandhi2 – 2 face photos – photo_priy01 and photo_priy02
3. Sonia Gandhi – one face photo – photo_soni01
Let us load all the five pictures first using the face_load_image() method as shown below:
#Dr. Xavier Chelladurai
#10 April 2020
#Program to load a picture and find its face encoding
import face_recognition
photo_indr01 = face_recognition.load_image_file('./indra01.jpeg','RGB')
photo_indr02 = face_recognition.load_image_file('./indra02.jpg','RGB')
photo_priy01 = face_recognition.load_image_file('./priyanka01.jpg','RGB')
photo_priy02 = face_recognition.load_image_file('./priyanka02.jpeg','RGB')
photo_sonia01 = face_recognition.load_image_file('./sonia01.jpeg','RGB')
Let us now find the encodings for each face as follows:
encodings_indr01 = face_recognition.face_encodings(photo_indr01)[0]
encodings_indr02 = face_recognition.face_encodings(photo_indr02)[0]
encodings_priy01 = face_recognition.face_encodings(photo_priy01)[0]
encodings_priy02 = face_recognition.face_encodings(photo_priy02)[0]
encodings_sonia01 = face_recognition.face_encodings(photo_sonia01)[0]
Now we want to find the distance between the face encodings. Instead of finding the distance for each pair in a separate method call, we can give the list of all faces and find the distance from one face. For example, consider the list faces shown below:
faces = [encodings_indr01, encodings_indr02, encodings_sonia01, encodings_priy02]
In this list, we want to find the distance of each member from encodings_priy01.
This is done using the following statement.
print("Distance: Priyanka01 to indr01, indr02, soni01, pri02 respectively")
faces = [encodings_indr01, encodings_indr02, encodings_sonia01, encodings_priy02 ]
print(face_recognition.face_distance(faces,encodings_priy01))
Distance: Priyanka01 to indr01, indr02, soni01, pri02 respectively
[0.63962708 0.68208037 0.71973885 0.48593351]
Notice that Priyanka Gandhi has more resemblance with Indira Gandhi than with Sonia Gandhi. Also, the distance between Priyanka's two photos is 0.48593351. Recall that two pictures are the face of the same person if the distance is less than 0.6. If the distance is as small as 0.6 to 0.7 they are two people with good resemblance.
The program and output are shown in VSCode screen shown in Figure…..
NOTE: Please download the PDF Document for a better, clear description of the lecture content. The Python Source Code is given. You can download and practice.
-
21
Resemblance of Mother and Daughter - Example Program
NOTE: Please download the PDF Document for a better, clear description of the lecture content. The Python Source Code is given. You can download and practice.
Daughter and Mother resemblance
In this section, we write a Python program to recognize the photo of a daughter and map to the mother depending upon the resemblance. In this exercise we consider the photos of 6 mothers and six daughters as shown below:
The order of the daughters' photo is shown in the same order of the mothers.
Photo formats of mothers and daughters
The photos are stored in jpg format in different folders, mothers and daughters in files mother_00, mother_01, mother_02, mother_03, mother_04, mother_05 and the respective photos of daughters are stored in files daughter_00, daughter_01, daughter_02, daughter_03, daughter_04 and daughter_05. This is shown in Figure ---- and Figure -----.
Load the photo files into Python variables
The mothers' photos are loaded and stored in a Python list photo_mother[]. The Python list photo_daughter[] is used to load the daughters' photos. The following is the algorithm to load each daughter and their mother photo.
1. No of samples = n
2. photo_mother = [] Empty list
3. photo_daughter = [] Empty List
4. For i = 0 to n-1 do the following
Load the photo in file mother_0i.jpg to photo_mother[i]
Load the photo in file daughter_0i.jpg to photo_daughter[i]
After loading the photos, we have to do the encodings for each photo. This is included to the above algorithms as follows:
1. No of samples = n
2. For i = 0 to n-1 do the following
a. Load the photo in file mother_0i.jpg to photo_mother[i]
b. Do the face encoding for photo_mother[i] and store in encodings_mother[i]
c. Load the photo in file daughter_0i.jpg to photo_daughter[i]
d. Do the face encoding for photo_daughter[i] and store in encodings_daughter[i]
Path of the file to be loaded
As shown in Figure --- the mother files are loaded from the full path shown below:
'./mother/mother00.jpg'
'./mother/mother01.jpg'
'./mother/mother02.jpg'
'./mother/mother03.jpg'
'./mother/mother04.jpg'
'./mother/mother05.jpg'
If we want to read these files using a for-loop, we need to use a running index variable I in the range(0 to 5) together with a String concatenation using a template.
Consider the template:
'./mother/mother_0{}.jpg'
Let us call this template, m_path_template where m refers that it is for mothers.
We write,
m_path_template = './mother/mother_0{}.jpg'
The braces {} indicate that it is a placeholder for a variable. We can pass the value of i to the placeholder by calling format() method of String class as follows:
m_path_template = './mother/mother_0{}.jpg'
m_path = m_path_template.format(i)
Now we can load the file using the following Python statement in a for-loop with I ranging from 0 to 5.
face_recognition.load_image_file(m_path,'RGB')
The file returned in the above call has to be appended to the photo_mother[] list.
photo_mother.append(
face_recognition.load_image_file(m_path,'RGB'))
In a similar manner, the daughters photo files can be loaded with the following path in a for-loop with I varying from 0 to 5.:
d_path_template = './mother/mother_0{}.jpg'
d_path = d_path_template.format(i)
face_recognition.load_image_file(d_path,'RGB')
The value returned is appended to the Python list photo_daughter[] as follows:
photo_daughter.append(
face_recognition.load_image_file(d_path,'RGB'))
Encoding the faces
Recall that the encoding of a face is a one-dimensional vector of size 128. For each mother and for each daughter, we need to find the encodings. The encodings of mothers and daughters are two lists as follows:
encodings_mother[]
encodings_daughter[]
We use the face_encodings() method of face_recognition package to find the encodings and append to the appropriate list.
encodings_mother.append(
face_recognition.face_encodings(photo_mother[i])[0])
encodings_daughter.append(
face_recognition.face_encodings(photo_daughter[i])[0])
The following is the full program to load all the mothers and daughters photos and do face encoding:
#Dr. Xavier Chelladurai
#15 April 2020
#Mother to Daughter mapping
import face_recognition
n = 6
photo_mother =[]
encodings_mother = []
photo_daughter = []
encodings_daughter = []
for i in range(n):
m_path_template = './mother/mother_0{}.jpg'
m_path = m_path_template.format(i)
photo_mother.append(face_recognition.load_image_file(m_path,'RGB'))
encodings_mother.append(face_recognition.face_encodings(photo_mother[i])[0])
d_path_template = './daughter/daughter_0{}.jpg'
d_path = d_path_template.format(i)
photo_daughter.append(face_recognition.load_image_file(d_path,'RGB'))
encodings_daughter.append(
face_recognition.face_encodings(photo_daughter[i])[0])
Now we want to find the distance between each mother and each daughter using the function face_distance() from face_recognition package.
for i in range(6):
a = "Distance: Daughter {} "
print(a.format(i))
print(face_recognition.face_distance(encodings_mother,encodings_daughter[i]))
We get the output in the form of a matrix as follows:
Daughter 0 [0.46468639 0.55054639 0.61815041 0.59760066 0.50912364 0.6194513 ] Daughter 1 [0.65283955 0.55075114 0.65463587 0.7115194 0.69625752 0.61397934]
Daughter 2 [0.62013454 0.56107183 0.56086755 0.61414331 0.57996218 0.60642965]
Daughter 3 [0.65434505 0.56664115 0.56087084 0.65704375 0.57341042 0.68933992]
Daughter 4 [0.64555336 0.61893406 0.63163709 0.62008706 0.60603338 0.62022531]
Daughter 5 [0.59682512 0.69444066 0.70778876 0.67299249 0.63777551 0.5575591 ]
The complete program in VSCode is shown in Figure----. The output is shown in Figure-----.
Analysis
The distance of the six daughter faces from each of the mother faces are shown in the following table. If the distance is small, the resemblance is more. Consider the distance daughter_00 to each of the six mothers. Mother mother_00 is the real mother and we find that the distance between daughter_00 and mother_00 is the smallest among all other mothers. This is done by looking at the row_0 and choosing the minimum. This tells us that daughter_00 has the resemblance of here original mother mother_00.
By looking at the row-2 entries, we find that daughter_01 has resemblance to her real mother mother_01. Same is true for daughter_02, daughter_04 and daughter_05. All of them have more resemblance to their real mothers. However, when we see the row for daughter_03, the distance to the real mother mother_03 is more than some other mothers. This means that this daughter does not have her mother's resemblance, maybe she resembles her father.
Conclusion
A daughter may have the resemblance of her mother. In our sample, out of 6, 5 daughters have more resemblance to their real mothers. Though 5 out of 6 is more than 80%, this does not show that more than 80% of daughters resemble their mothers. We need to consider a bigger sample size to arrive at any conclusion.
NOTE: Please download the PDF Document for a better, clear description of the lecture content. The Python Source Code is given. You can download and practice.
-
22
Face Recognition - Compare Faces method
NOTE: Please download the PDF Document for a better, clear description of the lecture content. The Python Source Code is given. You can download and practice.
In this video, we introduce the compare_faces () method and explain how it can be used to compare a known face with an unknown one.
NOTE: Please download the PDF Document for a better, clear description of the lecture content. The Python Source Code is given. You can download and practice.
-
23
Face Compare - Sample Program
In this video, we write a sample program, where we compare an unknown face with a list of faces and recognize the unknown.
NOTE: Please download the PDF Document for a better, clear description of the lecture content. The Python Source Code is given. You can download and practice.
-
24
Python Pandas CSV File
In this video, we introduce the use of Pandas data frame objects to have the locations of the images and load. the known images using a for-loop.
NOTE: Please download the PDF Document for a better, clear description of the lecture content. The Python Source Code is given. You can download and practice.
-
25
Example Program for Face Recognition
In this program we effectively use the Pandas Datafrmaes.
NOTE: The Python Source Code is given. You can download and practice.
-
26
Recognize Face and write the name on the face image
In this program, after recognizing the face, we write the name of the person on the image and display.
NOTE: The Python Source Code is given. You can download and practice.
-
27
Attendance Recording in a File
In this program, we recognize the face and record the fact in a data file.
NOTE: The Python Source Code is given. You can download and practice.
-
28
Face Recognition Quiz
Face Recognition Quiz