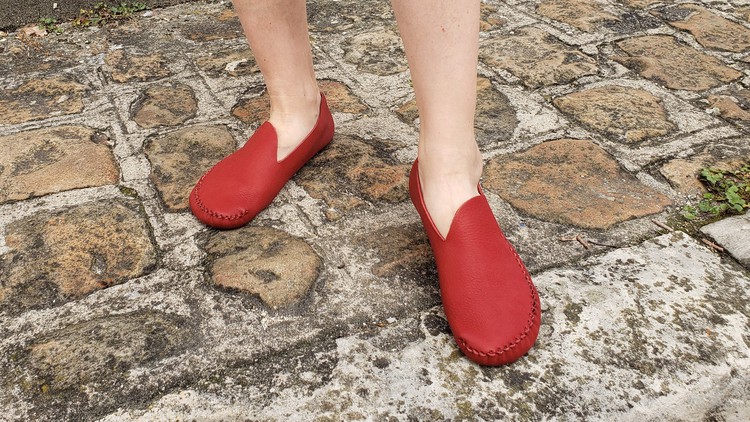
DIY "Moon" Moccasins With Printable Patterns & PDF Tutorial
- Description
- Curriculum
- FAQ
- Reviews
Over the course of 2 hours of video, Lougaya clearly and precisely explains how to make your own moccasins with very few simple hand tools.
The great difference with most other moccasins and patterns that you can find on the market is that ours are made to be adjusted exactly to the morphology of each person. Patterns will suit people from size 34 to 48 EU / 3 to 14 US.
Just like a second skin…
Our moccasins are like barefoot or minimalist leather shoes, 100% in leather. In fact, they truly are like a second skin that can be worn on all occasions and on all grounds. If you are looking for natural footwear with high sensory feedback, you’re at the right place.
We are convinced that even people without prior experience in leather work, sewing, and shoe making can complete this project quite easily.
When purchasing our tutorials, you will gain instant access to the videos that you will be able to watch and replay as many times as you like.
Along with the videos, you will receive the PDF tutorial as well as the printable patterns.
The video tutorial helps to understand the right gesture, whereas the PDF tutorial highlights important details in large images and written explanations and helps you to keep track of each step in order. Even after your first pair, it is a useful document to remember how to make them without having to watch all the videos again.
With practice, a pair can be made in only 2 to 3 hours, but it would usually take about 1 day on the first trial.
Patterns should be printed in A4 or US letters. If you are not able to print the patterns at home, please send us a request.
The tutorials also cover the topics of choosing leather and tools, making soles, leather conditioner, and even some ideas to make use of leather off-cuts and other projects to apply the techniques that you will have learned.
To make good-looking and comfortable moccasins, you need to find very soft leather that will easily pucker around the toes. Ideally, it should be thick as well (1.8 to 3 mm thick / 4 to 6 oz leather). We know that such leather is not that easy to find, especially when you can’t go to a leather shop in person and/or that you are a novice.
Feel free to reach out to us if you need help finding the best quality leather suitable to work with our patterns at [email protected]
-
1IntroductionVideo lesson
Learn how to make the Moon moccasins in one piece of leather. A classic design that can be customized by shaping the tongue however you like, with a pointy end or more square for example...
-
2Choosing and Assembling The PatternVideo lesson
Measure the width of the foot and choose the pattern accordingly.
-
3Cutting The LeatherVideo lesson
Trace around the pattern with a permanent marker. Flip it over to draw the second foot and cut around it by following the inside of the like to replicate the exact same size.
-
4Preparing The StitchingVideo lesson
Place both pieces on top of each other with the outside facing you and use your pattern to draw stitching marks right on the edge of the leather. This has to be very precise because each dot matches precisely with the other side. When you are finished, make sure that all marks are visible and redo any missing ones if necessary.
-
5Preparing The Stitch, Making HolesVideo lesson
Here is how to make holes with an awl. Make sure you poke perpendicularly to the leather and close enough to the edge. Hold close to your hole and give a firm push. If you struggle, see the HELP video in the bonus to find out how to make holes with a piece of cork.
-
6Stitching The FrontVideo lesson
Here is how to stitch the moccasins by hand. Make sure you pull tight and firm at each stitch you put in for a regular and neat finish. If you try pulling the two sides away from each other it should not move and you shouldn't be able to see through the stitch. The thicker your leather, the harder you will have to pull.
-
7Custom-Fitting The HeelVideo lesson
This is how to take the measurements for fitting the heel. The longest toe should touch the end put without any pressure on it. First, check the size around the instep/bridge and adjust it if necessary by adding or removing a stitch. Finally, draw the fitting marks for the heel.
-
8Finishing The Front StitchVideo lesson
Once you have done the fitting and you are sure with the adjustment on the bridge/instep, you can close the front stitch before stitching the heel.
-
9Cutting The HeelVideo lesson
Join the ankle marks and draw the axis of the center of the heel. Then draw the profile of the heel before cutting it to the right size.
-
10Stitching The HeelVideo lesson
Stitching the heel is the same technique as stitching the front.
-
11You've made it!Video lesson

External Links May Contain Affiliate Links read more


