Blender 3D Model a Ghibli Art Stylized Scene

- Description
- Curriculum
- FAQ
- Reviews
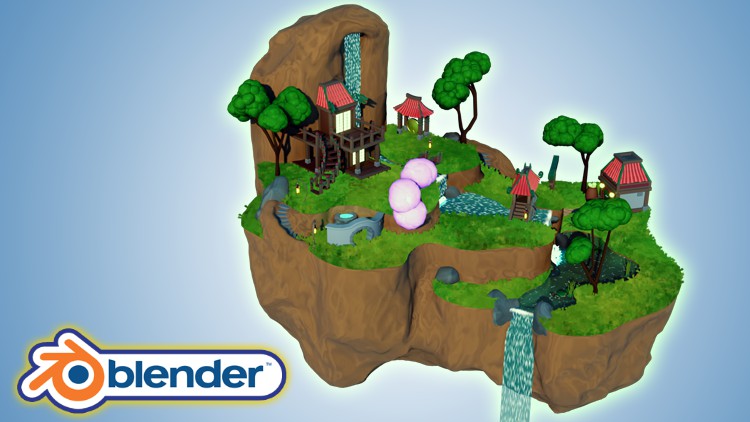
Would you like to learn how to model a stylized oriental island scene reminiscent of anime films or series?
Now, what if I told you I have a course to do just that on Udemy?
‘Blender 3D Model a Stylized Oriental Scene’ will see you creating 16 assets that complete an exciting scene full of life through 3D animation.
‘Blender 3D Model a Stylized Oriental Scene’ will give you access to 24 full hours of 3D art.
Learn how to build 4 levels of a flying island in 128 lessons.
This course will see you learn all the techniques pros use and how they use them.
Through reading this course description you will find out:
– What you want to learn about 3D modelling;
– What you are going to get through ‘Blender 3D Model a Stylized Oriental Scene’, and;
– What are you going to lose if you don’t enrol in this course.
Modeling
‘Blender 3D Model a Stylized Oriental Scene’ will see you take a deep dive into the power of curves and great techniques for using them.
Learn how to use multiple modifiers to create amazing 3D models. This will include Blender’s simple deform, skin, displace and decimation modifier.
A lot of my students have fed back that they would like to learn to sculpt in Blender. We will be doing exactly that!
Following the success of my latest courses, we will be modelling, texturing, and finalising every individual asset before moving onto the next. Students have said that this has helped them in staying excited throughout the creation process, being able to see how their scene comes closer to the course preview step-by-step.
Of course, you could set yourself a challenge and diversify aspects of the scene, such as including different buildings, changing their architectural design or colours, or modelling and animating more animals.
Be creative! Make your islands bigger and lusher. Add different types of flowers and trees and build up the stylized character of the scene with new assets you have thought of.
Texturing and Materials
‘Blender 3D Model a Stylized Oriental Island’ will teach you all about advanced Blender node techniques and the course will act as an in-depth guide to the entire process.
This course will also teach you the basics of shaders and how to create your own water shader which you will be able to use in any other builds. But that is not the only unique feature of this course.
‘Blender 3D Model a Stylized Oriental Island’ will help you make your own procedural materials and shaders which we will take full advantage of in the course. The procedural materials we will be making include the rocks, the earth material, the paths, the water, the koi fish, the gong, and the foliage.
Particle Systems
Take your 3D modelling skills to a new level by creating stylized trees using the Blender particle system.
We will be using a technique that is meant for hair strands to create the grass through procedural systems.
Through completing ‘Blender 3D Model a Stylized Oriental Island’, you will learn how to use particle systems to create grass in the influential style of Ghibli art. As part of that, you will find out how useful a Blender emission shader is to help you resonate that art style.
Animation
Enrol to ‘Blender 3D Model a Stylized Oriental Scene’ to learn how to bring your scene alive with procedural rocks, foliage, and wildlife.
We will not just model them. We will also animate them!
Learn how to create stylized animated water, including waterfalls, rapids, and turbulence.
You will also be going through a fully comprehensive guide about animating fish and butterflies that move realistically, following a set path.
Lighting
By enrolling in ‘Blender 3D Model a Stylized Oriental Scene’, you will also learn how to take control of your scene’s lighting as we take a close look at HDRI stylized lighting, more so than in any of my other courses.
For a full introduction into lighting 3D scenes, we will also cover all in-built Blender lighting functionalities.
Rendering
‘Blender 3D Model a Stylized Oriental Island’ is a complete guide into using Eevee for lighting, rendering, shadows, exposure, and colour management.
You will also how to create great rendered animations of the scene using various camera techniques.
Course Resources & Freebies
The course resource pack will include 16 course references for all the individual stylized oriental island scene assets we will be creating. It also includes 5 colour maps.
The best course navigation tool for ‘Blender 3D Model a Stylized Oriental Island’ will be available, yet again. The course handbook will give the control back to you and you will be able to fully streamline your learning process to your needs and wants seamlessly.
Something like this is essential to courses as long as this one, and 3D Tudor is the first to consistently include this with all the newest courses.
Enrol in this course and come be part of a 3D modeling journey of over 24 hours of learning.
Check out the free introduction and I am sure you won’t be able to put this course down!
Still unsure? Then, let me tell you what’s unique about this course:
– animating water and creating massive waterfalls;
– animating rapids and turbulence in stylized water;
– animating koi fish;
– seeing butterflies move realistically along a set path;
– creating grass using the Japanese Ghibli art style;
– learning how to use HDRI stylized lighting;
– animations & key commands throughout the learning process;
– – accessing 3 courses within a course, including full lessons on (a) Blender basics, (b) materials and textures, and (c) seams, sharps, and UVs.
From winding stairs to stone steps and cosy fountain nooks, to lush grass, ‘Blender 3D Model a Stylized Oriental Island’ will take you on a tour of oriental stylized design.
Let’s build your own Asian fantasy…
Until next time, happy modelling everyone!
Neil – 3D Tudor
-
3
 Lesson 2 - Starting our Street Lamp with Edge Loops
This lesson will be an introduction to working with and importing references to Blender. You will also learn how to use edge loops.
-
4
Lesson 3 - Different Ways to Create Meshes
Lesson 3 will see us create the lamp part of the lantern. You will be introduced to beveling and filling meshes in Blender.
-
5
Lesson 4 - How Seams & Sharps Work
In this lesson, you will learn why seams and sharps are important in 3D modelling. This is like a short course within a course, introducing you to using and applying seams and sharps effectively.
-
6
Lesson 5 - Learning About Nodes & Materials
This lesson is an introduction to materials and how to import them into Blender. You will find out why UVs are important. Best of all, you will learn about the basics of the Blender node system.
-
7
Lesson 6 - Working with Material Nodes
Lesson 6 will see us add our first materials to our street lamp light and our general stylized oriental island scene. You will learn about a simple material node build in Blender.
-
8
Lesson 7 - Basics of Lighting
In this lesson, we will look at importing a simple sunlight source and we will discuss how it works. We also create an emission shader complete with a gradient to give us that stylized feel for our oriental flying island scene.
-
9
Lesson 8 - Converting and Working with Curves
This lesson is our first look at the power of curves and how to create ornamental edges on the top of our light. We also take a look at a few Blender modifiers including the mirror modifier.
-
10
Lesson 9 - Using Seams Effectively
Lesson 9 will be a complete introduction to smoothing options within Blender. You will learn how to mark seams and sharps on our small build to create more realism and move away from blocky-looking models.
-
11
Lesson 10 - Creating Ornamental Swirls
In this lesson, we look at how to draw curves and meshes with our mouse to create 3D meshes. This is a very useful skill that will quickly elevate your 3D modeling toolkit.
-
12
Lesson 11 - Proportional Editing Workflow
This lesson will show you how to style swirls with a simple but underused option in Blender - proportional editing. We will go through the various options for procedural editing and it will quickly become part of your 3D modeling workflow.
-
13
Lesson 12 - Finishing the Lamp Materials
Lesson 12 will involve adding the rest of the materials to our lamp.
-
14
Lesson 13 - Parents & Children in 3D
In this lesson, I will introduce you to using Blender’s bevel modifier. Not only does it speed up our workflow, but, more importantly, it is a very easy way to add realism to any model.
-
15
Lesson 14 - Working with SVG's
This lesson will show you how to import designs you created in Adobe Photoshop into Blender. We will discuss how to use scalable vector graphics (SVGs) to reduce complex meshes and their respective build times. Within a few clicks, you will have created your oriental pattern.
-
16
Lesson 15 - Working with Multiple Modifiers
Lesson 15 will involve continuing work on our small bridge build. We will look at how to make the bridge look structurally realistic. As part of this lesson, we will create the planks and the side rail.
-
17
Lesson 16 - Learning how to Speed up Workflows
In this lesson, we take everything we have learned so far and use it to create a faster 3D modeling workflow. We also add a lot of edge loops and learn about planning.
-
18
Lesson 17 - Completing our Small Bridge
This lesson will see us finish the small bridge in preparation for the next major step in designing our stylized oriental flying island scene. By this point, we will have added all our materials, sharps and bevel edges.
-
19
Lesson 18 - Working with Deform Modifier
-
20
Lesson 19 - Flipping our Normal's
In this lesson, we will work on our circle entrance and learn how to create stonework. We also look at simple techniques to create flowing meshes. Finally, you will learn what a normal is within the context of 3D modeling.
-
21
Lesson 20 - Fixing Boolean Meshes
This lesson will show you why booleans are great in 3D modeling. You will also learn about the difficulties using booleans can cause. This lesson will be essential to your independent troubleshooting as an artist because there is no point in learning how to use booleans if you do not know how to fix distorted meshes to achieve clean topography.
-
22
Lesson 21 - Starting the Fruit Basket
Lesson 21 will teach you how to quickly and easily create hollowed-out models. This lesson will also see us start work on the fruit basket that will be featured in our stylized oriental island scene.
-
23
Lesson 22 - Creating the Basket Material
In this lesson, we will start working on our first full and complex procedural material. We will be using Blender’s node system. At the end of this lesson, you will have finished working on your fruit basket.
-
24
Lesson 23 - Creating Procedural Materials
This lesson will see us creating procedural materials. One of these materials is the melon material for the fruits that will be placed within our fruit basked. The melon material seems complex, but with everything we have learned so far, the process will be simple. As part of this lesson, we will also start working on our large arch reference.
-
26
Lesson 25 - Introduction to Sculpting
In this lesson, you will be introduced to sculpting within Blender. We will go through mesh preparation and look at a few of the brushes available to use. We also look at quick ways to remesh our rockpool grey box.
-
27
Lesson 26 - Creating the Rock Material
This lesson will see us create the procedural rock material for our rock pool using the Blender node system.
-
28
Lesson 27 - Creating a Water Shader
Lesson 27 will focus on creating the water for our rock pool using a material shader. We will also be creating the water plane using displacement.
-
29
Lesson 28 - Finishing the Rockpool
In lesson 28, we will be creating the petals that will lie on the water of our stylized oriental island scene rock pool. To do this, we will use the Blender spin function.
-
30
Lesson 29 - Creating Reeds the Easy Way
In this lesson, we will create the lily pads using the Blender knife tool. Using a combination of curves and proportional editing, you will learn how to make reeds for the main body of water in our stylized oriental island scene.
-
31
Lesson 30 - Working with Colour Ramps
This lesson will see us creating the procedural material for the reeds using a gradient node system. You will also be making a basic start on our roof template.
-
33
Lesson 32 - Creating our First Building Grey box
In this lesson, we will start creating our food storage building for our stylized oriental island scene. We will be building its grey box.
-
34
Lesson 33 - Working with Bisect Tool
This lesson will continue work on the food storage building we began 3D modelling in the previous lesson. To add a fantasy element to the scene, we will be working on creating the Hobbit style door for the building complete with wooden door planks and a stone circle around them.
-
35
Lesson 34 - Laying out the Food Storage Foundation
Lesson 34 will see us laying out the food storage foundation. We will be greyboxing out all the parts in preparation for the main build.
-
36
Lesson 35 - Transformation Orientation Tips
In this lesson, you will learn how to manipulate an object from an orientation. We will finish modelling all the food storage building parts apart from the roof tiles.
-
37
Lesson 36 - Resetting Bevels
This lesson will see us beveling all the parts of the food storage building to limit the number of edges the design has and to increase its realism. This will build up the stylized feeling in our oriental scene.
-
38
Lesson 37 - Creating our First Roof
In lesson 37 we get to test out our roof template for the first time. You will learn how to fit it in place and a great way to manipulate it using the lattice and proportional editing.
-
39
Lesson 38 - Creating the Lanterns
In this lesson, we will be creating our oriental lanterns that will adorn either side of our food storage building’s hobbit style door.
-
40
Lesson 39 - Adding Materials to our First Building
This lesson will begin the texturing process for our stylized oriental island scene’s food storage building.
-
41
Lesson 40 - Fixing Problems with Sharps
Lesson 40 will see us troubleshooting within Blender. You will be learning how to fix problems with sharps.
-
42
Lesson 41 - Creating Low Poly Tree Branches
In this lesson, you will begin working on the flora of our stylized oriental island scene. We will be creating low poly tree branches in anticipation of adorning them with stylized cloud-shaped leaves.
-
43
Lesson 42 - Branch Manipulation Guide
This lesson will be a full guide to manipulating low poly branches within Blender so that a realistic shape is achieved.
-
44
Lesson 43 - Creating our Leaves Template
Lesson 43 will see us creating the template for our stylized tree leaves. To keep with the stylized theme of our oriental scene, these leaves will be cloud-shaped in a style reminiscent of anime.
-
45
Lesson 44 - Creating our First Particle System
In this lesson, we will be creating our first particle system.
-
46
Lesson 45 - Creating the Tree Trunk Material
This will lesson will continue our work on our stylized oriental island scene’s trees. We will be creating the tree trunk material using the Blender node system, focusing on making it look like real tree bark.
-
47
Lesson 46 - Creating the Roof of our Gong Tower
In lesson 46, we will begin work on our stylized oriental island scene’s gong tower. We will start working on its roof. Gongs are iconic Asian musical instruments that emit noise when a mallet hits its metallic circular disks.
-
48
Lesson 47 - Fixing Meshes that Don't Work
This lesson focuses on problem-solving once more. Because we used the knife tool, the mesh we created had broken geometry. To resolve this, we remeshed the model.
-
49
Lesson 48 - Creating the Gong Roof
In this lesson, we will create the gong roof using the template we created for the food storage building. This will be adapted using the lattice modifier.
-
50
Lesson 49 - Completing our Gong Roof
Lesson 49 will focus on the gong roof. We finally finish the roof and prepare it for adding in modifiers.
-
51
Lesson 50 - Preparing Mesh for Simple Deform
The lesson will involve using an amazing modifier called simple deform. This simple modifier will be doing the bulk of the work when it comes to getting that oriental feel for our scene.
-
52
Lesson 51 - Creating the Gong Supports
In this lesson, we will begin working on the Gong supports. Our stylized oriental island scene gong will hang from four wooden supports, giving the musical instrument enough space to swing backwards and forwards on either side.
-
53
Lesson 52 - Cracking the Gong
Lesson 52 will see us breaking the gong. We will do that to add another fantasy storytelling element to our stylized oriental island scene. By the gong being broken, we are implying that a battle happened on this island that has since been restored.
-
54
Lesson 53 - Creating Procedural Rope
This lesson involves creating procedural rope. This rope will be what our gong will hang from. Although the rope is just a basic cylinder it can easily be brought to life with a simple node setup.
-
55
Lesson 54 - How to Create Gold Material
In this lesson, you will learn how to create gold material using Blender’s node system. We will focus on getting the gold material to look right by ensuring that it glints in the light.
-
57
Lesson 56 - Creating the Water Wheel
This lesson will be the start of your journey to creating an oriental water mill. We will be creating the water wheel using basic modeling practices within Blender.
-
58
Lesson 57 - Calculating Around Circles
In this lesson, we look at how we can quickly and easily calculate objects following a radius. This is a good idea before creating the full mesh.
-
59
Lesson 58 - Testing our 3D Skills
Lesson 58 will test your 3D modeling skills. We will begin work on the large bridge building for our stylized oriental island scene. It involves building a bridge with three curved entryways, steps, wooden supports, and a curved roof with roof decorative details.
-
60
Lesson 59 - Working with Complex Booleans
This lesson will see us working with multiple modifiers at the same time. This will enable us to create our unique bridge look. In a later lesson, we will be taking a look at the problems that come with creating the bridge this way.
-
61
Lesson 60 - Creating the Bridge Stone Blocks
In this lesson, we will be creating the bridge support blocks for our large bridge building. These will become the outline of the three curved openings of our bridge. Stone blocks will also be placed in three other locations on the bridge to add to the stylized effect of our oriental island scene.
-
62
Lesson 61 - Rebuilding the Bridge
Lesson 61 is focused on troubleshooting. Booleans distort 3D meshes, so, in this lesson, I will be showing you how to fix this. In other words, we will be rebuilding our bridge.
-
63
Lesson 62 - Viewport Options Visability
This lesson will involve learning how to use Blender viewport options to give us a better visual of our scene. This is a small part of the lesson but well worth learning.
-
64
Udemy - lesson 63 - Creating Oriental Roof Swirls
In this lesson, we will be working on the decorative elements of our stylized oriental island scene. This will be focused on the large bridge building. The roof will be adorned by swirls on each of its four bevelled edges, thereby adding to the stylized feeling of the design.
-
65
Lesson 64 - Starting the Complex Roof
Lesson 64 will involve starting to work on the most complex roof of our stylized oriental island scene. The roof will have four bevelled edges, a flattened bell shape at its bottom, and an angular top.
-
66
Lesson 65 - Large Roof Preperation
This lesson involves us continuing to build and refine the bridge roof. This is perhaps the hardest roof to get right. We also create the edge loops in preparation for deformation.
-
67
Lesson 66 - Completing the Large Bridge Build
This lesson will see us complete the build of our stylized oriental island scene’s large bridge building. We work on adding in all the materials and bevels to really bring the bridge to life.
-
68
Lesson 67 - The Importance of Edge Loops
Lesson 67 will see us adding in a couple of simple deform modifiers. We do, however, come across some issues and I will show you how to easily correct these and why these problems may surface.
-
69
Lesson 68 - Creating Foliage the Easy Way
This lesson will see us creating some of the foliage for our stylized oriental island scene. You will learn how to use empties to create the leaves of any foliage quickly and easily.
-
70
Lesson 69 - Procedural Foliage Materials
In this lesson, we will be making the procedural materials for the foliage of our stylized oriental island scene.
-
71
Lesson 70 - Starting our Low Poly Fish
Lesson 70 will be the start of our work on some of the animals in our stylized oriental island scene. Our work will begin modeling low poly koi fish.
-
72
Lesson 71 - Mirroring the Fish
This lesson will show you how to create a 3D mesh by mirroring the design to the other side to have the same mesh proportions on both sides of a model.
-
73
Lesson 72 - Fixing Problem Meshes
In this lesson, we continue working on the fish mesh. We come across various problems you might face when building meshes in this way. We go through various techniques to rebuild and fix simple meshes.
-
74
Lesson 73 - Using Voxel Remesh
Lesson 73 is aimed at looking at two Blender techniques to complete our low poly fish. The first is decimation which we will use to reduce the mesh density. Then, we will move on to voxel remesh which will retopologise the mesh and create a much cleaner topology.
-
75
Lesson 74 - Procedural Fish Material
This lesson will see us creating the procedural material to texture our stylized oriental island scene’s koi fish. By this point, you will have a good understanding of what and how the nodes work together to create the fish skin.