Arduino Robotics With Scratch Programming in TinkerCAD

- Description
- Curriculum
- FAQ
- Reviews
Arduino Robotics With Scratch Programming in TinkerCAD – Learn Arduino Robotics Using Visual Programming Methods With Electronics Simulation Software with Interesting Projects
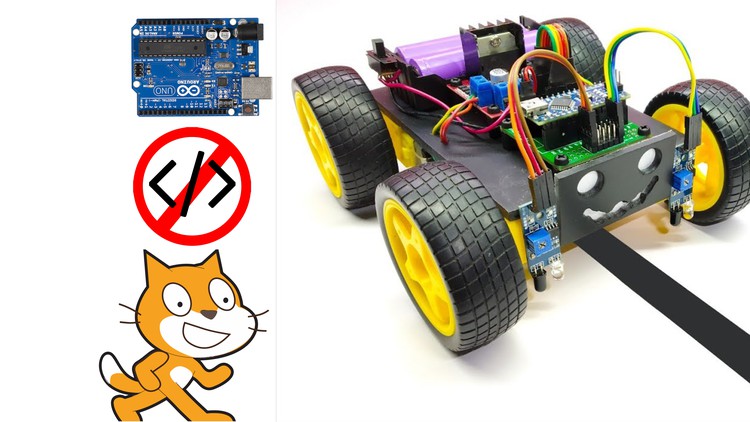
This is the original comprehensive course for Arduino makers and inventors by using scratch programming in TinkerCAD. Students can learn to design circuits, code and build robots by learning this exciting course. The explanations are given for each step you have to follow from the beginning if you are new to Arduino. This course provides you the overall understanding about the working principles of Arduino and scratch programming. You don’t have to copy others’ code anymore. You can code yourself for your innovative projects. Arduino needs C++ Program natively to upload codes. But here, the TinkerCAD software will generate the C++ Programming from the scratch program that we write. But how to write a scratch program? Don’t worry. Here, I have explained to you an easy way to create a scratch program by using flowcharts. Therefore, you can create programs for your own projects.
This course is for absolute beginners and intermediate students in Arduino. All the software access guides, Arduino IDE download and installation guides are provided as separate lectures. If you don’t know, you can watch and learn step by step. If you know, you can just skip those lectures. Safety is very important since we are handling electronics. Therefore, safety guidelines are explained clearly before starting on projects. The important electronic components we use in the course are explained clearly. And also the electronics components buying links are provided for easy purchase from Amazon.
Method of Study:
Here I will explain 5 different projects to you. If you learn those 5 you are not limited to work on only 5 projects. You can create tons of different projects by learning the working principles of the electronics components, circuit design and scratch coding. First, you have to focus on the projects. And follow my steps. Then you have to achieve the simplified version of the projects. After you have achieved the simplified version of them, then you can expand it. Such as you can add more sensors, change the code, combine our projects and increase the complexity of the projects. That is how I advise my students to practice my courses. Then you can understand the theories and practicals clearly. Throughout the study, if you don’t understand anything you can ask me questions. I am always available for my students to clarify their doubts.
Who can learn this course?
-
Age above 10 years
-
Absolute beginners to Arduino
-
Intermediate students to Arduino
-
Parents who wish to teach Electronics, Robotics to their kids
-
STEM educators & Teachers
-
Hobbyists with no programming background
What are the benefits?
-
Free Software Access to practice Arduino Robotics.
-
Free Simulation is available for checking our program and playing around with different changes in the circuit.
-
Everyone can learn visual programming easily.
-
No need to copy others’ code. We can create our own code.
-
Even for simplifying the Scratch Program Flowchart method was used.
-
Wiring diagrams with Engineering Best Practices are explained clearly for professional circuit designs. Starting from early childhood.
-
Free Download and Installation guides for Arduino IDE Software are provided.
-
Project Based Learning – 5 Interesting projects will be explained clearly.
-
No C++ Coding. No Problem. We will program in Scratch Visual Programming Language. Then the software will automatically generate the C++ code for us.
What is included in this Arduino Robotics Course?
-
Free TinkerCAD Software access guide.
-
Free Arduino IDE Software download and installation guide.
-
Free download of Lecture Notes with Wiring Diagrams, Scratch Programs and C++ coding for the projects.
-
Free software is sufficient to practice Arduino Robotics. But, if you want to practice practically, you can buy some electronic components. The links to buy suitable electronic components from Amazon are provided for reducing the surfing time for electronic kits.
-
Safety First. Safety guidelines are explained clearly before start working on electronics.
Projects in Arduino Robotics With Scratch Programming in TinkerCAD
-
Home Security System
-
Object Detection System
-
Automatic Smart Dustbin System
-
Obstacle Avoiding Robot
-
Line Following Robot
Why Scratch Programming in TinkerCAD for Arduino Robotics?
Scratch is the world’s largest coding community for children and a coding language with a simple visual interface that allows young people to create digital stories, games, and animations. Scratch is designed, developed, and moderated by the Scratch Foundation, a nonprofit organization.
Best of all, TinkerCAD Circuits provides a bottomless supply of virtual components that students can use to build and simulate their projects. When they’re ready to physically prototype their projects, TinkerCAD Circuits makes it easy to export their code as a native Arduino.
Keywords:
Programming Fundamentals, Scratch Programming, Arduino Robotics, C++, C Programming, Arduino, Robotics, Electronics, The original comprehensive course for Arduino makers, Coding for kids, TinkerCAD, Artificial Intelligence, Python, Arduino Uno, Arduino Nano, Arduino IDE, Arduino Projects, Programming for kids, Programming languages, Step by step guide, Comprehensive Course in Arduino, Computer Science, Programming Fundamentals.
-
1
 1.1 Introduction to the Course
What are the benefits?
Free Software Access to practice Arduino Robotics.
Free Simulation is available for checking our program and playing around with different changes in the circuit.
Everyone can learn visual programming easily.
No need to copy others' code. We can create our own code.
Even for simplifying the Scratch Program Flowchart method was used.
Wiring diagrams with Engineering Best Practices are explained clearly for professional circuit designs. Starting from early childhood.
Free Download and Installation guides for Arduino IDE Software are provided.
Project Based Learning - 5 Interesting projects will be explained clearly.
No C++ Coding. No Problem. We will program in Scratch Visual Programming Language. Then the software will automatically generate the C++ code for us.
Learn this course on your native language. This course is available with subtitles in 10 different languages such as Arabic, English (US), French, Hindi, Portuguese, Russian, Simplified Chinese, Spanish, Tamil and Urdu. More subtitles coming soon!
What is included in this course?
Free TinkerCAD Software access guide.
Free Arduino IDE Software download and installation guide.
Free download of Lecture Notes with Wiring Diagrams, Scratch Programs and C++ coding for the projects.
Free software is sufficient to practice Arduino Robotics. But, if you want to practice practically, you can buy some electronic components. The links to buy suitable electronic components from Amazon are provided for reducing the surfing time for electronic kits.
Safety First. Safety guidelines are explained clearly before start working on electronics.
Projects in Arduino Robotics With Scratch Programming in TinkerCAD
Home Security System
Object Detection System
Automatic Smart Dustbin System
Obstacle Avoiding Robot
Line Following Robot
-
2
1.2 Virtual Online Platform Software Access to Practice Robotics
This is TinkerCAD Software Platform Account Creation and Introduction to the Interface.
1. Create an account
2. Go to Circuits
3. Rename your circuit
4. Select All components in the Components tab to obtain all the available components in the environment
5. Now you can make your own project.
-
3
2.1 Introduction to Robotics
NOTE: Do not work on AC Current (Your Home AC Supply Circuits). They are very dangerous. In our course we are going to only deal with 5V or 12V DC Circuits.
Breadboard: This is used to connect wires and components together. Understand how the internal pins are connected together to do the projects.
LED: When the power is provided the LED bulb will be turned ON. Please be aware that the LED bulb can withstand 3.3V - 5V and 20mA of current. If you supply more than 5V, then your LED Bulb will be damaged. If you have a 9V battery you can use a 1K resistor inline with the LED to secure the LED.
Jumper Cable: They are specially made for connecting the breadboards and sensor modules. You can use them to connect the components. They are available as Male to Male, Male to Female and Female to Female cables.
Batteries: You can use 5V battery, or 9V battery for our projects. However, 3.3 V, 1000 mAH rechargeable batteries are suitable for the connection of Mobile Robots.
-
4
2.2 Sensors
Sensors are used to detect physical properties. They detect the properties and convert it as an electrical signal and send it to the controller.
-
5
2.3 Actuators
-
6
2.4 Controllers - Arduino
-
7
2.5 Free Download and Install Arduino CC Software
-
8
2.6 Exercises 1,2 and 3
-
9
2.7 Flowcharts to make visual programming easier
-
10
2.8 Learn the Basics of Scratch Programming