Arduino - Build your own Bionic ARM with Voice Recognition

- Description
- Curriculum
- FAQ
- Reviews
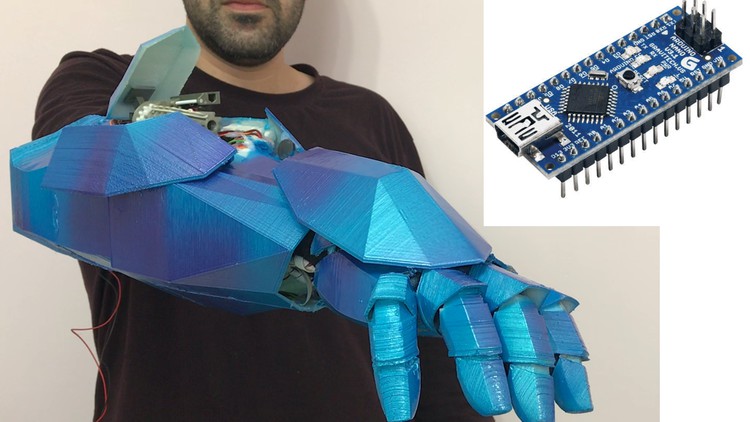
In this Course you will Learn how to build your own Fully functional 3D printed Arm with Arduino!
I will show and explain to you in the Videos how to connect everything together so at the end you will have your own product, your own working Bionic Arm!
we will use Arduino nano for this course.
This includes everything that is shown in the video such as:
-
Voice recognition
-
Sounds
-
Led lights with sounds
-
Small minigun for shooting rubber band with voice commands
-
Servo motors
-
Leds
-
Lasers that are controlled by the hand movements.
-
Accelerometer for the hand movements (I will also show how to use the MPU6050 – that has also Gyro and Temperature sensor)
I will teach you how to print the parts so it will fit all together, I will give you the sources of the arm 3d printer files (.stl files that are supported for all of the 3d printers).
I will give you my schematic and explain you and show you within the videos how to connect the components to the Arduino and every step I am making will be filmed!
I will provide you my source code for the Arduino!
I am showing you everything and giving you the sources you need for making your own arm!
As for the parts of the Bionic arm I am making one lecture that explains where and what to buy so you will have all of the links for the components you need to buy for building the Bionic Arm.
so all you need to do is: join this journey today!
With the knowledge you will get here you can also build your own smart home with the Arduino and the voice recognition and the sound board unit and many other projects.
-
1
 Course Preview
 -
2
Bionic Arm building course go through
Description about the bionic arm and go through the schematic
-
3
Parts List + where to buy list(must watch before starting!)
The next list is a must for making the bionic arm work properly! I am explaining in this lecture which parts you must have and which one you can consider whether you want to buy or not...
you can use the links below I found the lowest prices for you.
-
4
Install Arduino coding software
How to install the Arduino software
-
5
Forearm 3d parts and explanation + sources attached
In this lecture i attached the 3d parts of the Arm, the parts are made by me. The Arm 3d parts are attached here in a .rar file.
For 3d printing , if you don't have a printer you can try Facebook 3d printing communities and they can do it for you for a cheap price or free or just for material payment if they are really nice.
I added here a table that explains how to print every part, Use it!
-
6
Hatch door 3d parts and explanation + sources attached
In this lecture i attached the 3d parts of the Hatche's Servos, the parts are made by me. The 3d parts are attached here in a .rar file.
For 3d printing , if you don't have a printer you can try Facebook 3d printing communities and they can do it for you for a cheap price or free or just for material payment if they are really nice.
-
7
Hand 3d parts and explanation + sources attached
In this lecture i attached the 3d parts of the Hand, the parts are made by me. The Hand 3d parts are attached here in a .rar file.
For 3d printing , if you don't have a printer you can try Facebook 3d printing communities and they can do it for you for a cheap price or free or just for material payment if they are really nice.
I added here a table that explains how to print every part, Use it!
-
8
 Rubber band minigun 3d parts and explanation +sourced attached +credits
Credits for the looming terror minigun from Thingiverse site: Looming Terror ( 32 round automated mini gatling gun) byCaninois licensed under theCreative Commons - Attributionlicense.
I modified some of the files - so read the article and use the right files!
i added the link to thingiverse as part of the credits, and also added the same files of the looming terror minigun here.
-
9
The electronic parts overview
-
10
Electronic parts placement on the 3d models
-
15
Load Voice recognition programming software
-
16
How to connect the Voice Recognition to FTDI (USB to Serial) unit
-
17
How to Record your commands to the Voice recognition + Code commands
-
18
Connecting the Voice Recognition to the Arduino
-
19
Load the Arduino with program that checks that Voice recognition controls sounds
In this lecture we will test the sound board and the voice recognition module
-
20
Running a 360 degrees servo vs regular servo, example code for Arduino
-
21
Connecting the rubber band minigun 3d parts with 360 servo motor
In this lecture we will connect the 360 degrees servo to the 3d part model of the rubber bands minigun.
This type of servo is called 360 degrees servo but it's rotation is unlimited, and not just from 0 to 360.
-
22
Connecting the rubber band minigun to the Bionic Arm 3D Parts
-
23
connecting the back hatch regular servo to the 3d parts
-
24
connecting the side Hatch regular servos to the 3d parts
-
25
Connecting the wires of the 4 servos to the arduino
-
26
Upload to the Arduino with program and check the Hatch opening and shooting
-
31
Gluing 6 Leds on the Hand part(note the polarity before gluing)
-
32
Connecting the leds together by the schematic
-
33
Connect the Leds to the Mosfet RFP30N06LE and 22ohm Resistor
-
34
Connect wires and glue the Accelerometer MPU6050 to the Hand 3d part
-
35
Connect the Fingers 3d parts and the glove to the Hand 3d part
-
36
Connecting the hand cover 3d part to the hand 3d part
-
37
Connect wires from the MPU and the Leds to the arduino
-
38
How to run the MPU6050
-
39
Test that the MPU controls leds and the Lasers+their Servo motor