After Effects for Photography

- Description
- Curriculum
- FAQ
- Reviews
Photography is not just about the moment you press the shutter; it’s also about the transformative journey that your images can embark upon afterward. Everyday activities for photographers often include making adjustments to color and exposure to ensure their shots align with their vision. However, diving into the expansive realm of special effects can elevate your photographs, opening the door to a myriad of enchanting possibilities that can truly make your photos stand out in a sea of imagery.
Many might be unaware of the potent synergy between Adobe’s After Effects and Photoshop. While Photoshop is a powerful tool in its own right, there are certain visual spectacles that can only be achieved when these two software applications join forces. It’s this very combination that can produce effects that are nothing short of magical.
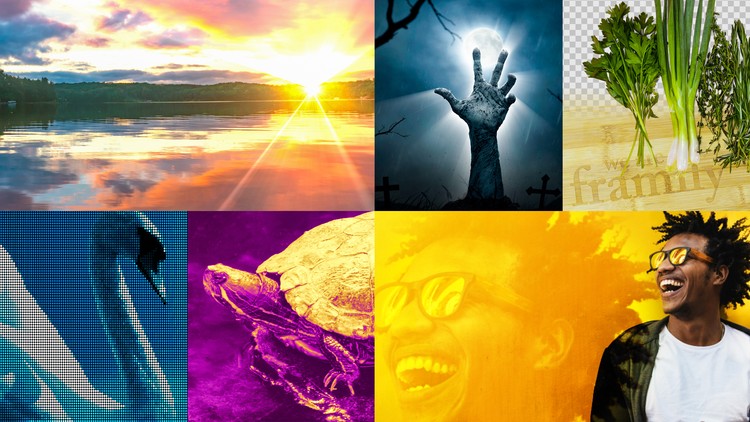
In our upcoming course, you’ll be guided by the experienced Chris Converse, who will adeptly showcase the potential of leveraging After Effects to enhance your photographs. Prepare to be enlightened on various techniques such as introducing a captivating sunset to an image, mastering the double exposure effect for an ethereal look, making profound and impactful color modifications with the Channel Mixer effect, and designing mesmerizing repeating patterns using the Motion Tile effect. Embark on this illuminating journey and discover how to breathe new life into your photographs.
-
1
 Introduction
This course is very different from most other After Effects courses in that we’re going to be focusing on using After Effects to enhance, embellish and add special effects to photography. We’ll use effects to augment, colorize and stylize some photographs, as well as create textures and patterns that are generated from our images.
-
2
About the exercise files
Each folder within the chapter folders will contain a photo in either a JPG or the native Photoshop format. You are also encouraged you to use some of your own photographs as well. Now if you are familiar with After Effects, you can skip ahead to the next chapter. However, if you have never used After Effects before, the next few videos will give you a brief overview.
-
3
A brief intro to After Effects
After Effects works in much the same way as Illustrator, Photoshop and InDesign. In fact, the main panels in After Effects function the same way as panels in the other apps. The only real difference is what they are named. When you first look at the after effects interface, it can be a little intimidating, but for this course, we’re only going be using a few panels.
-
4
Getting comfortable with the After Effects interface
This course uses the Creative Cloud 2019 version of After Effects. However, most of this course will work back the Creative Suite versions of After Effects. We’ll take a look at the interface, timeline and workspace to get comfortable working in the software. We’ll also view a chart so you can create a composition big enough to print.
-
5
Importing Photoshop files
After Effects can import a wide range of file types — including many graphic file formats, some 3d formats, and of course, a range of video formats. For instance, if you import a native Photoshop file, After Effects will bring in all the layers or you can choose a specific layer. You can create a composition and the link to the source file is maintained.
-
6
Importing Camera RAW files
After Effects includes support for Camera RAW images, just like Lightroom, Bridge, and Photoshop. So you can import RAW images directly into your project and you’ll see the familiar Adobe Camera RAW dialog box. And once you choose your settings After Effects will open the image with the adjustments, and create an XMP sidecar file, just like the other Adobe Apps, which means that the other apps can now open this RAW image with the same settings.
-
7
Exporting Photoshop, JPG and PNG files
The key way we can use After Effects artwork in non-video related projects is to export a composition directly to the Photoshop format — complete with layers and full transparency support. And in addition to PSD files, After Effects can also render directly to JPEG and full 8-bit transparent PNG files.
-
8
Adding a sunset
-
9
Keying (removing) a background color
Many times, your photography may be used in a graphic design project and designers may need to remove the background. Here’s a technique for removing a solid color background or ‘keying’ the background color. While you can certainly do this in Photoshop, I would argue that this can be done much faster in After Effects.
-
10
Add a burst of light
In this example, we’ll add a lighting effect to a photo composite I got from Adobe Stock and I would like to thank the Stock Team for giving me written permission to include the watermarked images with this course. The elements in the example image were separated in Photoshop, so we can ‘burst’ the light in After Effects.
-
11
Adding a rippled reflection — Part 1
In this two part example, I want to add a more exaggerated ripple effect to the a reflection in my photo. So here in Part 1, I’ll begin by opening the file in Photoshop to show you the mask I have prepared in this image. We’ll need to create a new comp with a 3D solid layer and applied fractal noise.
-
12
Adding a rippled reflection — Part 2
This is part 2 of this 2 part example on creating a rippled reflection in a photograph. We completed adding a solid to our composition, making it a 3D layer, and wrapping it into a nested composition — so now we’ll continue by adding an effect to the reflection, and using the nested composition as a map for displacement.
-
13
Double exposure portrait
Double exposures can look cool when done nicely. We’ll use the Magnify effect to create a double exposure effect on a portrait. I’d like to thank the Adobe Stock team for giving me permission to include this watermarked photo in this course. To create this look, we’ve combined the Magnify effect with a second copy of the same layer, giving us a lot of control and a quick way to create a fully editable double exposure effect.
-
14
Creating a duotone, a tritone, and a pentone
In this example, we’ll take a look at the CC Toner effect. This is an interesting colorizing effect that quickly replicates 2-color printing techniques, as well as 3 and 5 custom-color renditions of your photograph. Experiment with your own photos to create color combinations that will let your stylize your photos to match a corporate brand, or maybe an illustration style, or to just make something you find interesting.
-
15
Mixing channels with the Channel Mixer
In this example we’ll take a look at the Channel Mixer effect, which will allow us to make dramatic color changes and we’ll also be using adjustment layers and masking tools to affect different areas of the photo. So give these effects a try on your own photos and see what kind of interesting color combinations you can come up with.
-
16
Changing colors with Colorama
The Colorama effect is interesting because it let’s you colorize an image, kind of like CCToner—except you get to define as many colors as you like and you can assign them to any range in the original photo — and there’s lots of presets to get you started. Applying and modifying different presets will give you countless options for stylizing your photographs.
-
17
Repeating patterns with MotionTile
The MotionTile effect lets you create a repeating pattern from a photo and includes options for setting vertical or horizontal offsets to the pattern. You can create a repeating pattern at any size, all from the same photograph and the original photo does not have to be transparent. So try this technique with any photograph and create some amazing patterns.
-
18
Blending patterns with RepeTile
The RepeTile effect works a lot like MotionTile combined with some kaleidoscope-type of controls. We’ll start from a photo thats not very interesting, and create something unique with this effect. I think that the most interesting patterns in RepeTile come from photos that have different values and colors in the corners.
-
19
Texturizing patterns with Ball Action
The Ball Action effect has some really interesting controls for turning your photos into textures. This effect re-creates your image out of colored spheres, and allows you to control the size of the spheres and even disperse and twist them in 3d space. We’ll use this effect to make the example photo look like it is being broadcast on an oversized outdoor display.
-
20
Edging textures with Roughen Edges
The Roughen Edges effect allows you to create a wide range of edges for your photo with lots of options for fractal and smooth edges. Once you like the edges, save your Composition as a Photoshop file, or a PNG, as we discuss in the intro videos, and the edges will be transparent so you can add in another background, or use this in a photo composite project.